1. 123 Log
in
to Psynet normally.
2. Find the patient record
using Patient Search, or add a New Patient
3. Click the Medications tab.
4. Click the ![]() button.
button.

![]() A new browser window is opened.
A new browser window is opened.
Logging in and selecting a patient
5. Enter your DrFirst username and password provided
to you by Psytech Solutions.
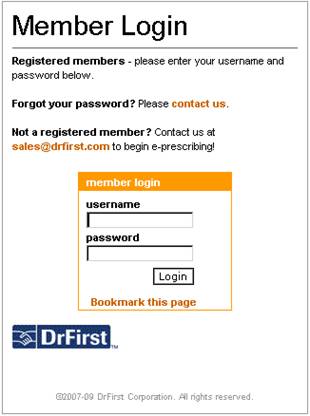
![]() The
DrFirst username and password may be different than your Psynet username and
password!
The
DrFirst username and password may be different than your Psynet username and
password!
6. Click the E-Prescribe tab or the Click Her to Begin E-Prescribing
button. 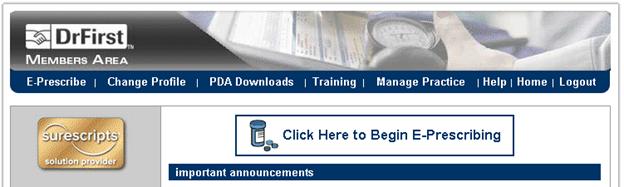
7. Click Select Patient from the menu at the top of the page. ![]()
8. Enter the patient last name that you are searching for.
9. Click the ![]() button.
button. 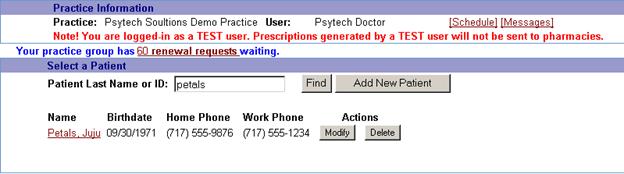
10. Click the ![]() patient
name link.
patient
name link.
11. If
for some reason you cannot find your patient in DrFirst,
12. Open
the record in Psynet, add a space to the end of the street address, and click ![]() .
This will retransmit the patient demographic information to DrFirst.
.
This will retransmit the patient demographic information to DrFirst.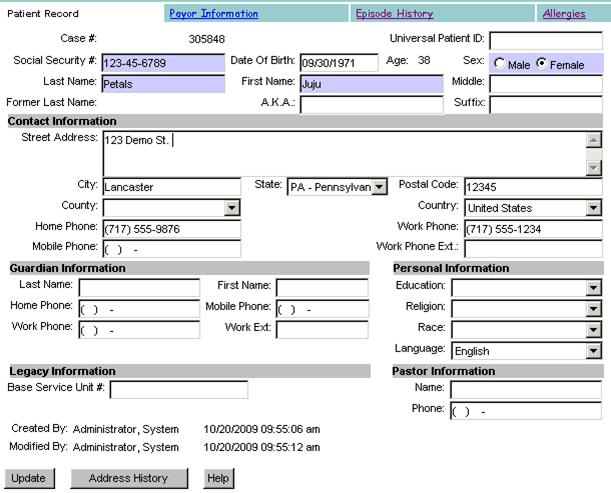
![]() You
may edit any of the fields in Psynet, but you must make a real change (even as
simple as adding or deleting a space) and update the record in Psynet to
retransmit the patient data to DrFirst. If you edit the patient name, SSN, DOB,
address, or home or work phone numbers, that information will be changed in
DrFirst as well.
You
may edit any of the fields in Psynet, but you must make a real change (even as
simple as adding or deleting a space) and update the record in Psynet to
retransmit the patient data to DrFirst. If you edit the patient name, SSN, DOB,
address, or home or work phone numbers, that information will be changed in
DrFirst as well.
Patient Allergy Information
1. When
a new patient is added, you will be prompted to add allergy information. You
may also choose Manage Allergies
from the menu at the top of the page.
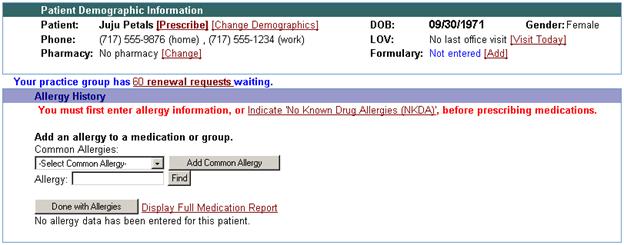
2. Click
![]() to indicate no known allergies,
to indicate no known allergies,
3. Select a common allergy from the drop down and click ![]()
Select a Reaction from the drop down and click ![]()
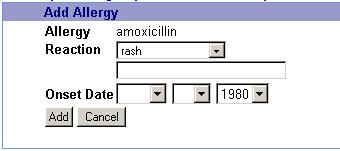
![]() You
may also enter free text in the box under the drop down. You may leave
the Onset Date fields blank if this information is not known. If a full
date is not entered (see above) the current date is used as the onset date in
Psynet.
You
may also enter free text in the box under the drop down. You may leave
the Onset Date fields blank if this information is not known. If a full
date is not entered (see above) the current date is used as the onset date in
Psynet.
4. Enter an Allergy and click ![]()

5. Click the ![]() if a matching allergy is not found.
if a matching allergy is not found. 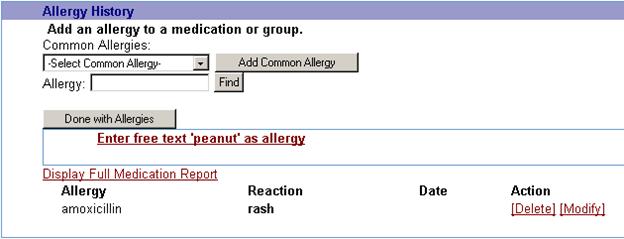
6. Enter the Reaction and Onset Date information. Click
![]()
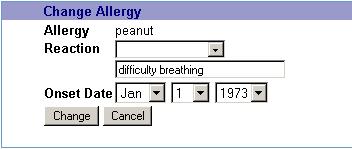
![]() If
you click Modify for an existing allergy, rather than adding a
new allergy, the
If
you click Modify for an existing allergy, rather than adding a
new allergy, the ![]() button will be a
button will be a ![]() button instead.
button instead.
7. Click ![]() when finished adding allergies.
when finished adding allergies. 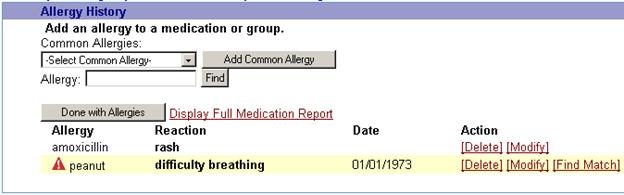
Set the Patient Default Pharmacy
1. When
a new patient is added, you will be prompted to choose a default Pharmacy. You
may also click the ![]() link next to Pharmacy: in the Patient
Demographic Information.
link next to Pharmacy: in the Patient
Demographic Information.
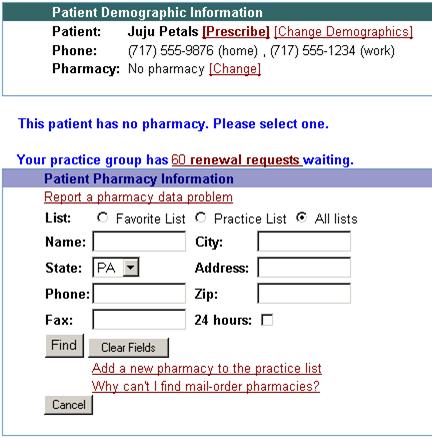
2. Enter some search criteria,
and click ![]() .
.
3. Click the ![]() pharmacy name link to select a pharmacy to be
the patient’s default pharmacy.
pharmacy name link to select a pharmacy to be
the patient’s default pharmacy.
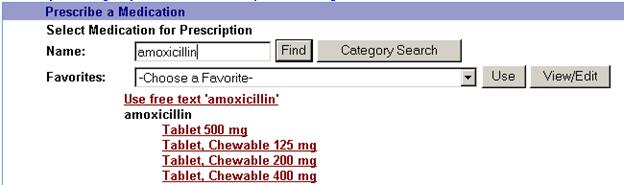
Prescribing Drugs
1. Click the ![]() link next to the patient name.
link next to the patient name.
2. Enter
a drug name and click ![]() .
Choose a dose from the list or choose
.
Choose a dose from the list or choose ![]() .
.
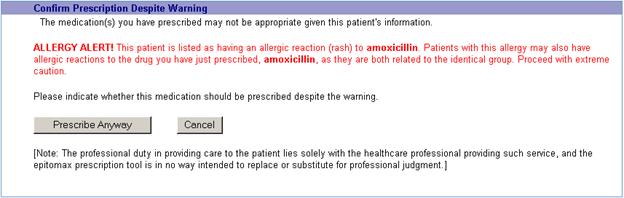
3. If
the patient has an Allergy or there is a drug interaction with another
medication that the patient is currently taking, a warning will be displayed. Click ![]() or
or ![]() .I
clicked
.I
clicked ![]() .
.
4. Select a Favorite
prescription from the drop down and click ![]()
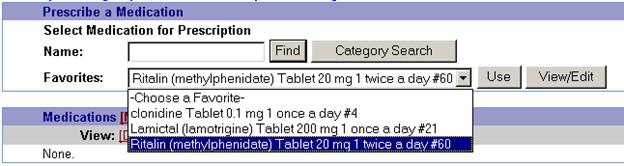
5. Verify that the
prescription shows in the list of Pending
Prescriptions for the patient.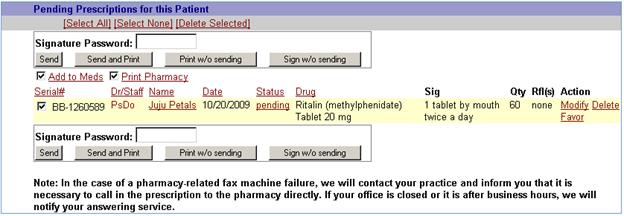
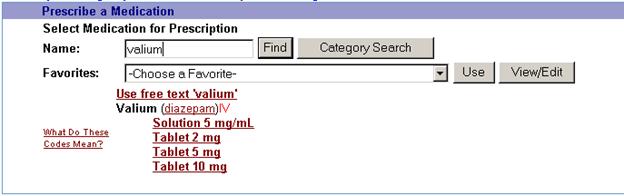
6. You
may also Enter a drug name into the
Name field and click ![]() if the drug that you wish to prescribe hasn’t
been made a favorite prescription yet. Choose
a dose from the list or choose
if the drug that you wish to prescribe hasn’t
been made a favorite prescription yet. Choose
a dose from the list or choose ![]()
7. 
8. Enter the Sig information and click ![]()
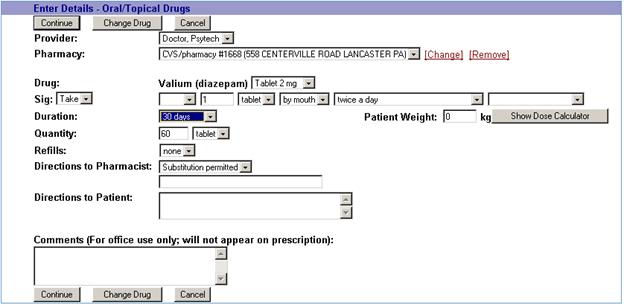
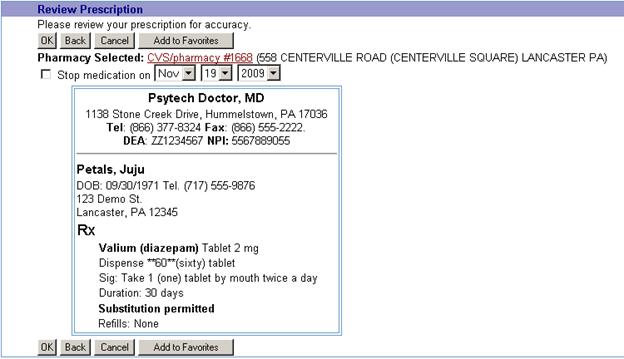
9. Review the RX for accuracy
and click ![]() .
.
10. Verify that the
prescription shows in the list of Pending
Prescriptions for the patient.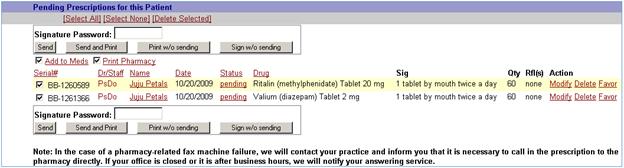
11. To send the prescription to the pharmacy, enter
the Signature Password and click
![]()
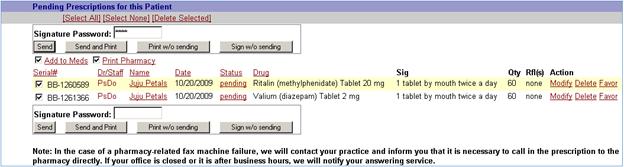
![]() Sends the prescription electronically to the
specified pharmacy.
Sends the prescription electronically to the
specified pharmacy.
![]() Sends the prescription electronically to the
specified pharmacy and opens a dialog box to print the prescription to an
attached printer. The dialog box is the standard Windows print dialog that is
specific to the current computer and printer that the user is accessing DrFirst
from. You might use this option if you wish to print a copy of the prescription
for inclusion in the patient’s medical record.
Sends the prescription electronically to the
specified pharmacy and opens a dialog box to print the prescription to an
attached printer. The dialog box is the standard Windows print dialog that is
specific to the current computer and printer that the user is accessing DrFirst
from. You might use this option if you wish to print a copy of the prescription
for inclusion in the patient’s medical record.
![]() Typically
used to print prescriptions for drugs that are not able to be sent
electronically. Opens a dialog box to print the prescription to an attached
printer. The dialog box is the standard Windows print dialog that is specific
to the current computer and printer that the user is accessing DrFirst from.
Typically
used to print prescriptions for drugs that are not able to be sent
electronically. Opens a dialog box to print the prescription to an attached
printer. The dialog box is the standard Windows print dialog that is specific
to the current computer and printer that the user is accessing DrFirst from.
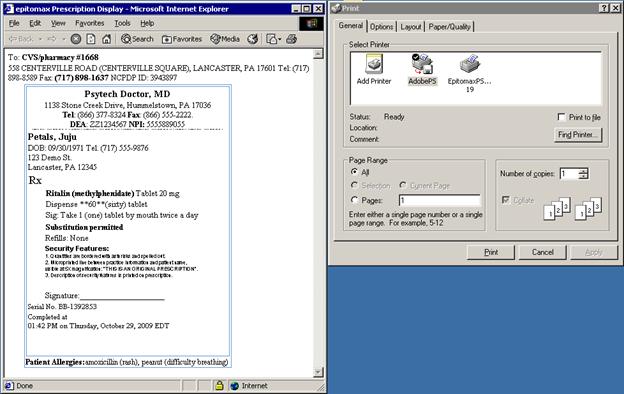
When printing a prescription for
Schedule II drugs, a window showing the RX and a print dialog box will open.
Choose the printer options you use to print prescriptions and print it. The
print dialog box is specific to your computer, printer, or network
configuration.
![]() Signs the prescription, but does not send it
electronically to the specified pharmacy.
Signs the prescription, but does not send it
electronically to the specified pharmacy.
12. If
you attempt to send a drug electronically that the system is unable to legally
send, a warning message will be displayed. ![]()
Adding a Favorite Prescription
1. Click the ![]() link next to the patient name.
link next to the patient name.
2. Enter a drug name into the
Name field and click ![]() .
.
3. Choose a dose from the list
or choose ![]()
4. Enter the sig information
and click ![]()

5.
Review the
RX for accuracy. 
6.
Click ![]() and then click
and then click
![]() to add this to the list of favorite
prescriptions for the logged in user.
to add this to the list of favorite
prescriptions for the logged in user.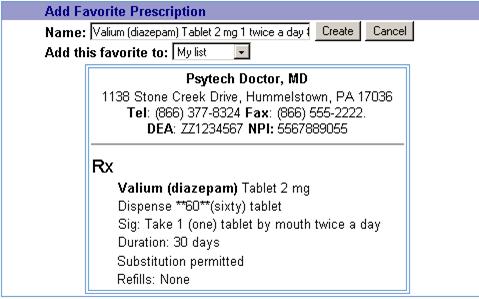
7.
You may also click the ![]() link on the far right of Pending Prescriptions list for a
patient.
link on the far right of Pending Prescriptions list for a
patient.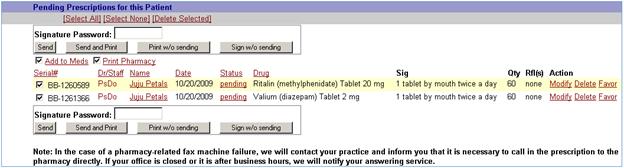
8.
Click ![]() to add this to the list of favorite
prescriptions for the logged in user.
to add this to the list of favorite
prescriptions for the logged in user.

Patient Medication Information
1. You
may also enter medications that the patient is currently on, but that you are
not prescribing. These could be prescriptions from the patient’s family
practitioner, or OTC medications. Choose
Manage Medications from the menu at the top of the page.
2. Enter the medication name and
click ![]() .C
.C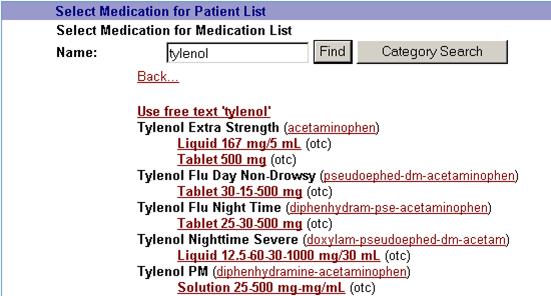
3. Click![]() to select the medication.
to select the medication.
4. Enter the Sig if known and click ![]() ,
or just click
,
or just click ![]() if not known.
if not known.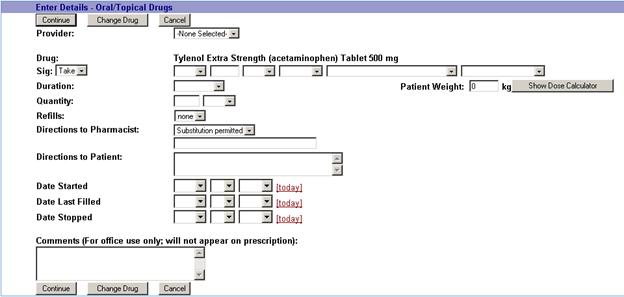
![]() Change
the
Change
the ![]() to –None Selected – unless you want the
current user to be set as the provider who prescribed the medication.
to –None Selected – unless you want the
current user to be set as the provider who prescribed the medication.
5.
Verify that the
Medication List for the patient is correct. 