How To Enter A Receipt And Apply Payments
When you get a check or Remittance Advice from an insurance company that you don’t have electronic remittance (835 File) processing configured for yet or you get a check from a client that you need to apply to some outstanding charges, this guide describes how to enter the receipt in Epitomax and apply the payments to the client charges.
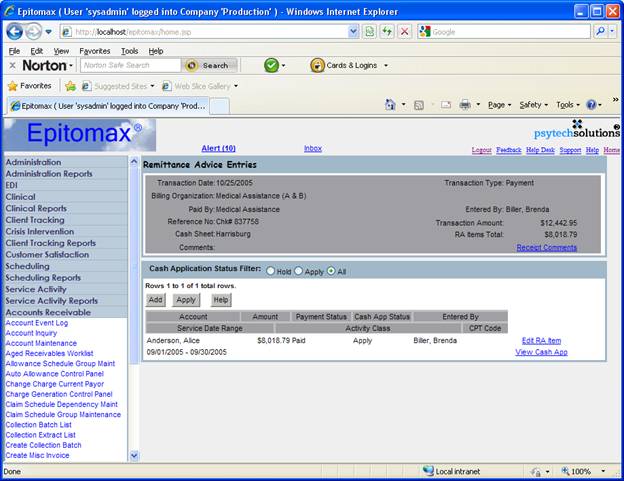
For this fictitious example, I received the following $12,442.95 Remittance Advice or EOB from Medical Assistance:
Anderson, Alice Residential Care 9/1/2005 – 9/30/2005 8,018.79
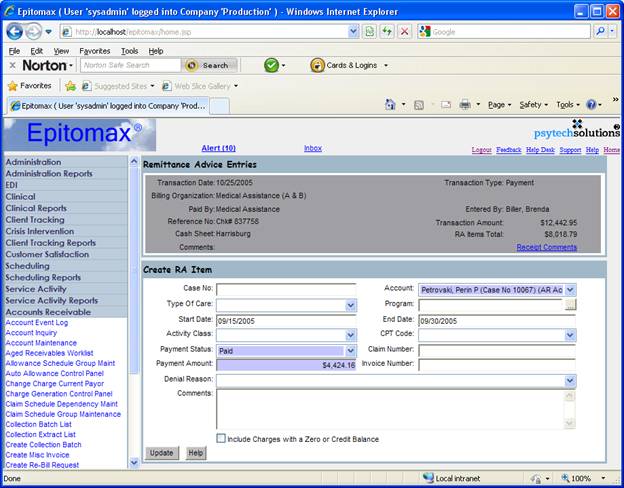
Petrovski, Perin Residential Care 9/15/2005 – 9/30/2005 4,424.16
1) Under the Accounts Receivable menu category, click on the Receipt Entry menu item.
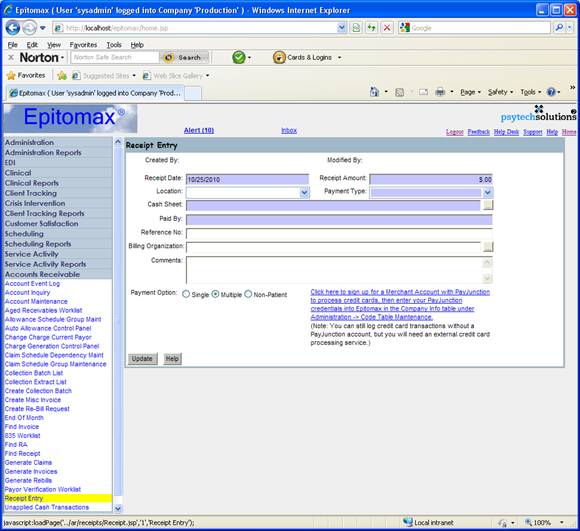
2) Notice that the Receipt Date defaults to today’s date, so you may want to change it.
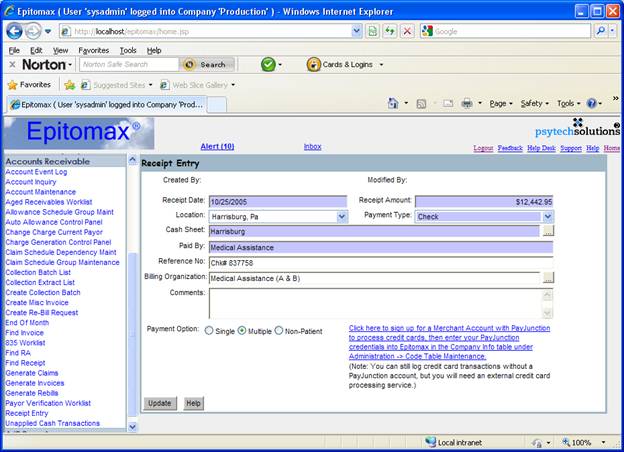
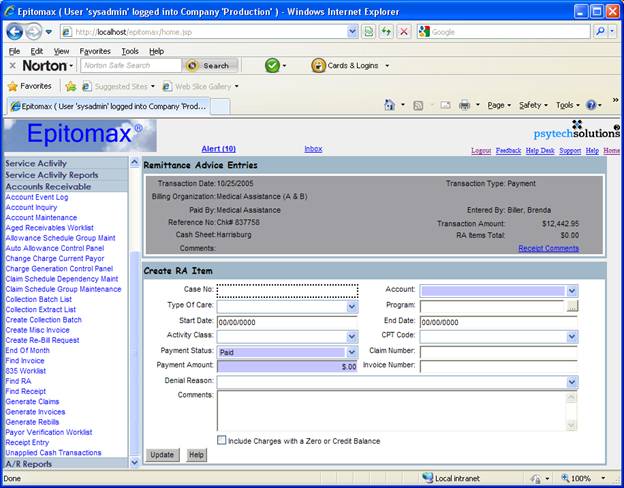
3) Enter all of the required information on the Receipt Entry screen.
a. The Receipt Amount is the full amount of the cash, check, credit card or electronic funds transfer received from the payor. You will enter individual payment amounts later.
b. The Billing Organization is the organization who sent you the payment. If the payment was from a client (Self-Pay), then leave the Billing Organization blank. Epitomax will use the Billing Organization to find charges with that organization as the current payor.
c. If you don’t see any Cash Sheets in the picklist, contact your system administrator about adding a Cash Sheet for you in Staff Maintenance.
d. Leave the Payment Option at Multiple.
e. Click on the Update button.
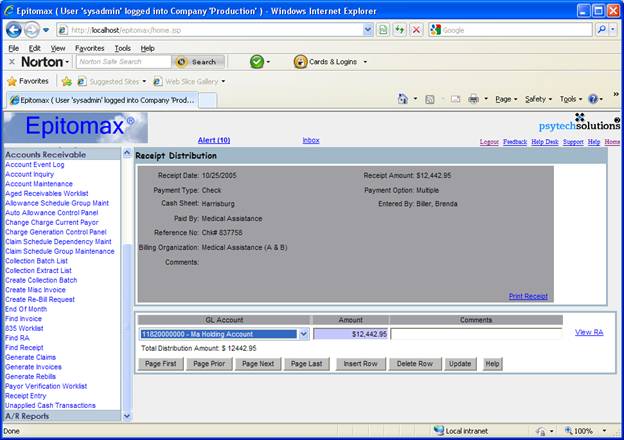
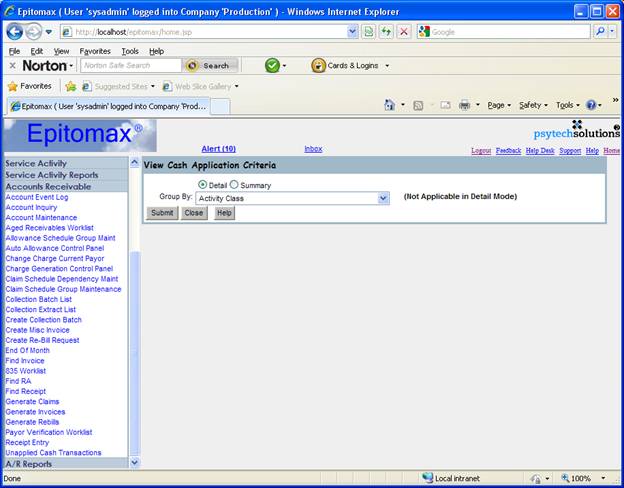
4) The Receipt Distribution screen displays next. Unless a portion of the receipt is for non-patient charges, simply click on the View RA link.
5) Now you are ready to enter the individual payments from the Remittance Advice. Click on the Add button to add the first payment.
6) Enter enough information to allow Epitomax to identify the charges the payment should apply to.
a. You can enter either Case No or Account, but at least one of these is required.
b. The more information you enter, the fewer charges will be found by Epitomax.
c. If you need to apply the payment (or a portion of the payment) to charges with a zero or credit balance, check the ‘Include Charges with a Zero or Credit Balance’ checkbox.

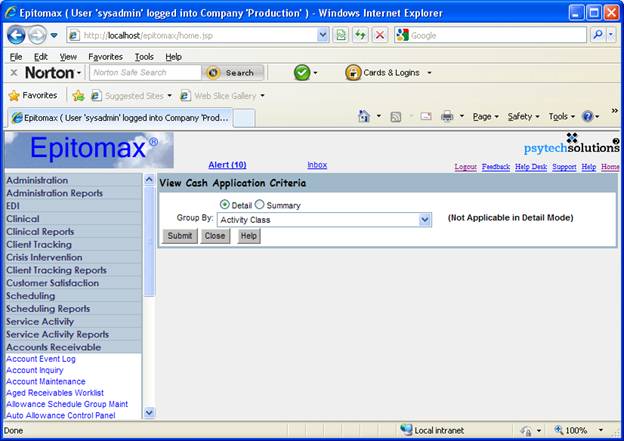
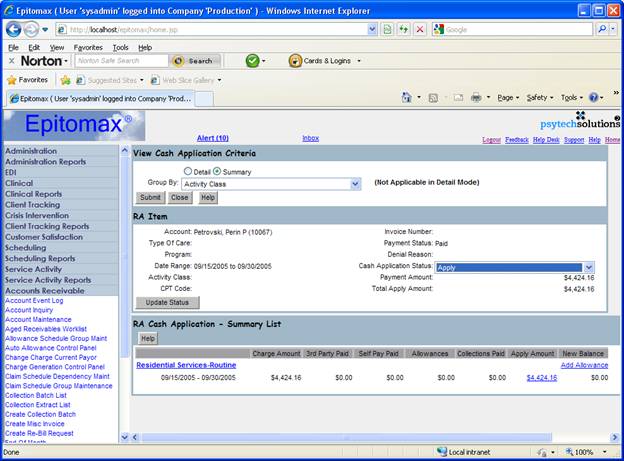
7) Click on the Update button to save the RA Item and move to the View Cash Application screen.
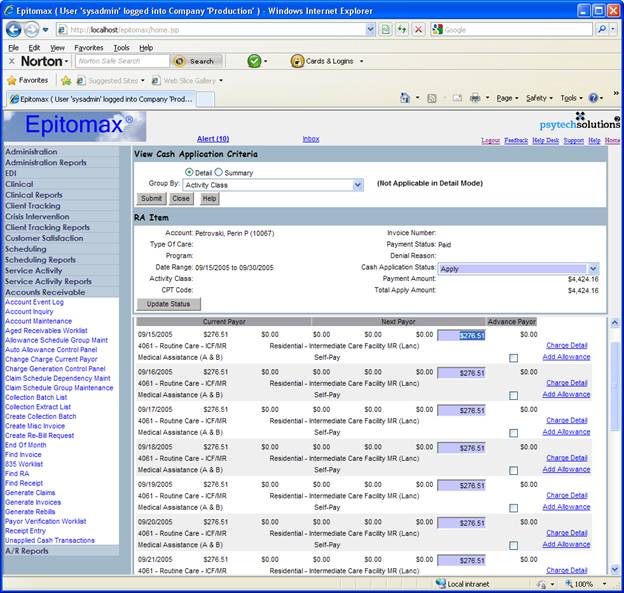
8) Click on the Submit button to see the charges found by Epitomax and the amount applied to each charge.
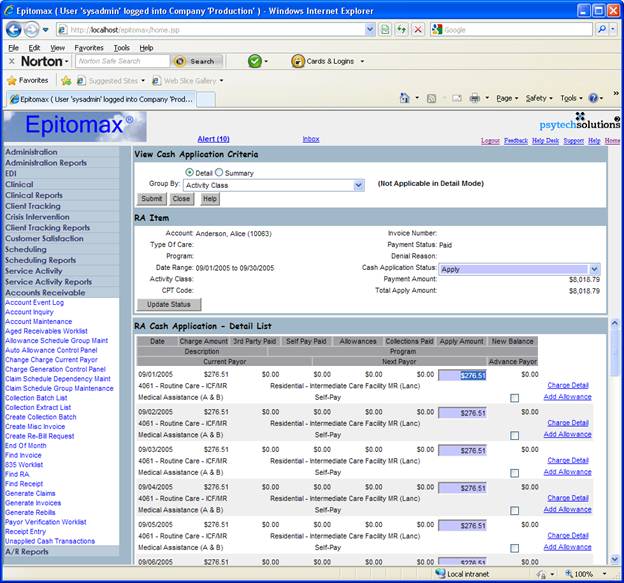
9) In this case, Epitomax wants to apply $276.51 to each charge.
a. The Apply Amount on each charge can be modified as required. If you do make changes, scroll down to the bottom and click on the Update button to save your changes.
b. If the ‘RA Cash Application – Detail List’ (bottom portion of the screen) looks good, the Cash Application Status (in the middle ‘RA Item’ portion of the screen) should be changed from ‘Hold’ to ‘Apply’ if it’s not already set to ‘Apply’. Click on the Update Status button to save your status change if you made one.
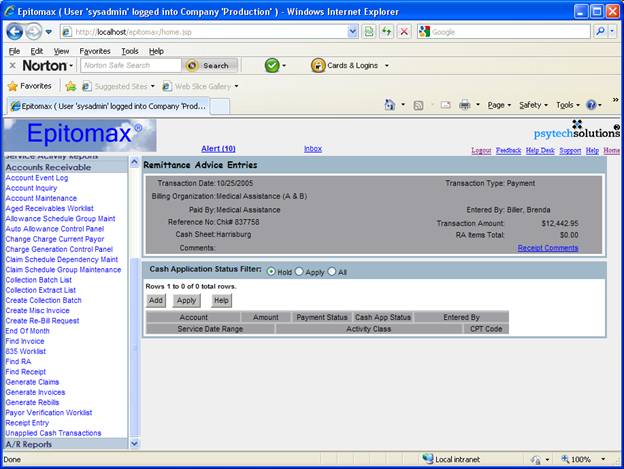
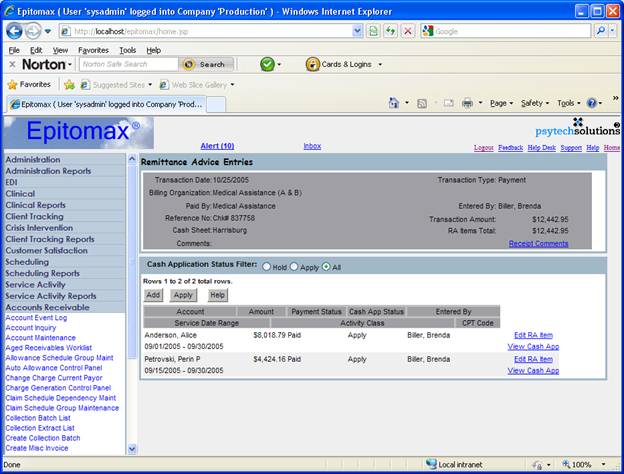
10) Click on the Close button (top portion of the screen) to return to the Remittance Advice Entries screen.
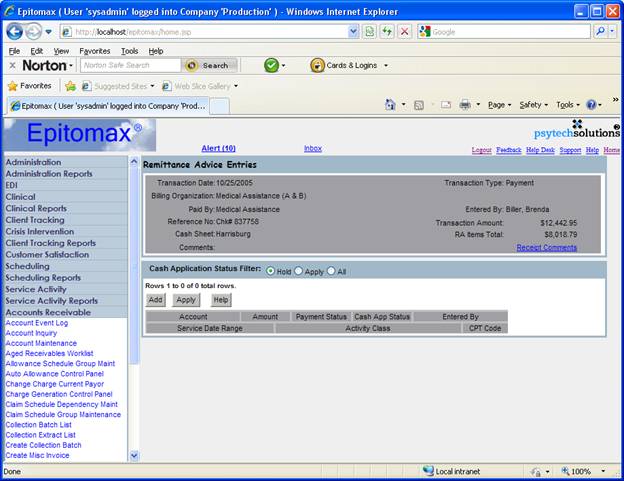
11) Note: the Cash Application Status Filter defaults to ‘Hold’ to alert you to any RA Items with a status of ‘Hold’. Change the status to ‘Apply’ or ‘All’ to see the first RA Item you entered.
12) Notice that the Transaction Amount and RA Items Total are still not equal. Epitomax will not allow you to Apply the Remittance Advice until they are equal. Also, none of the payments from this Remittance Advice are actually applied to the client charges until the Remittance Advice is applied (by clicking on the Apply button on this screen).
13) Click on the Add button to add the next Payment / RA Item.
14) After entering the RA Item information, click on the Update button.
15) Click on the Submit button.
16) If your charges were left with a balance after applying the payment and you wanted to write off that balance, you could select Summary instead of Detail (top portion of the screen) and click on the Submit button to display a summary of the charges.
17) From this summary screen, you can click on the Add Allowance link to apply an allowance or write off to the entire group of charges in one step.
18) Click on the Close button to return to the Remittance Advice Entries screen.
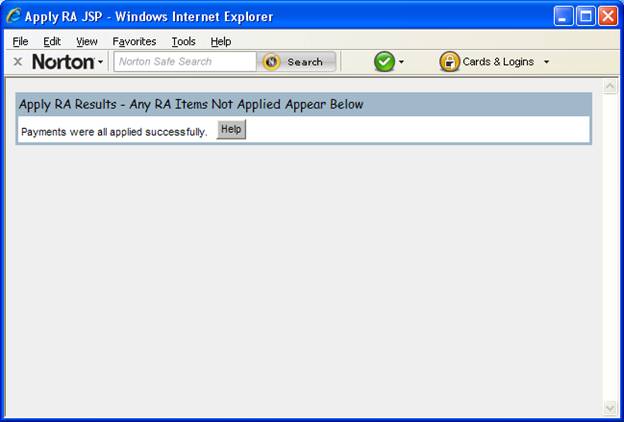
19) Now that you have entered all of the payments and the Transaction Amount (Receipt Amount) equals the RA Items Total, you are ready to click on the Apply button to have Epitomax create the payments and apply them to the charges on the client accounts.
20) You can now see the payments on the client accounts using Account Inquiry.
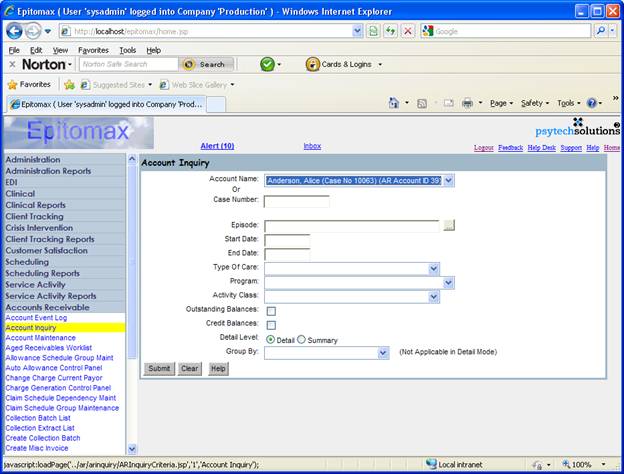
21) Enter the Account Name and click on the Submit button.
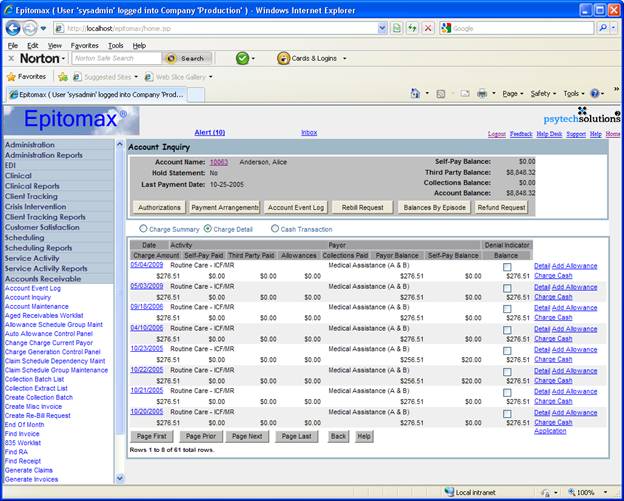
22) In the middle of the screen, change the Radio Button from Charge Detail to Cash Transaction.
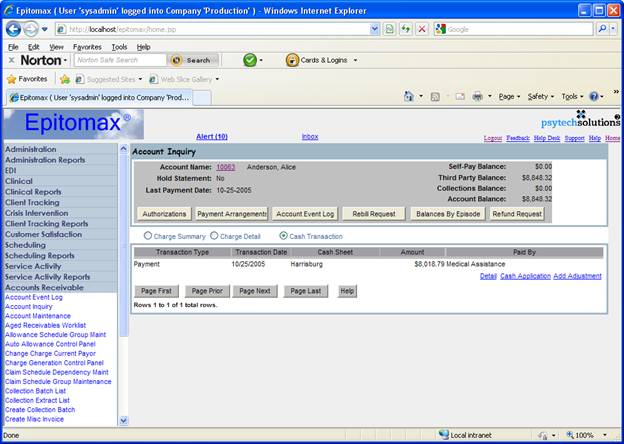
23) Payments, Allowances, Adjustments and Refunds that have been applied to the client’s account are listed here.
24) Click on the Cash Application link next to your payment.
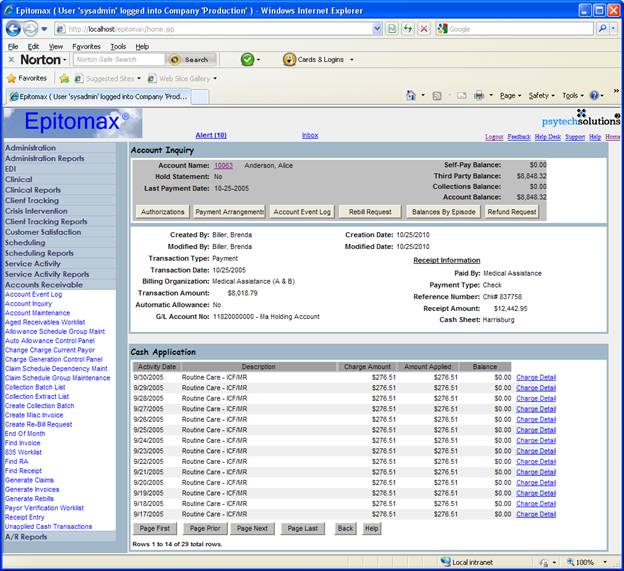
25) The details regarding the Receipt, the Payment, and the Cash Application display on the screen.