 ®
®
Initial Setup
Guide
Contents
XIV. Authorized Service Groups
XVIII. Security around Allowances and Adjustments
XIX. Ancestor Payor Plan Utility
®
Initial Setup
Guide
Contents
XIV. Authorized Service Groups
XVIII. Security around Allowances and Adjustments
XIX. Ancestor Payor Plan Utility
Congratulations on being a part of the Epitomax team. Now it is time to get the system set up and running so you can enjoy all the benefits Eptiomax has to offer. This guide will walk you through step by step of all the data setup requirements that must be performed before going live with your new system.
It is important to understand that when setting up your system that data must be entered in a particular sequence. You may not understand the sequence initially but as you continue to enter the data you will see how the sequence makes the data entry easier.
Click here for a short video introduction to setting up Epitomax
The following is the
suggested sequence for data entry
The locations are the places in which your services will take place. Click here for a brief video on setting up Locations
To enter the Locations perform the following steps:


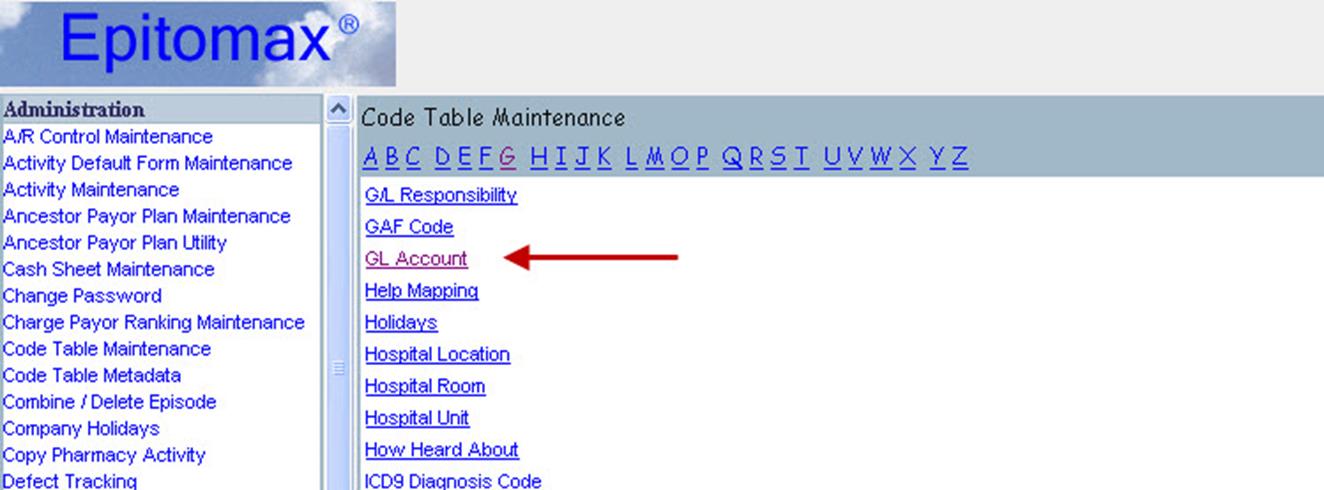
G/L Accounts must be added early in the data entry process because Programs and activities relate to these G/L numbers that will in turn populate your General Ledger. If you don’t plan to integrate Epitomax with you General Ledger system, you can just use the default G/L Accounts already in Epitomax (skip to section III Programs). Epitomax can integrate with QuickBooks Pro and most General Ledger systems. Contact support (click on the Support link at the top right in Epitomax) if you’d like to have your chart of accounts loaded into Epitomax for you.
Notes:
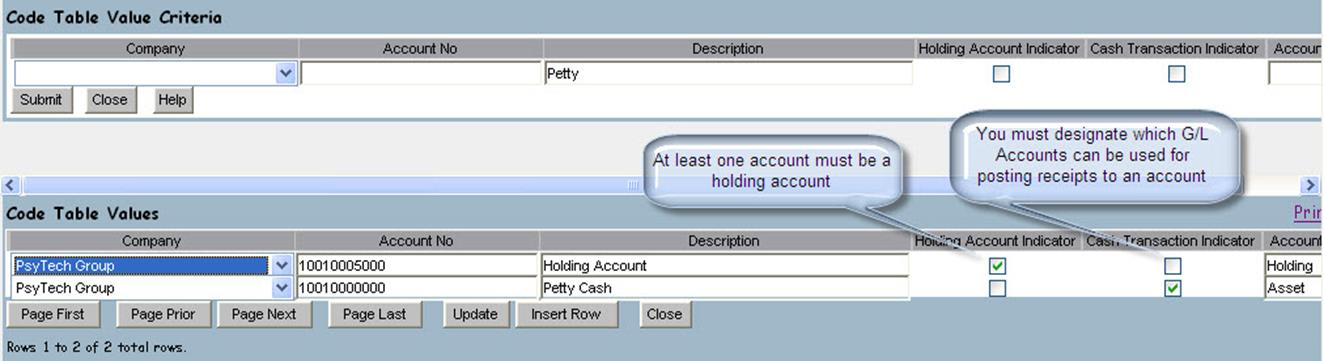
· You must designate as least one G/L Account as a holding account. This account will be used to hold the unapplied cash until it is posted to the correct charges.
· You must also dedicate at least one (or more) cash transaction accounts. These accounts are used to place your receipt into different G/L buckets.
· If you are not integrating Epitomax with a General Ledger system, move on to section III Programs.
Click here for a brief video on G/L Accounts
To enter the G/L Accounts perform the following steps:
These are the programs that your facility runs. These programs are designated by type of care (also known as level of care) in the system. Programs can be thought of as cost centers on the financial side. They can also be thought of as a course of treatment on the clinical side. When a client is admitted in Epitomax, they are admitted to a Program.
To enter the programs perform the following steps:
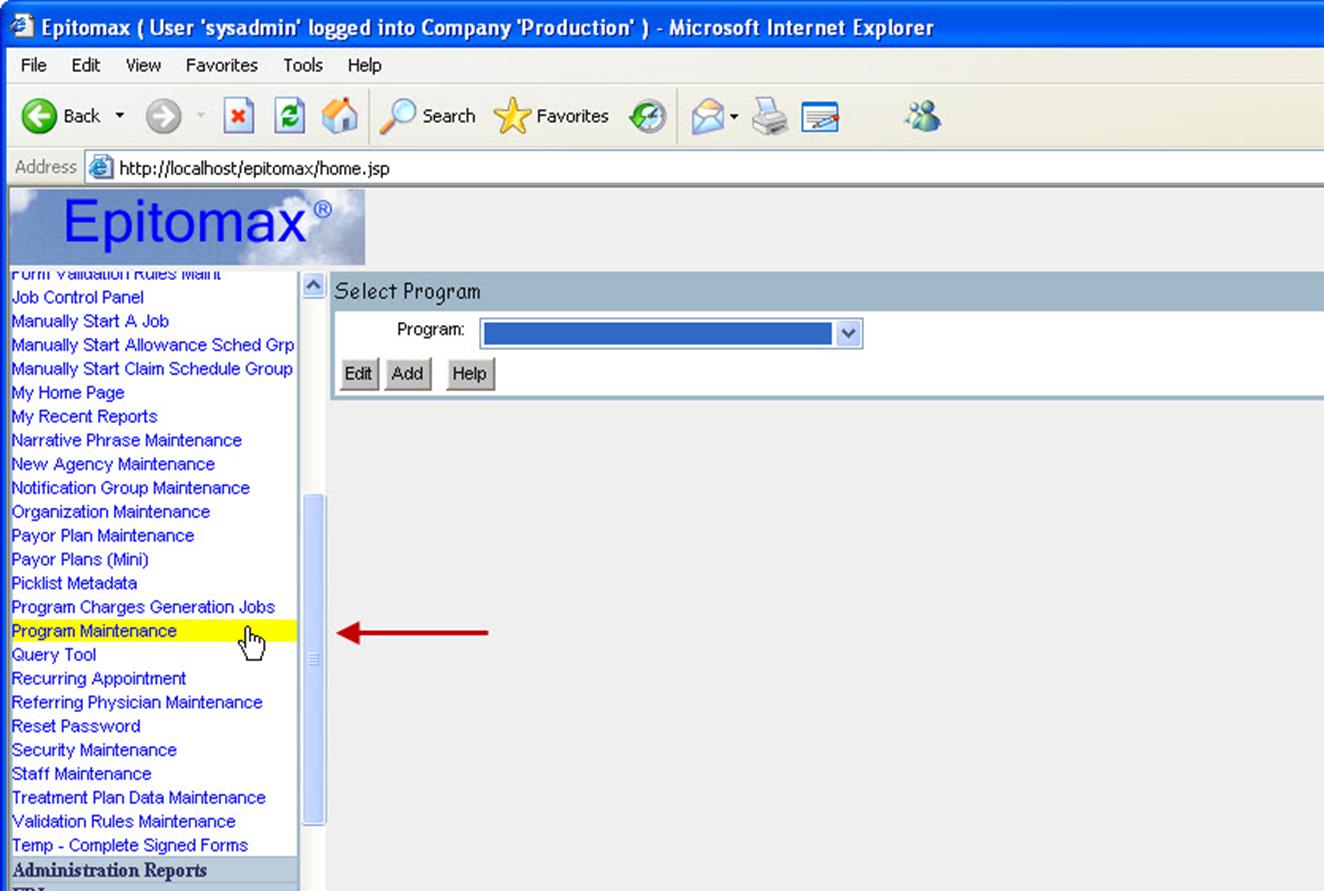
Click here for a training video on Program Maintenance
These are used to classify activity codes for scheduling and reporting. One Activity class is required on each activity. The Activity Class can be used to categorize a group of services into a category that you can select in report criteria and/or sort on to get convenient sub-totals. Until you go-live with Epitomax, just use the ‘Billable’ and ‘Non-Billable’ activity classes for all of your activities. Once you have real data in Epitomax and can try out the reports, you will have a much easier time identifying what you want for Activity Classes.
To enter the Activity Class perform the following steps:
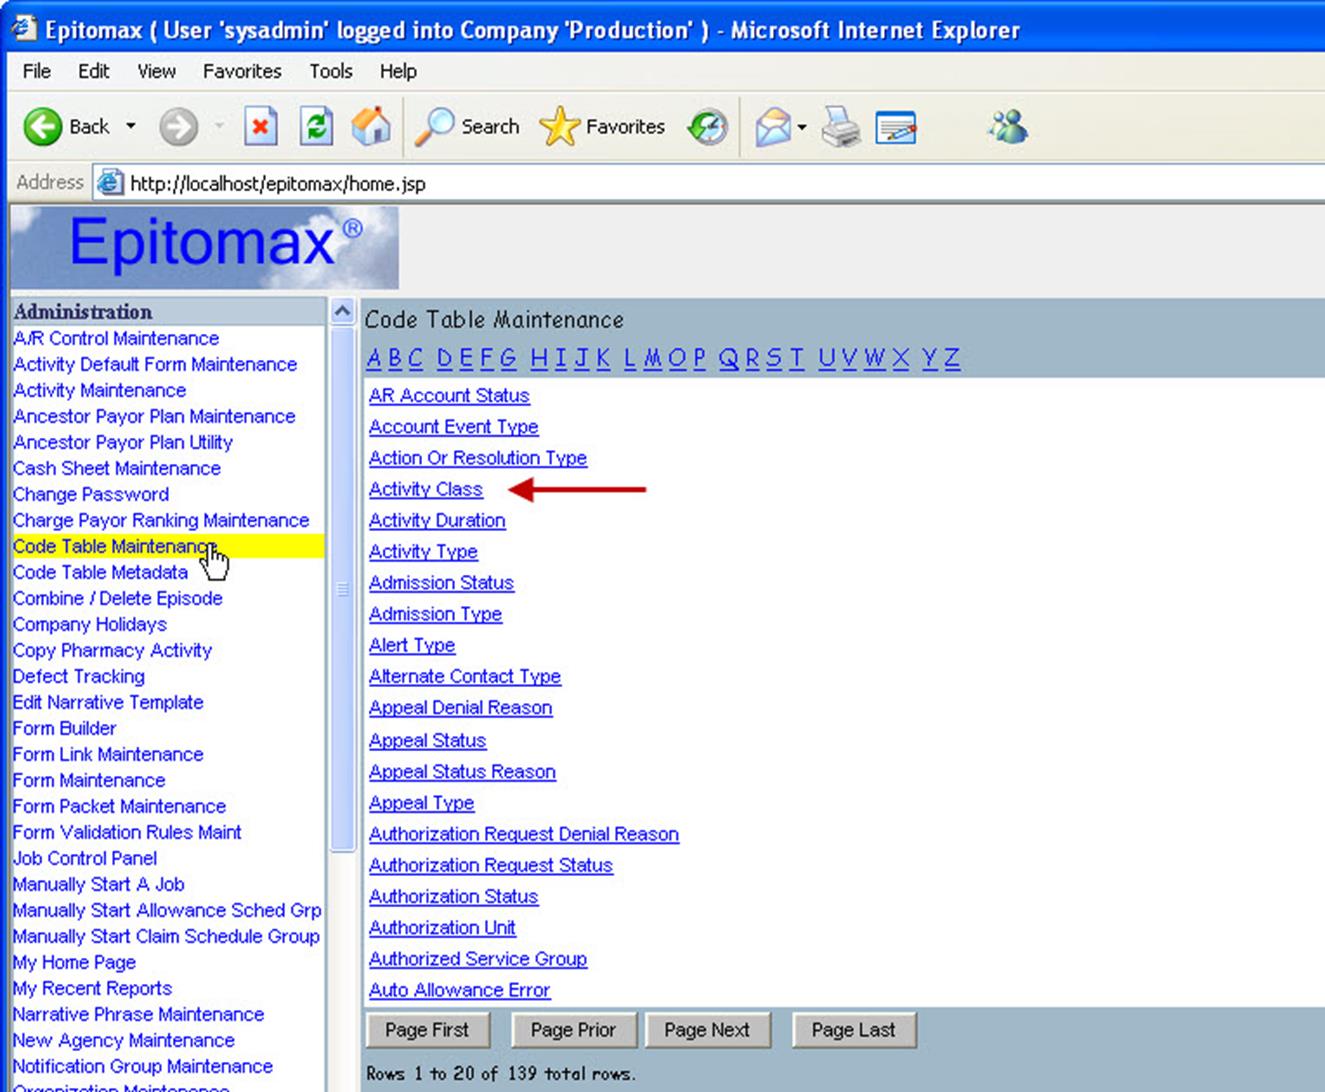
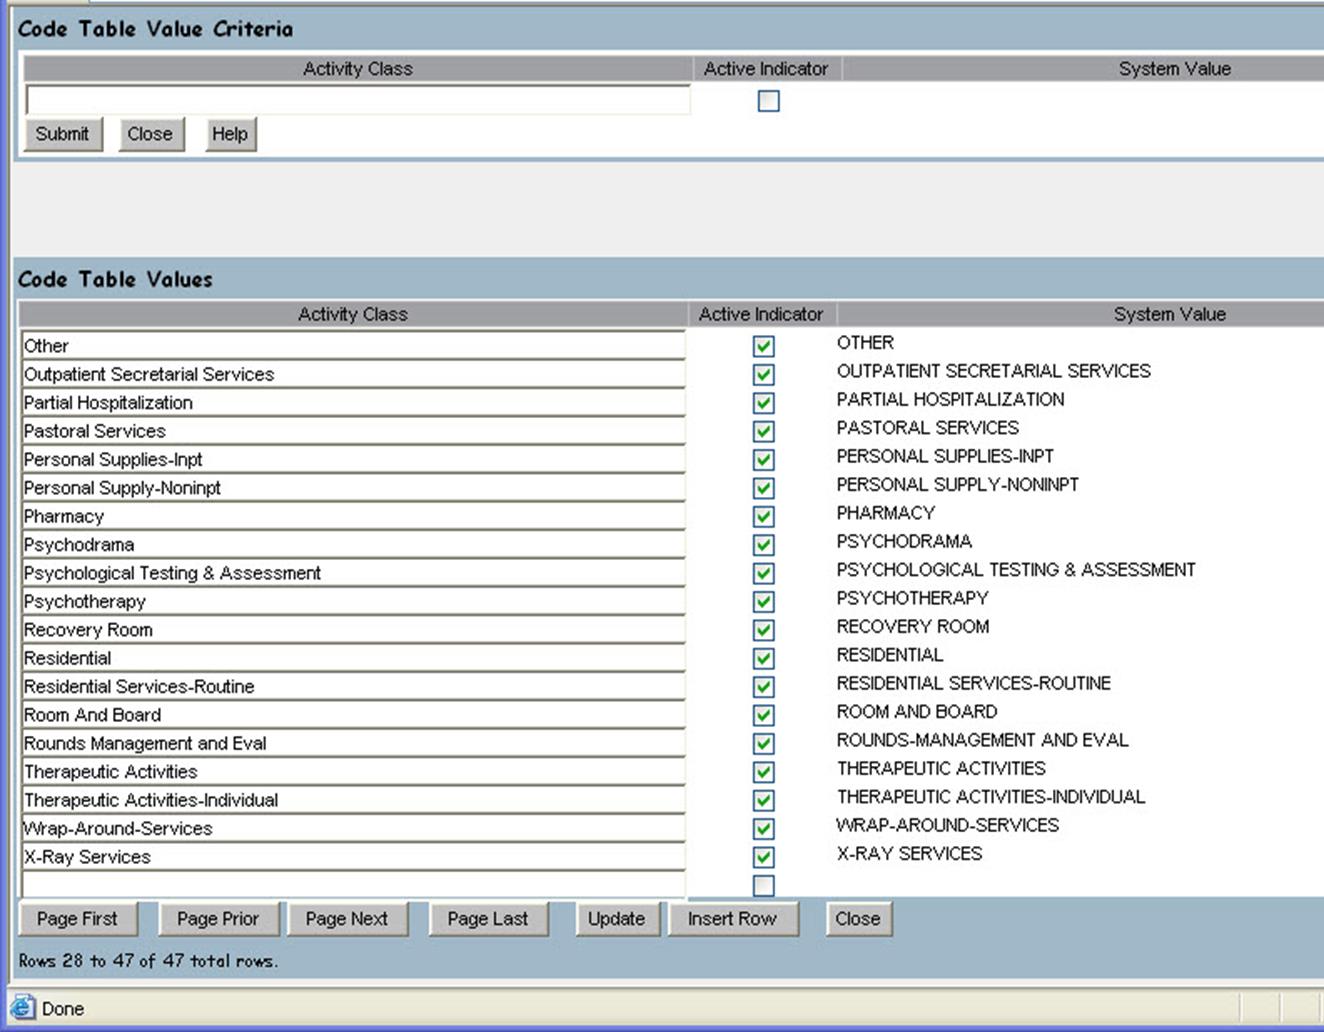
Click here for a brief training video on Activity Classes
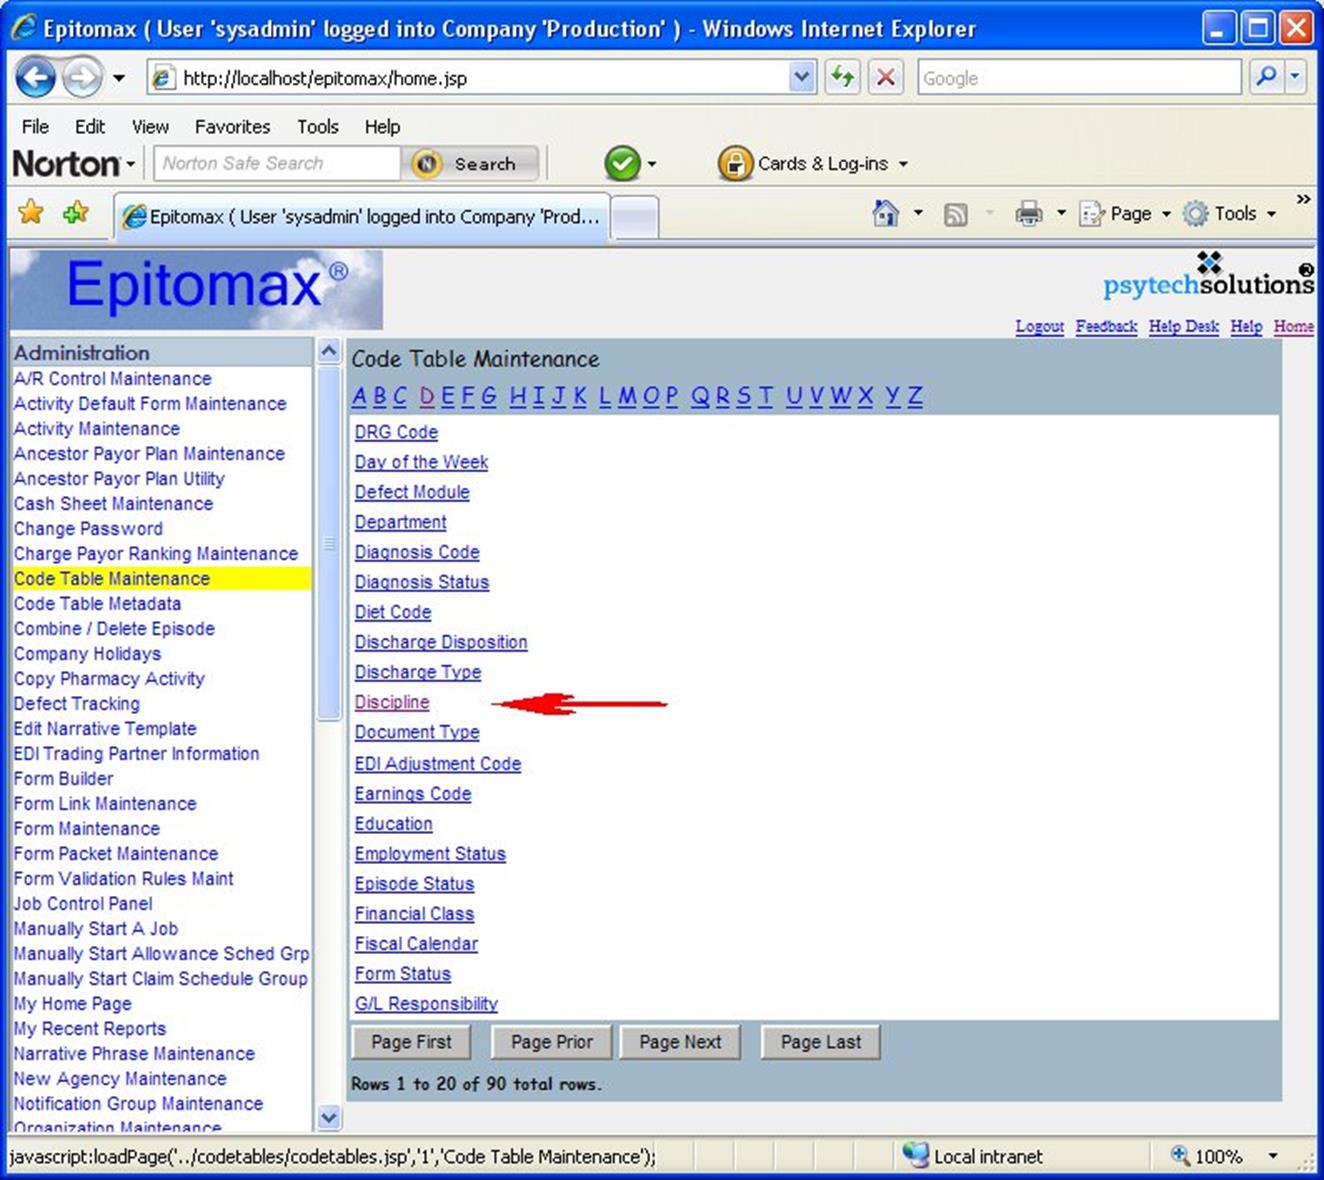
Disciplines are used to classify staff and to specify the rate for an activity performed by staff having that discipline. They are also used to add discipline modifiers to procedure codes on claims. One Discipline is required on each staff.
To enter the Discipline perform the following steps:
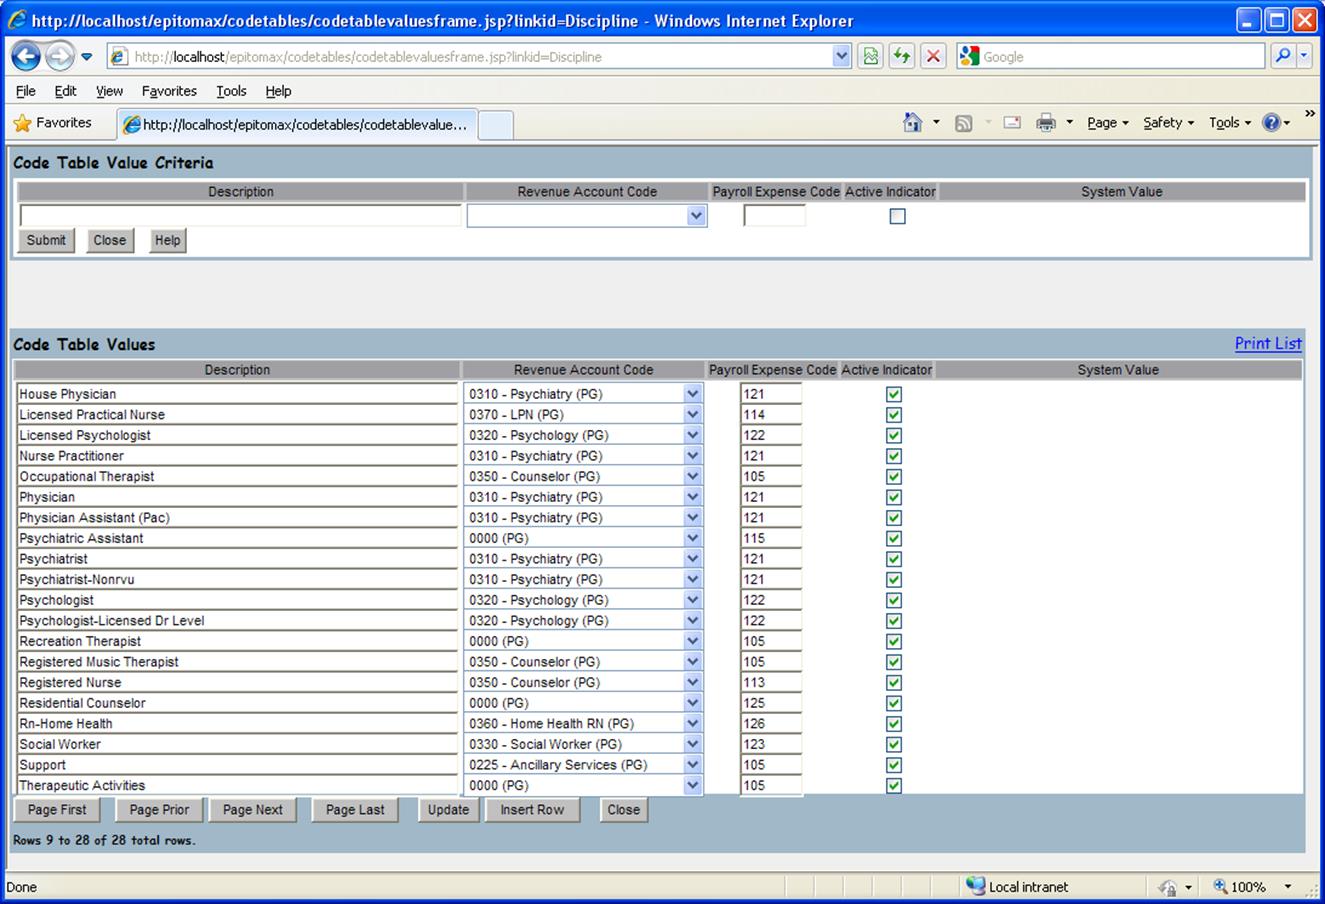
a. Description – This is the name that will be displayed throughout the system.
b. Revenue Account Code – This is only important if you are integrating Epitomax with your General Ledger system.
c. Payroll Expense Code – This is only important if you are integrating Epitomax with your Payroll system.
d. Active indicator – Indicates if this is an active Discipline that can be selected.
Click here for a brief training video on Discipline setup
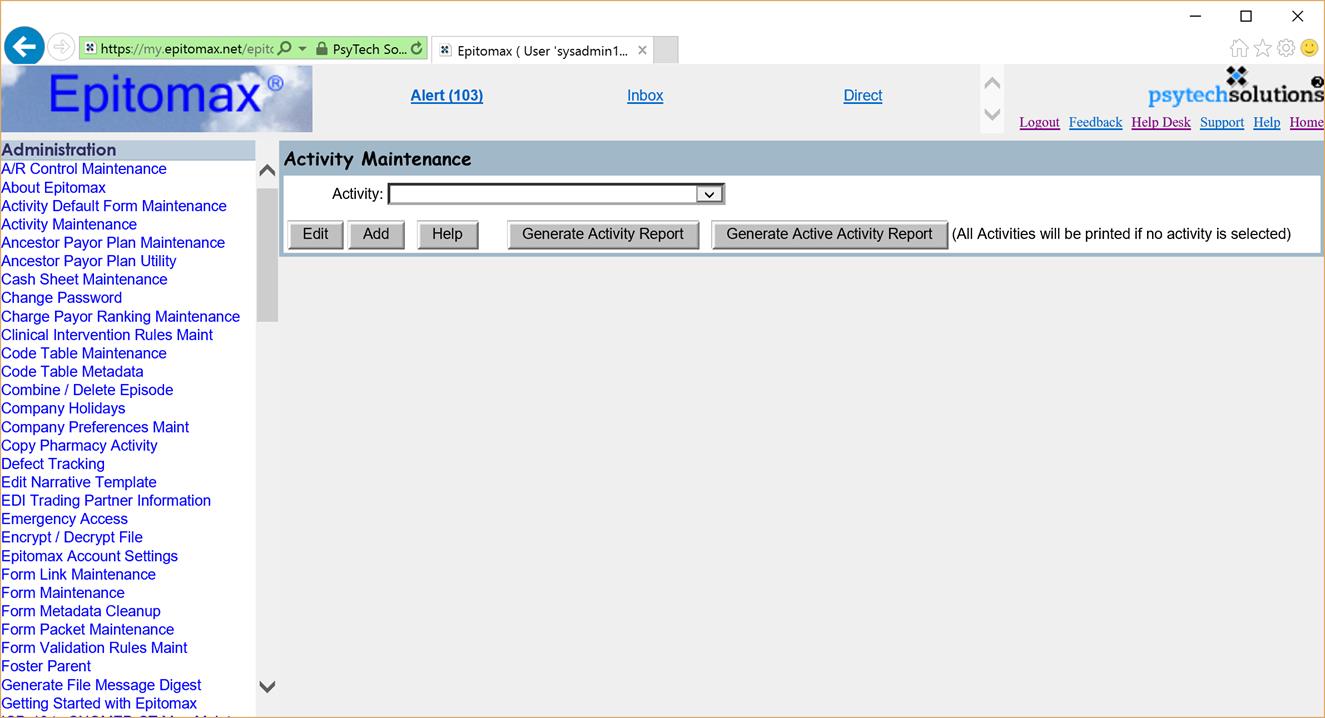
Activities are used for entering services in the system. Every service requires an activity code. You can create activities billable services, such as Individual Therapy, and you can also create activities for non-billable services/events such as staff meetings, etc.
To configure Activities perform the following steps:
a. Activity Code – This is the code that will be displayed throughout the system. Use a short code that staff will recognize.
b. Activity Type – This is a required field that is used to classify a group of activity codes. This is a general classification that is used in several reports in the system as well as certain billing and charge functions.
c. Activity Description – This is the description of the activity.
d. Effective Date – This is the date that the activity code is effective. Users will not be able to select this activity code if the date of service is before this date.
e. Expiration Date – This date can remain blank to keep the activity code permanently active. If you no longer want users to use a particular code, set the expiration date and the code will not be valid after that date.
f. CPT Code – This is the corresponding CPT billing code that is associated with this activity code. The primary use for this is to help apply payments from 835 electronic remittance files to the correct charge when there are multiple charges on the same date of service.
g. Unit Rate Indicator / Duration – The unit rate indicator informs the system that the billing rate for this activity is determined by the duration that is entered. In this example (above) the activity code will bill $12.50 for every 15 minutes of service. So for a 30 minute session the system would generate a $25 charge.
h. Default Rate – The default rate for the activity code. If unit rate indicator is used, this is the default rate for the duration specified. This is the Usual and Customary Rate or Gross Rate. You can specify contractual rates by payor in Payor Plan Maintenance.
i. Earnings Code – Leave blank. Only used for Payroll integrations
j. Revenue Account – Leave blank. Only used for G/L integrations.
k. Client Must Have Form to Complete Staff Status – Indicator to prevent this service from being completed unless a clinical form is attached to it.
l. Agency Required – Indicator stating that this activity is only valid for services billed to agencies. (In Epitomax, an agency is a payor you bill on an invoice rather than using a claim.)
m. Form Required Indicator – Indicates that this service cannot be billed without documentation (a completed clinical form) attached.
n. Auto-Complete Client Activity when Adding Client to Activity – Indicator for services such as ad-hoc groups where you only add client who attended the group.
o. Billable Indicator – Indicator that this service is billable.
p. Allow after discharge – This flag indicates if the activity can be entered for a date of service which is after the client’s discharge date.
q. Primary Therapist Cannot be Cancelled if Client Signed-In or Has a Form – Used for a specific customer.
r. Self-Pay Indicator – If this flag is set then this activity will be billed directly to the client. Any payors on the episode will be bypassed if this checkbox is checked. The charge will be billable only to the client.
s. Only Primary Therapist Can Add Note – Check this box if when there are multiple staff involved in a service only the primary staff (the one you are billing under) can document the service.
t. Ignore this Activity when Checking for Double-bookings – Indicates this service can overlap other services. Check this box for add-on codes.
u. Client Must Sign-In – Indicates the client must sign-in electronically for this service.
v. Hide When Scheduling Indicator – Indicates that this service is not scheduled in advance. Check this box for add-on codes.
w. Activity is a Group Service – Indicates the service is a group service without the need to specify a Group Code on the service.
x. CPT Add-on Activity – Indicates that this service is an add-on code. Check this box for add-on codes.
y. Client Must Have the Default Form – Indicates that staff cannot change the form attached to this service to something other than the form specified in Activity Default Form Maintenance.
z. Validate Sign-In Sheet to Complete Day – Indicates that when completing the staff day the system should require that the Date of Service, Start Time, and End Time on the electronic sign-in sheet match the Progress Note form.
Click here for a training video covering the first tab in Activity Maintenance
Click on the Insert Row button to insert a new row and select a program from the drop down. Only programs that are listed are valid programs for this activity code. When entering services the program entered must be listed here. So make sure you list all programs that will be used for this activity.
If you need to delete a row that you have entered incorrectly or no longer use, select the row that you want to delete and then select the “Delete Row” button and then click on the Update button.
After all your updates make sure to click on the Update button or all or changes will be lost.
Click here for a training video regarding the Activity Program tab
Click here for a training video regarding the Activity Location tab

a. Discipline – This is the staff’s discipline in which the rate will be associated with for this activity.
b. Rate – This is the rate associated with the discipline and activity code. This allows you to specify a different rate by discipline. Enter zero here to use the Default Rate from the Activity tab.
c. Rate Effective Date – This is the date that the discipline rate becomes effective. If the service is before this date the default rate is used.
Click here for a training video regarding the Activity Discipline tab
Click here for a training video on the Activity Class tab

a. Agency – This is the Agency in which the rate will be associated with for this activity.
b. Rate – This is the rate associated with the agency and activity code.
c. Rate Effective Date – This is the date that the agency rate becomes effective. If the service is before this date the default rate is used.
Click here for a training video regarding the Activity Agency tab
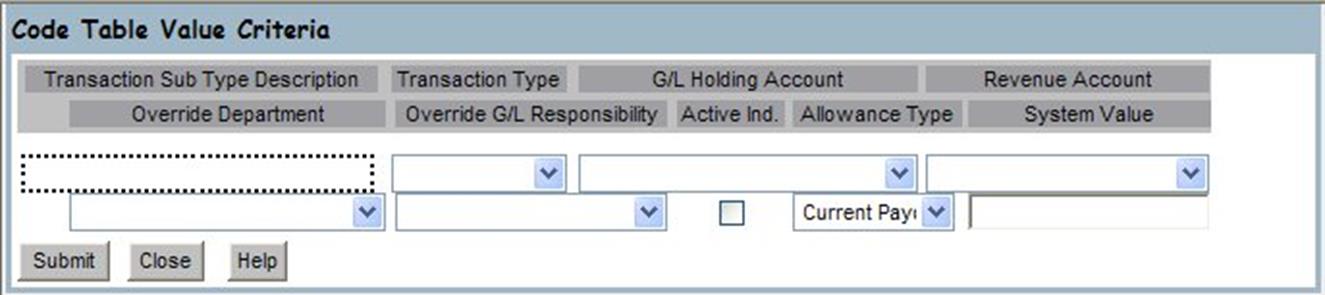
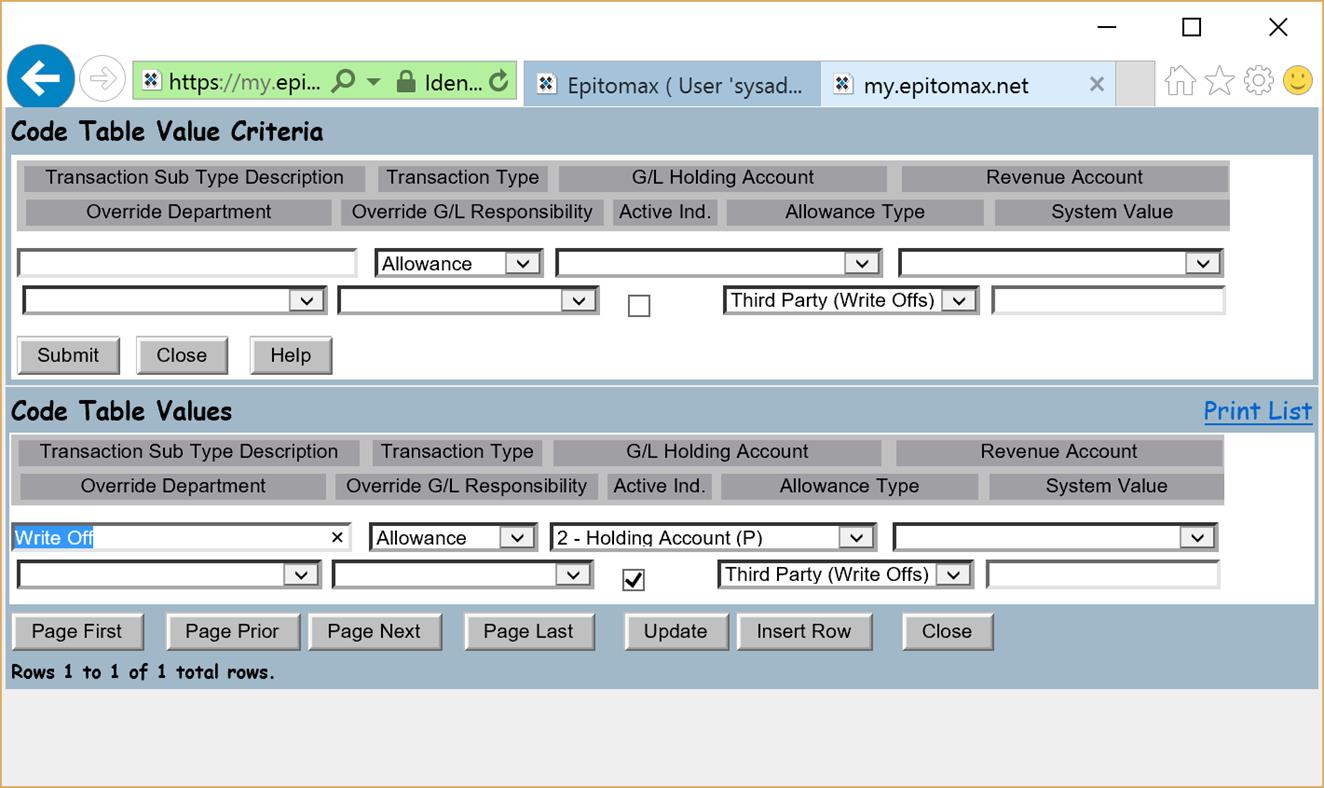
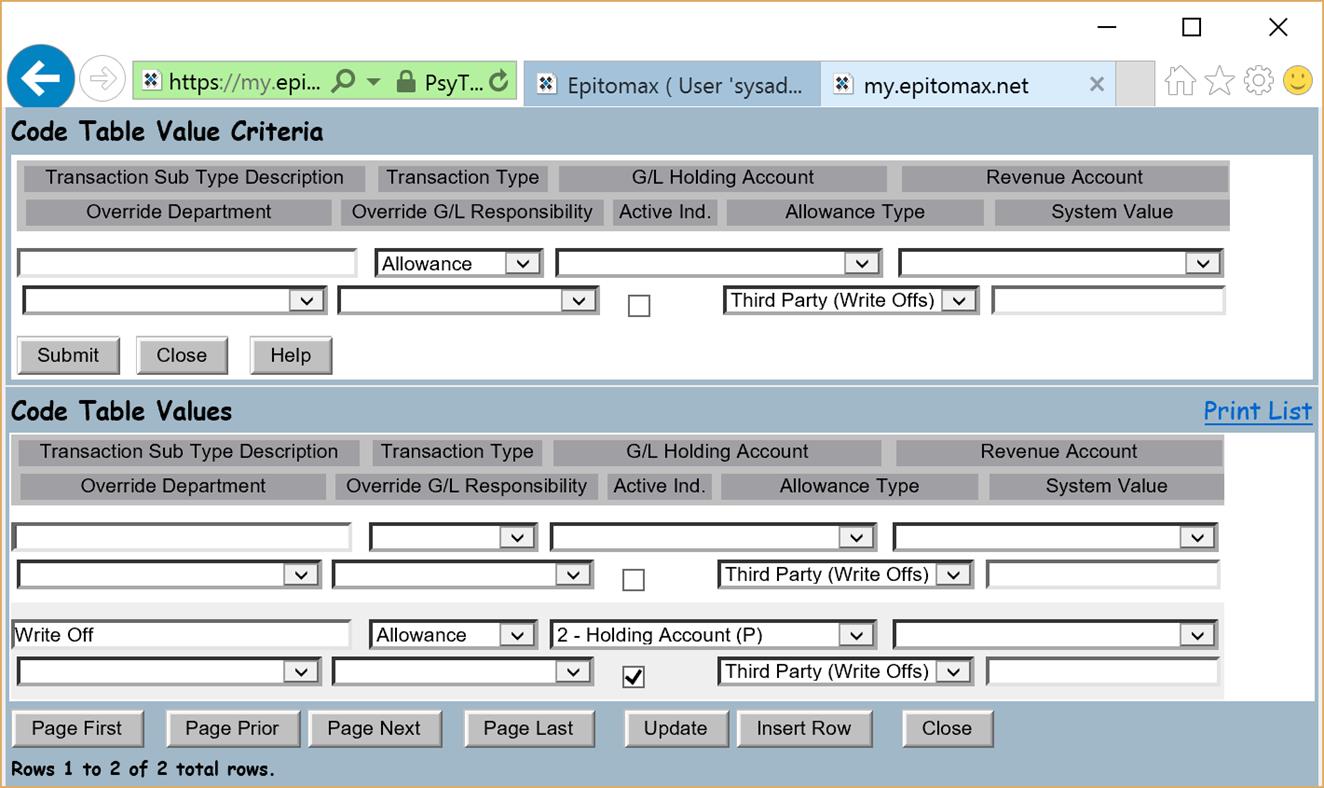
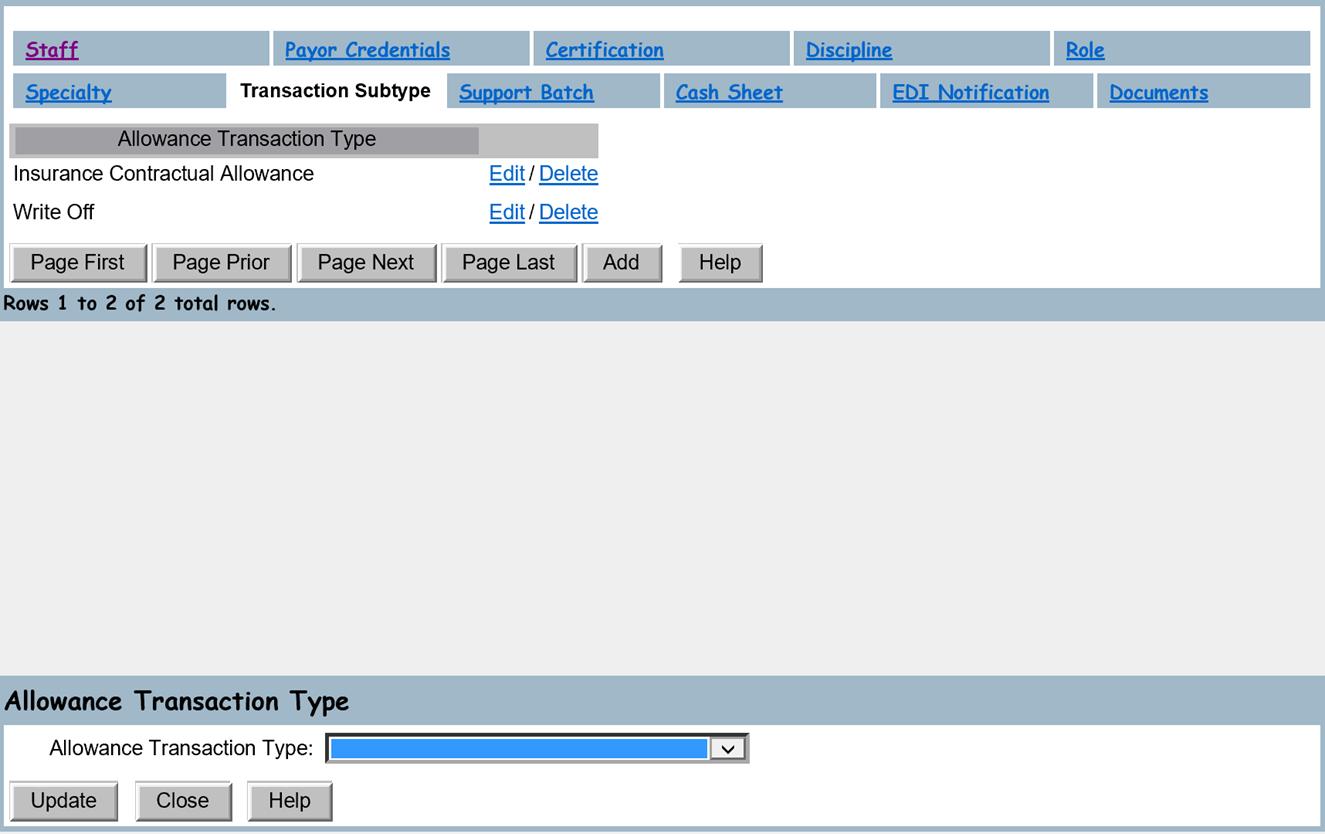
There are 4 Transaction Types in Epitomax: Payments, Allowances, Adjustments, and Refunds. The ones that typically have user-defined sub-types are Allowances. You must define at least one Allowance Transaction Subtype in order to use allowances (also called write-offs or contractual allowances) in Epitomax.
To enter the Transaction Subtypes perform the following steps:
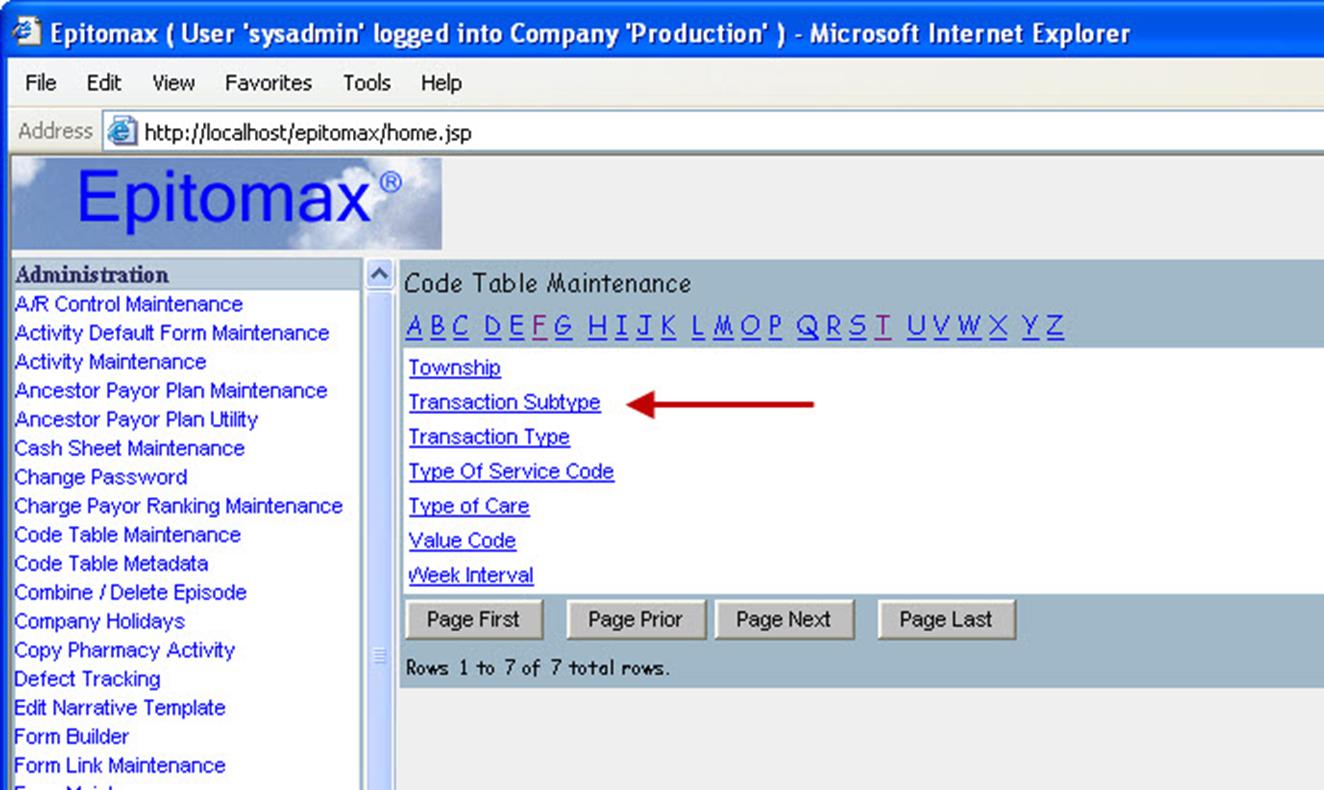

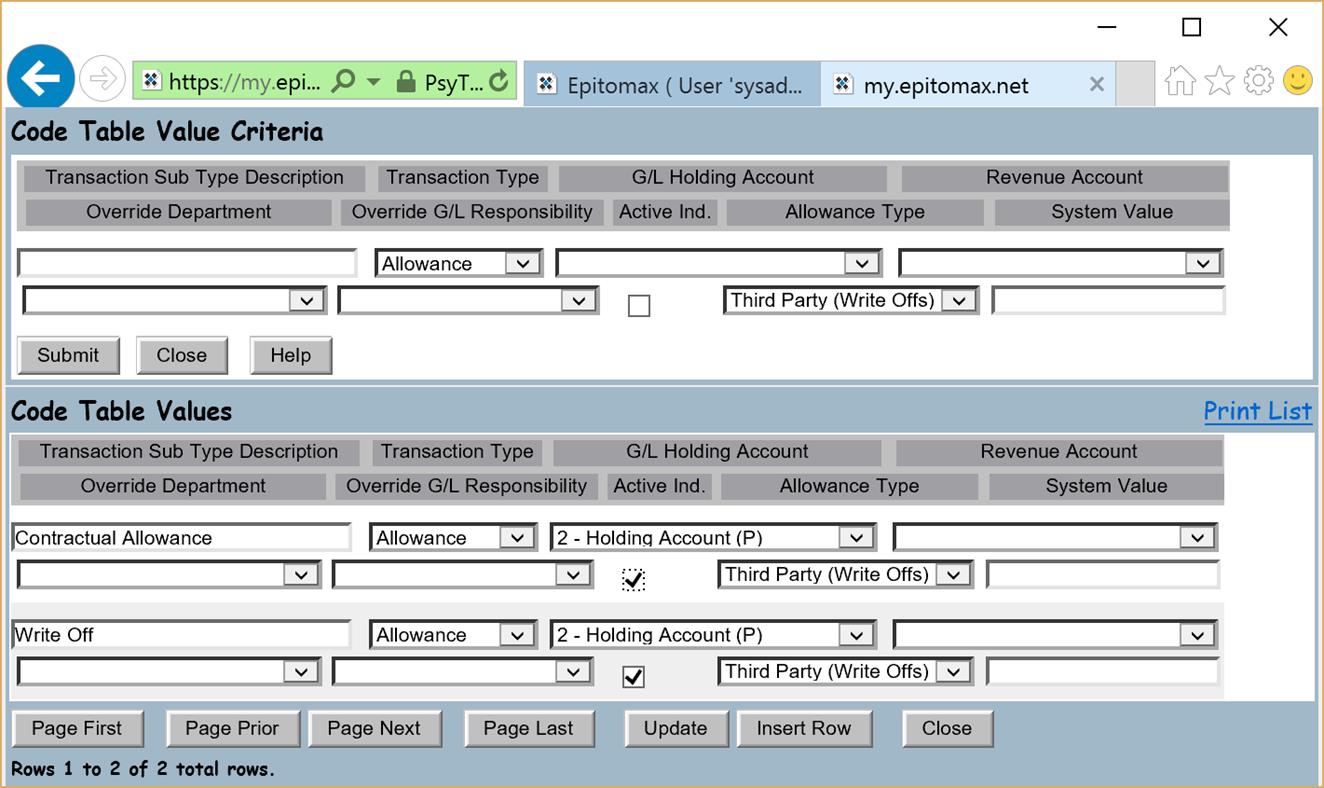
Click here for a training video regarding Transaction Subtypes
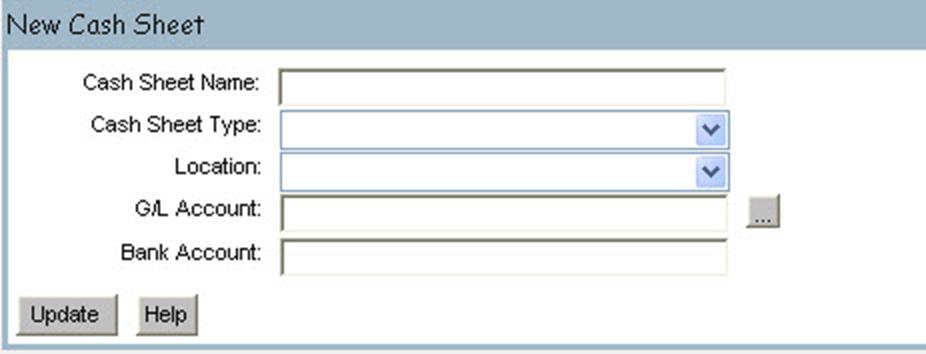
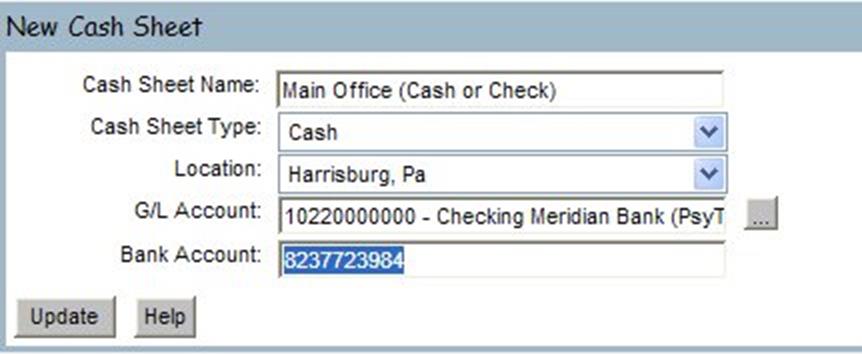
A cash sheet, just like in a paper world, is a place to record all cash receipts at a given location by Cash Sheet Type. Using Cash Sheets allows you to restrict who can enter cash receipts. It also allows you to print Deposit Listings used to reconcile your cash receipts.
Cash Sheets are by Location and by Cash Sheet Type (Cash, Check, Credit Card, EFT).
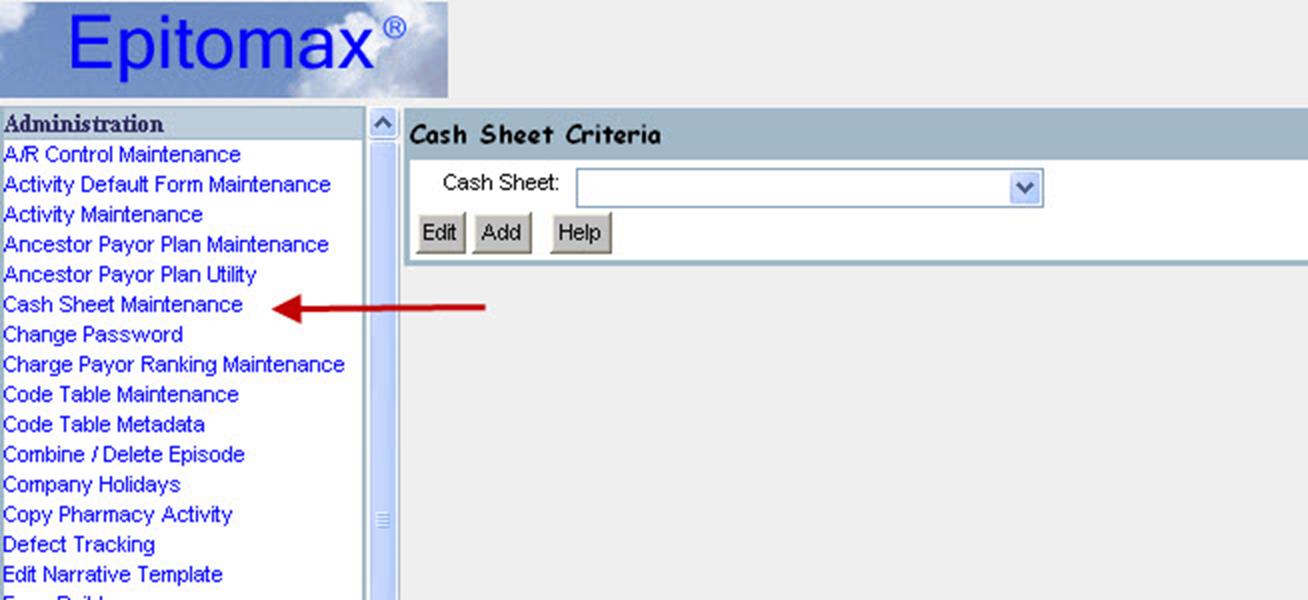
Click here for a training video regarding Cash Sheets
Care Giver Roles clinical roles. They are used when defining the Treatment Team for each client admission. Earlier, we configured Disciplines, and those were billing related. Some staff may be able to assume multiple Roles depending on how you define your care giver roles. Required signatures on clinical forms are defined by Care Giver Role.
To enter Care Giver Roles perform the following steps:
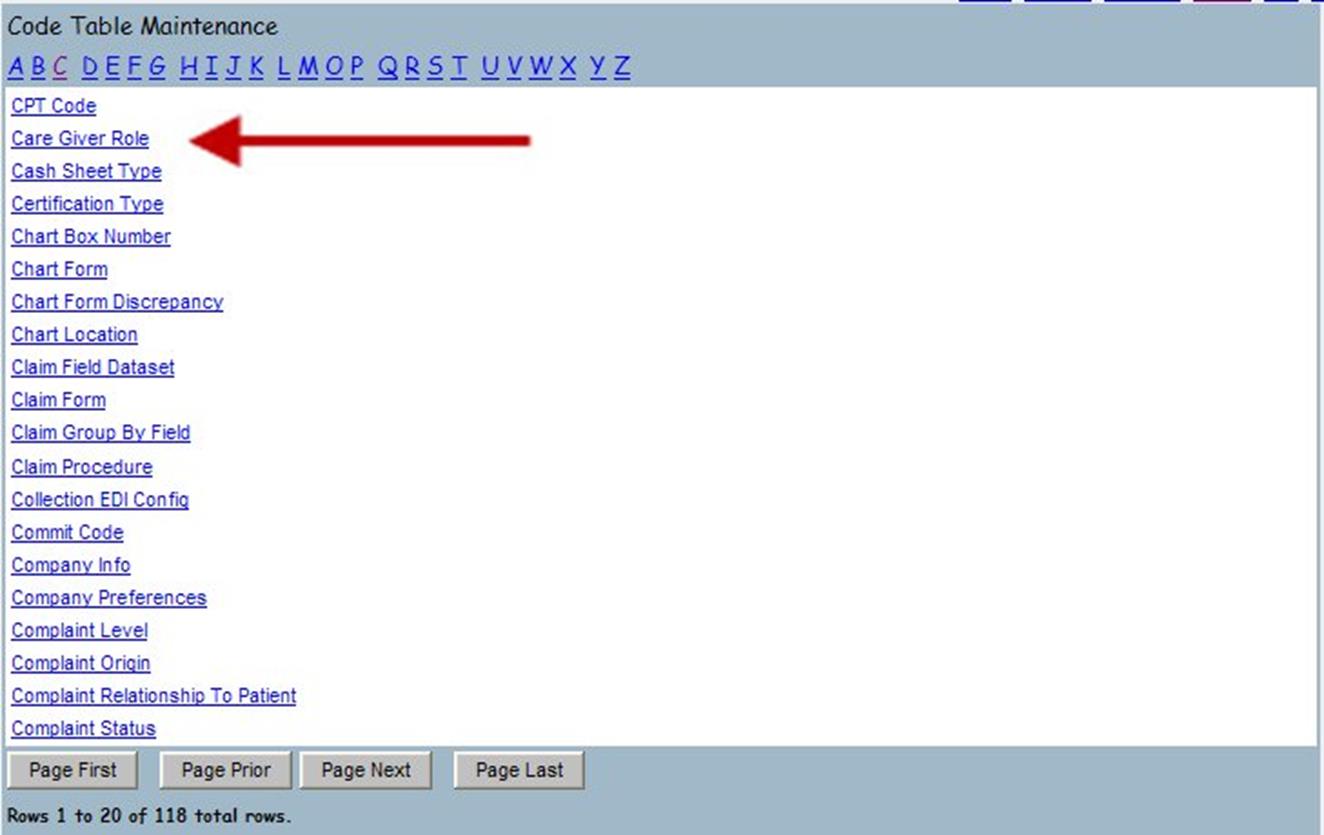

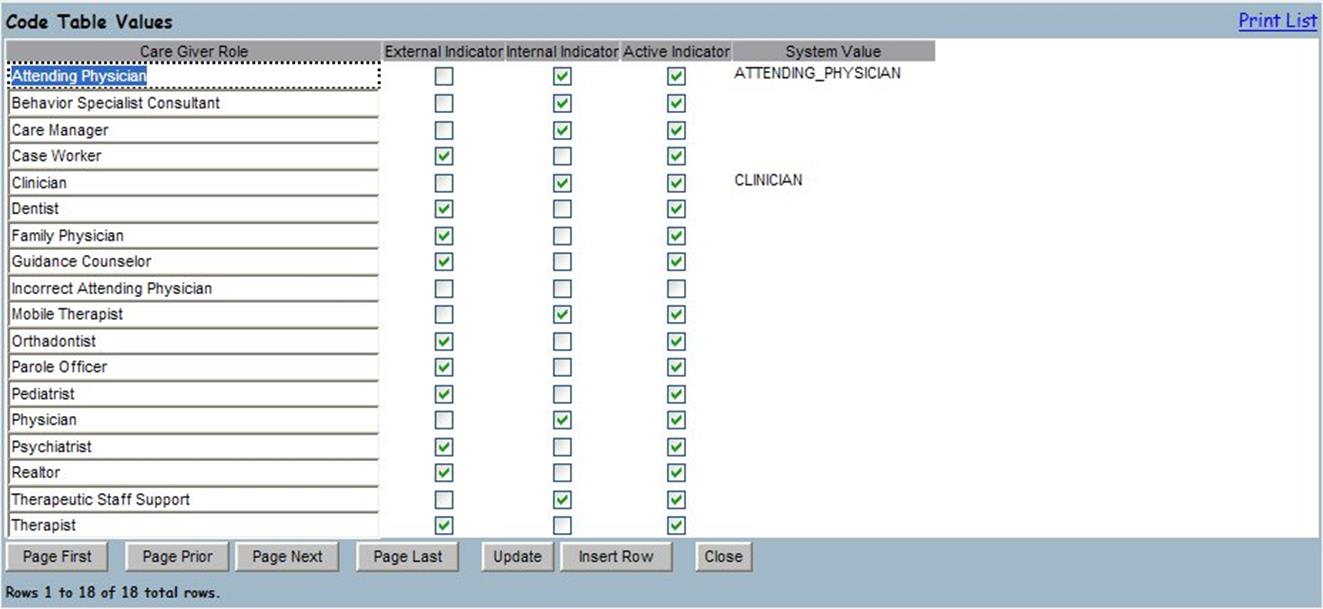
Click here for a training video regarding Care Giver Roles
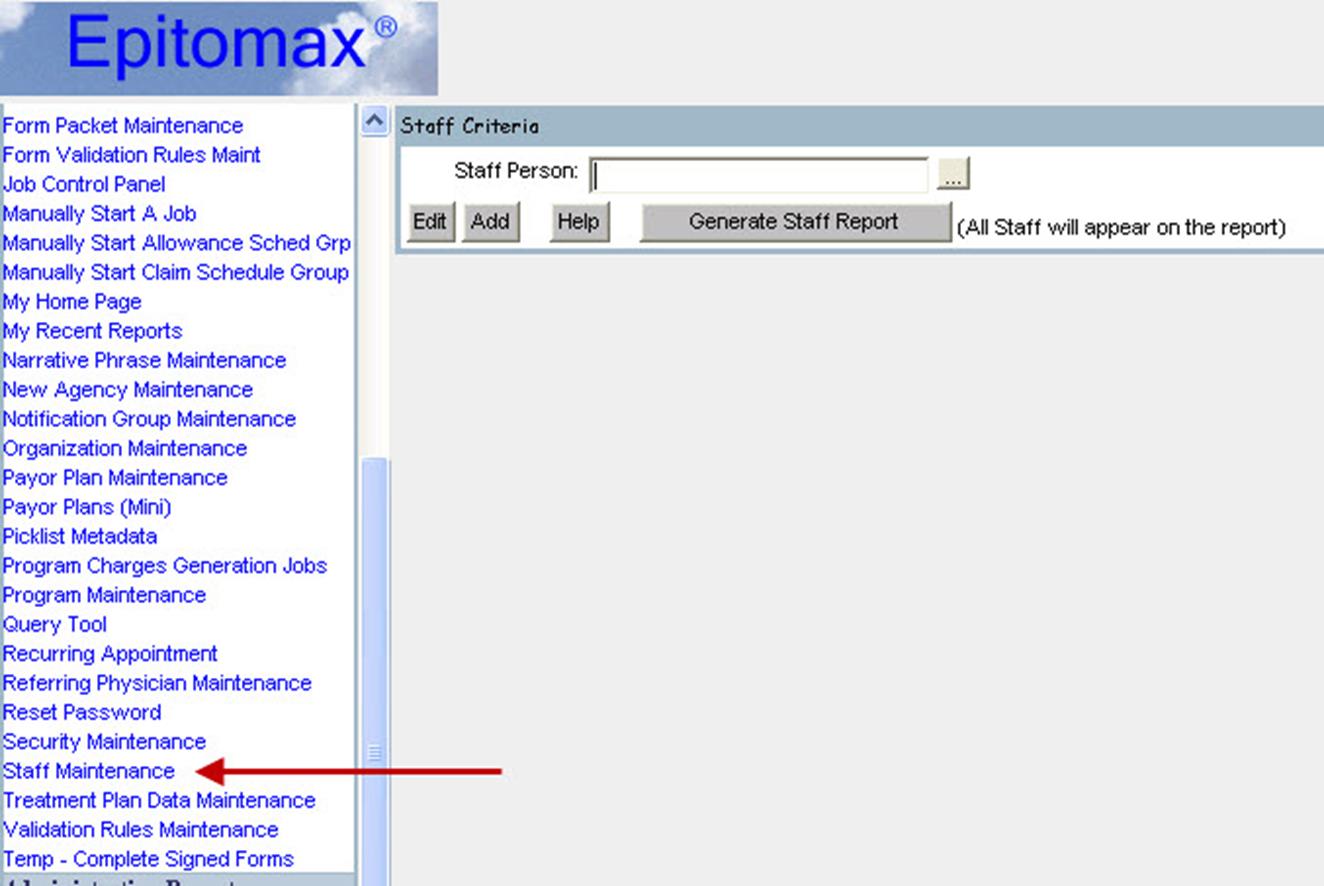
Required Fields
a. Legal Last Name – Staff’s legal last name
b. Uses Legal Name – Indicator to the system of what name should be used. If Uses legal last name is not checked than Last name and First name will be displayed throughout the system.
c. Employee Status – Select Active.
d. Email Address – Although this field is not required to save the staff in the system, without it the staff will not be able to reset their own password or receive email notifications from Epitomax.
e. For clinical staff, enter the following fields as well:
a. NPI No – Used for billing
b. Taxonomy No – Used for billing in some states with some payers
c. Primary Program – Defaults in on new appointments
d. Manager – Needed for functionality by Manager
e. Degree – Shows behind name on forms signature pages
f. Evaluator – Check this box
g. Uses Service Activity – Check this box
All the remaining fields can be filled in but are not required to add a new Staff person to the system.
Click here for a training video regarding Staff Maintenance
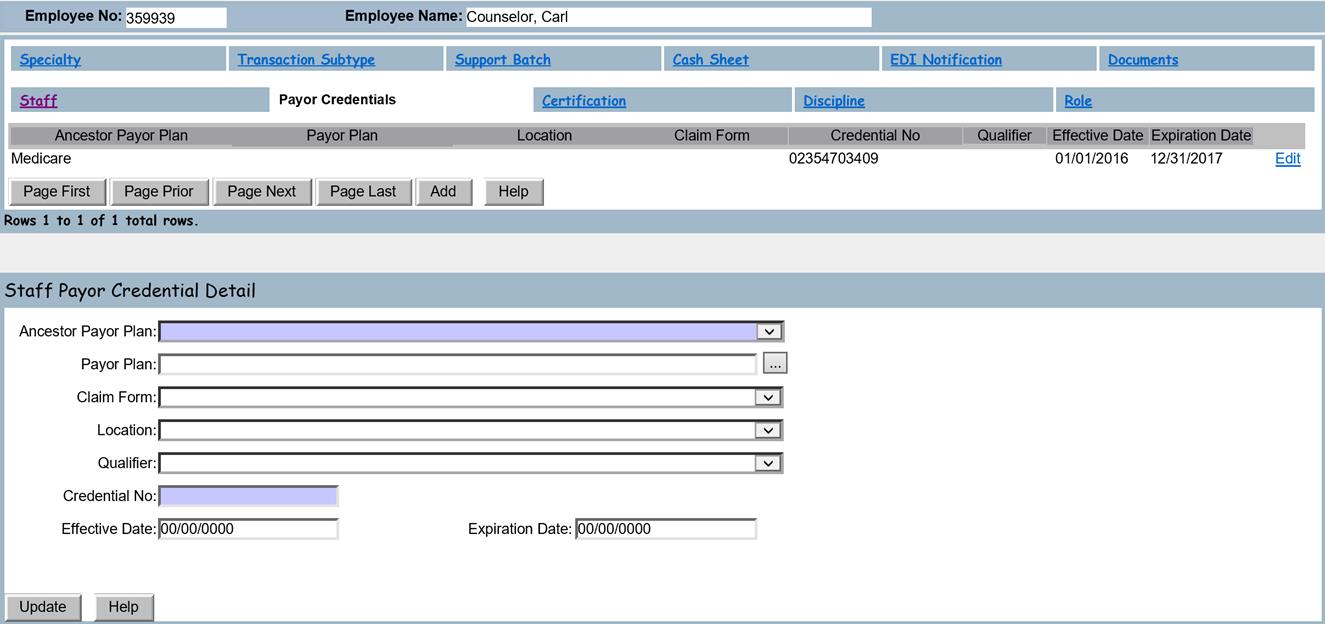
Enter information on this tab for staff who are credentialed with payors. Staff Payor Credentials are used by Epitomax to properly handle Medicare “incident to” billing. The Schedule Appointment function will also use this information to find appointments with credentialed staff when the client’s payor requires credentialed staff.
Click here for a training video regarding the Staff Payor Credentials tab
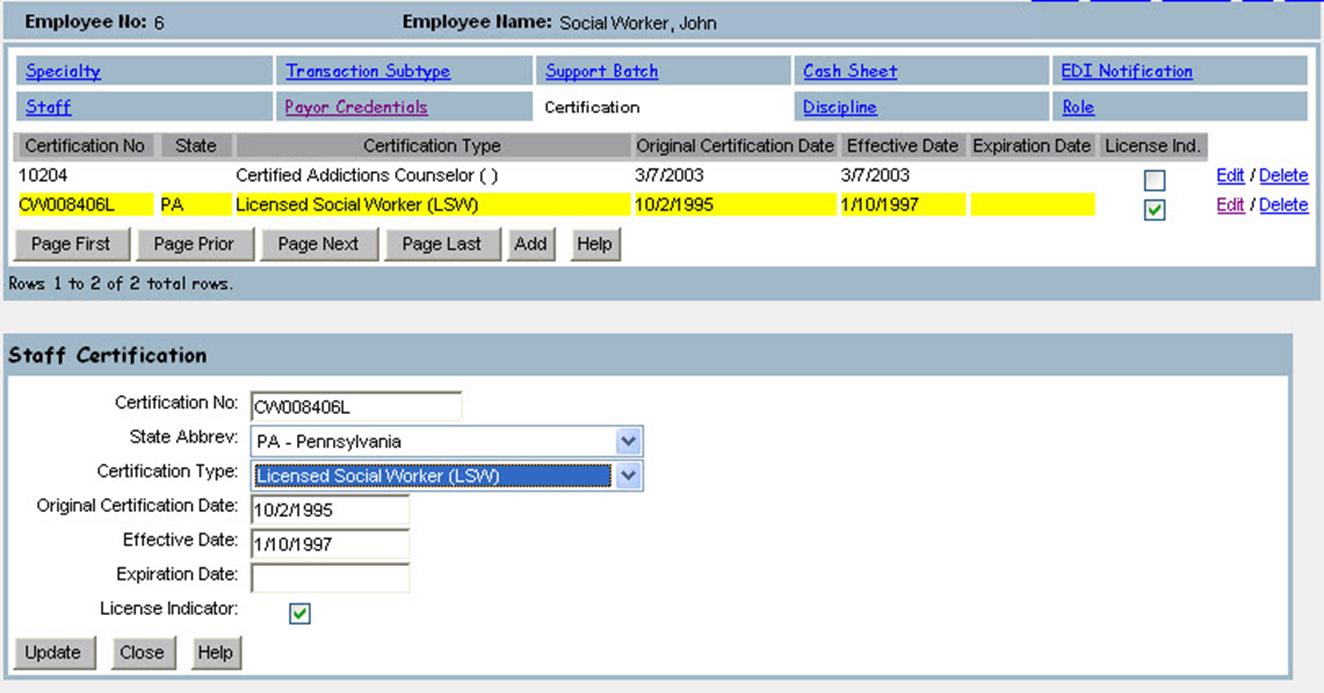
Click here for a training video regarding the Staff Certification tab
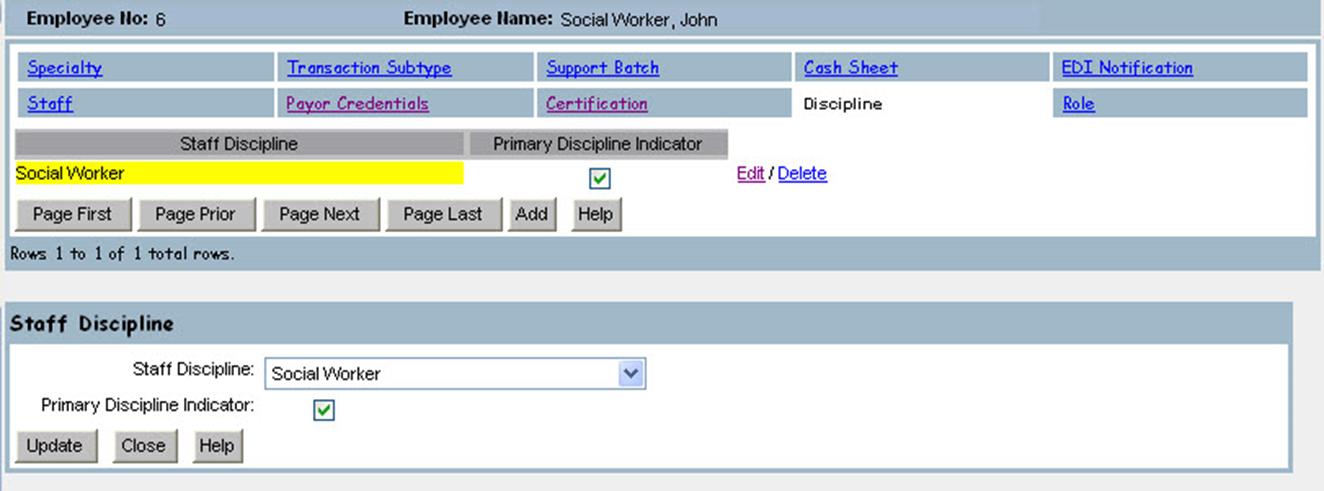
Click here for a training video regarding the Staff Discipline tab
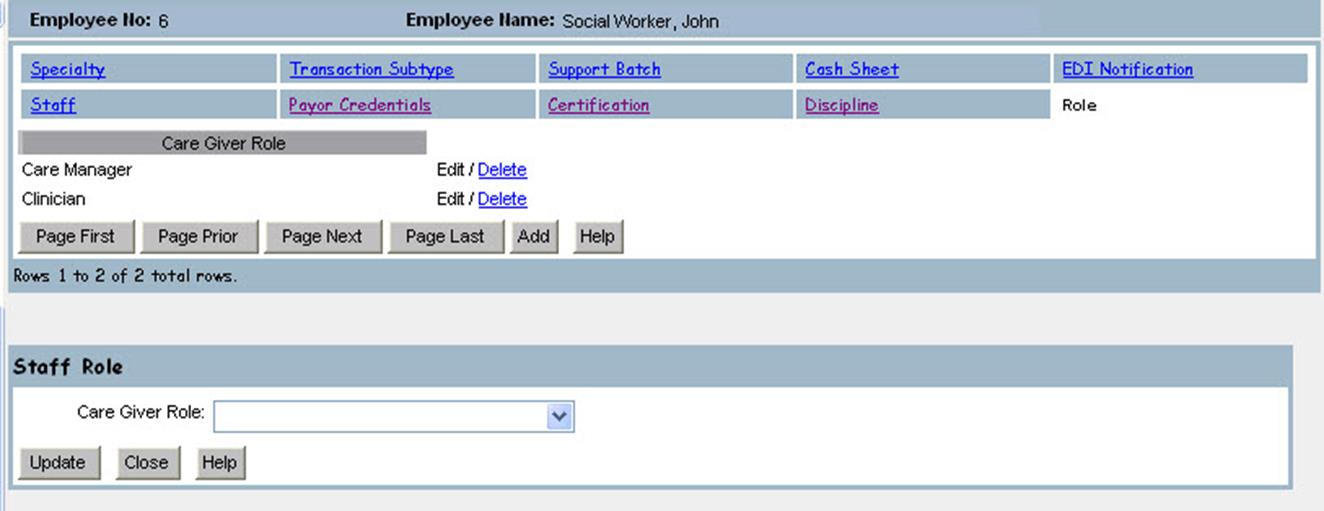
Click here for a video training regarding the Staff Role tab
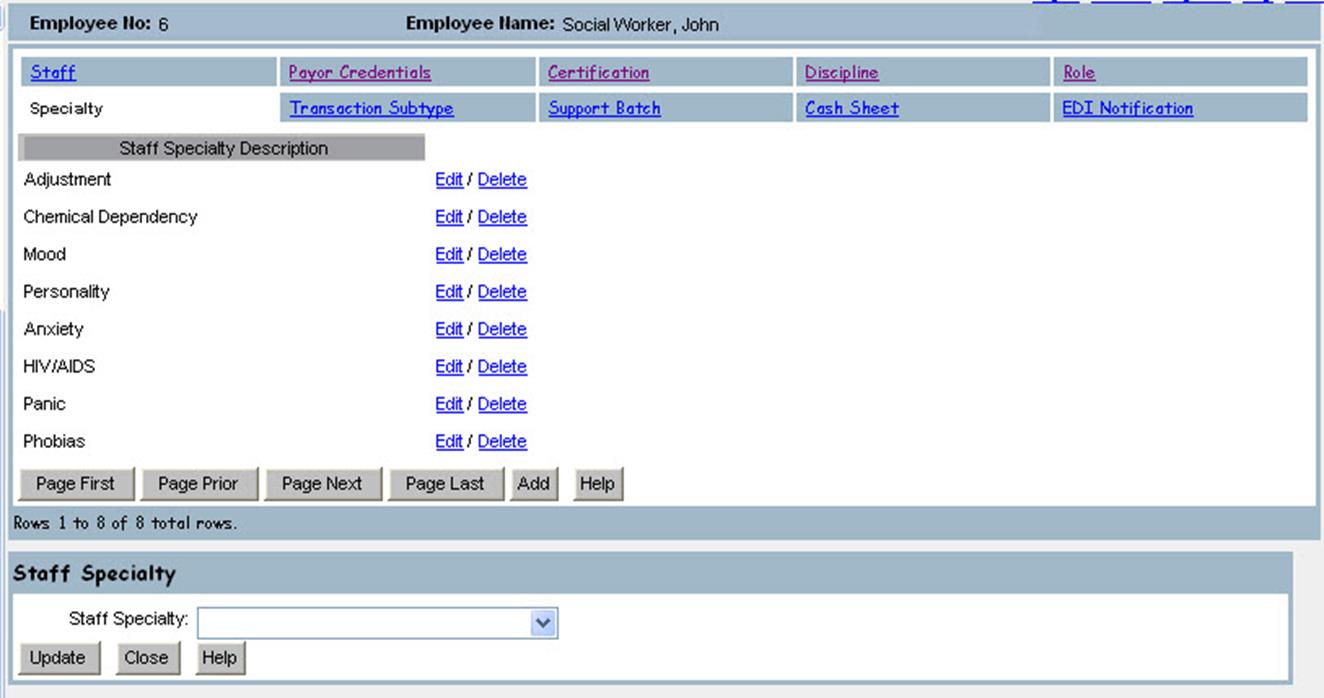
Click here for a training video regarding the Staff Specialty tab
Click
here for a training video regarding the Transaction Subtype tab

Click
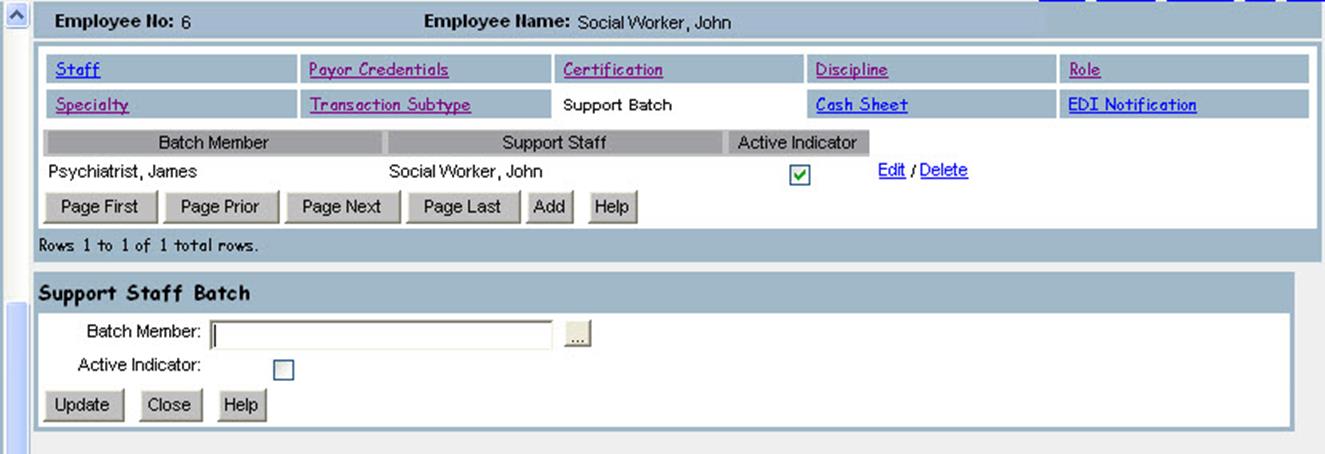
here for a training video regarding the Staff Cash Sheet tab
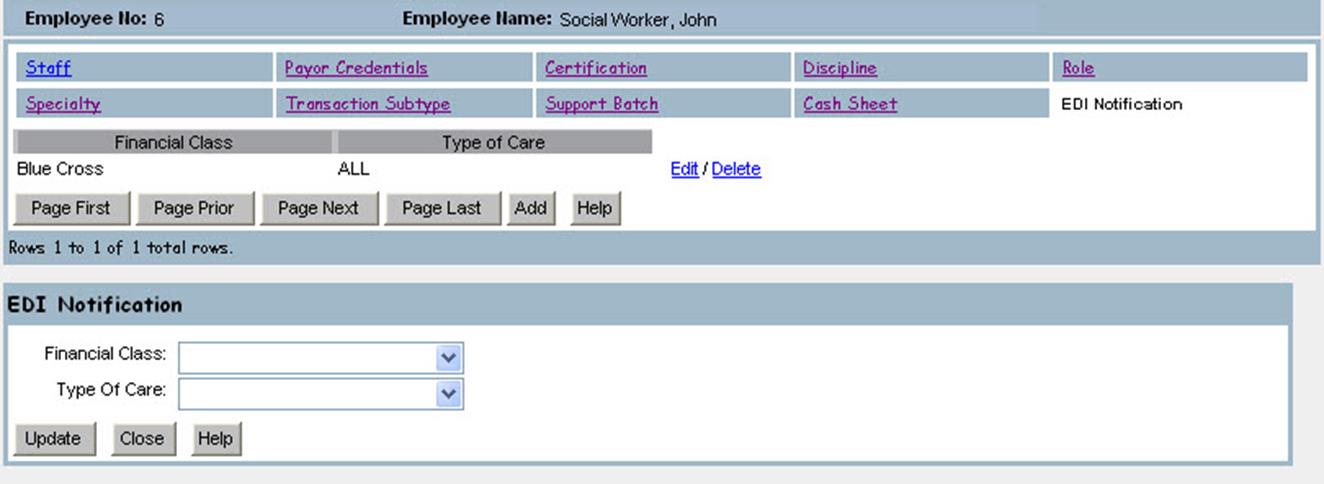
Click here for a training video regarding the EDI and Documents tabs
After adding someone in the staff table, you can now add a login to Epitomax for that staff.

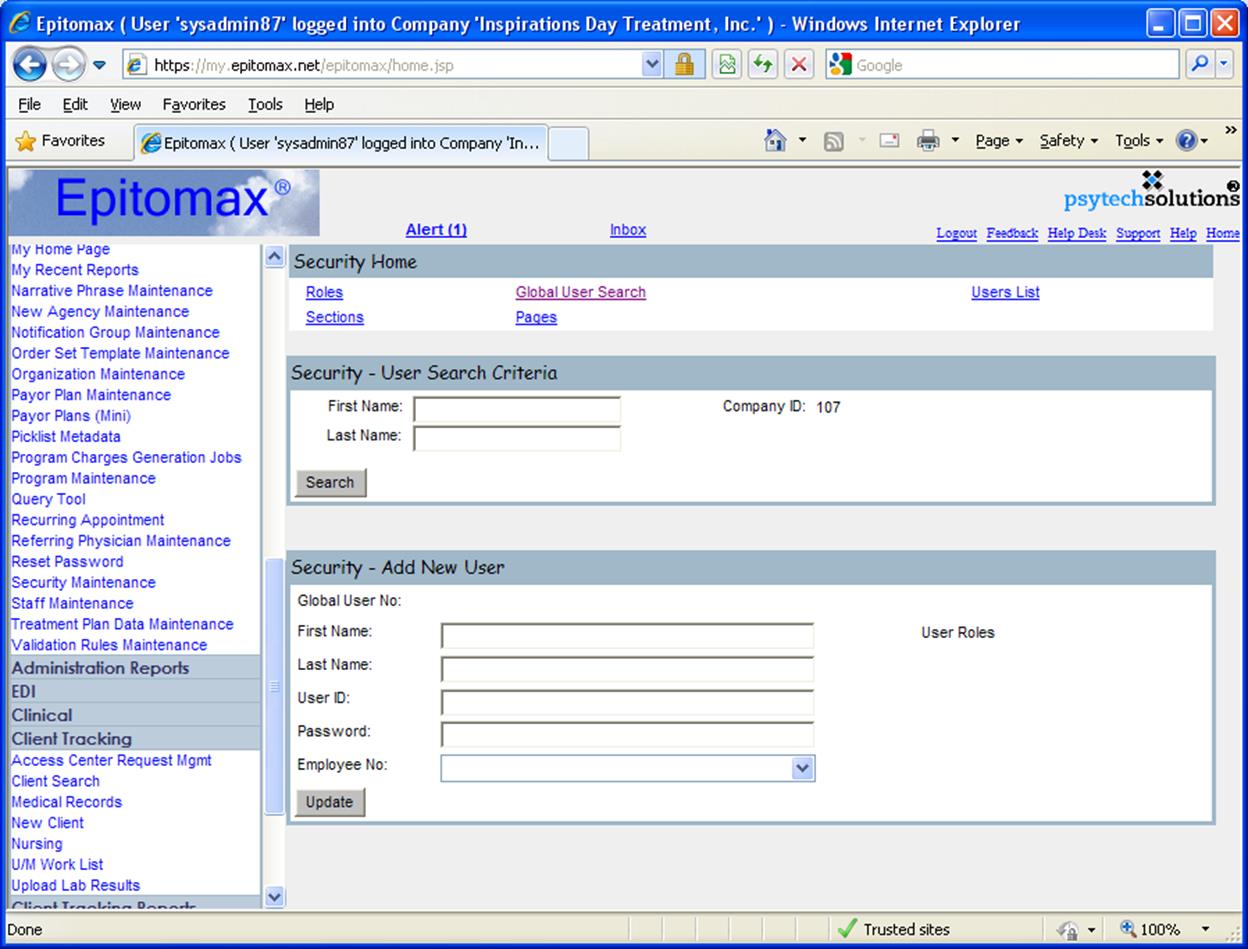
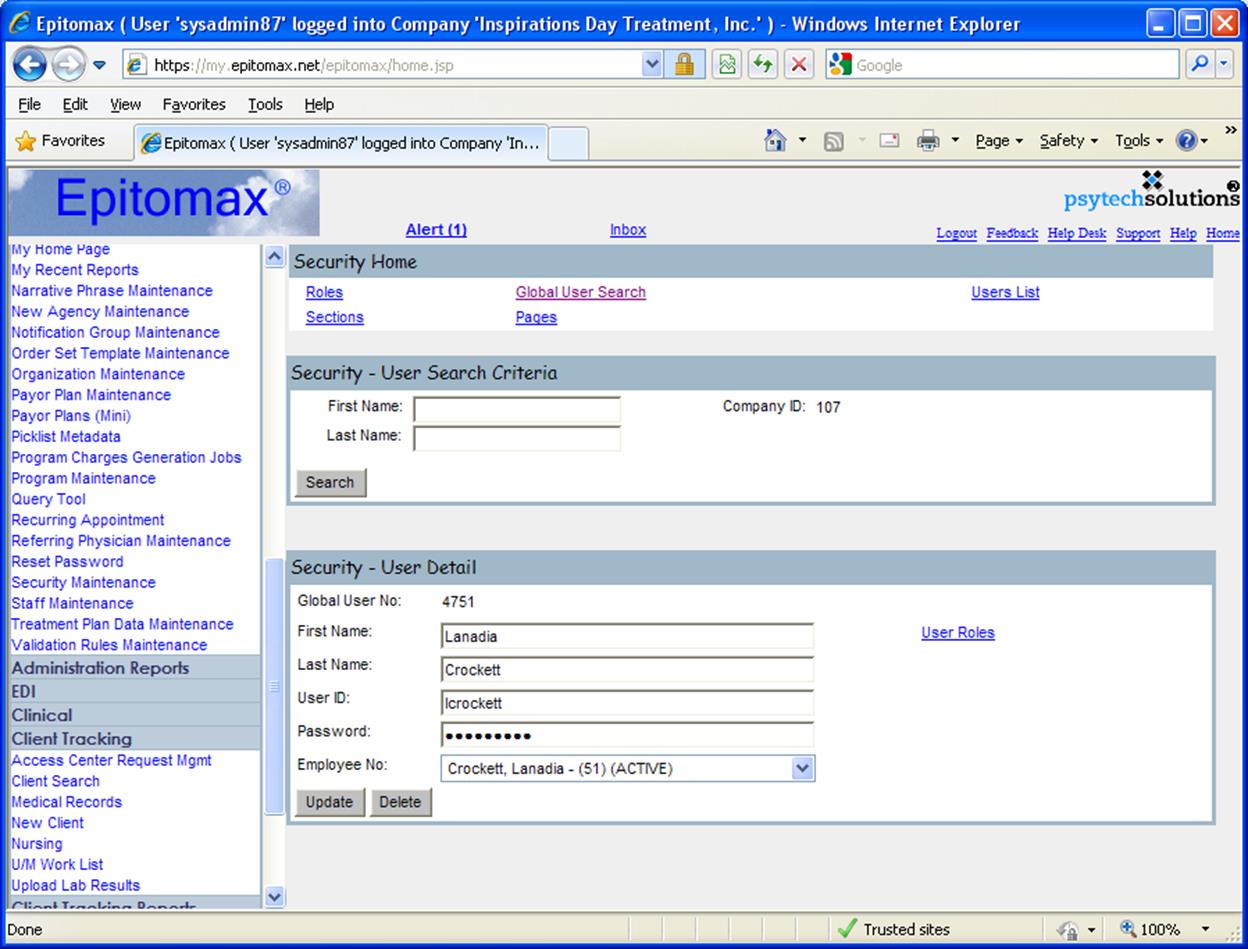
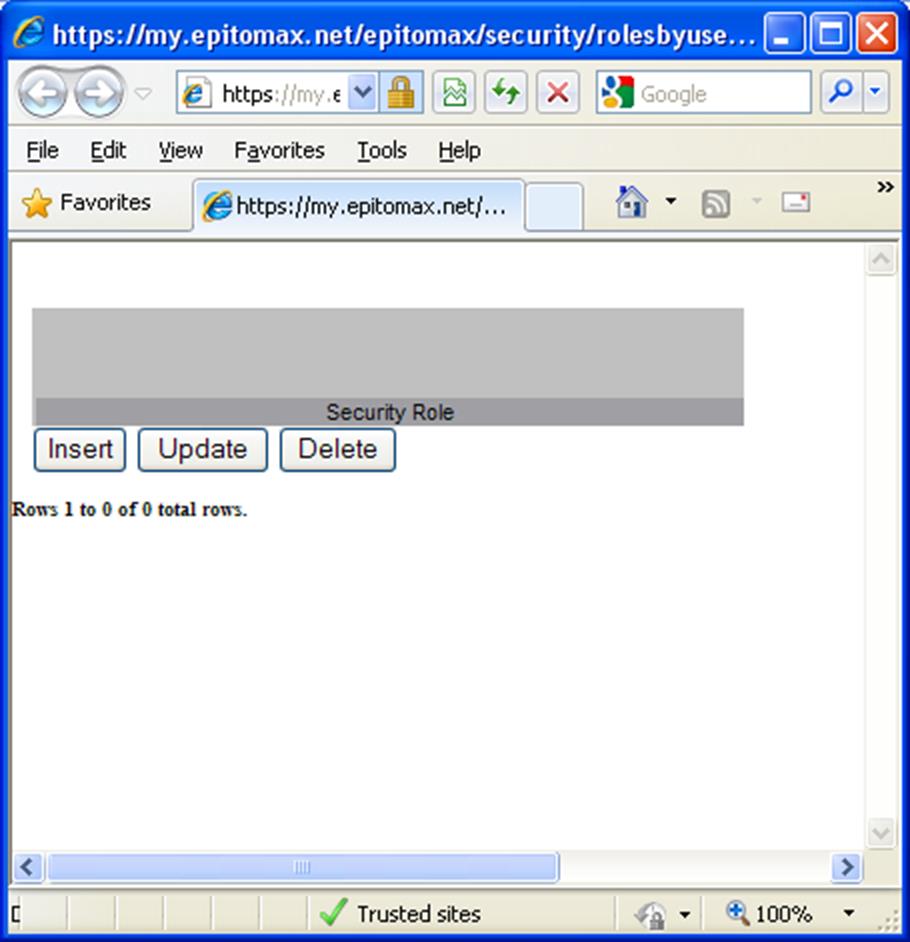
Click here for a training video regarding Creating Epitomax Users
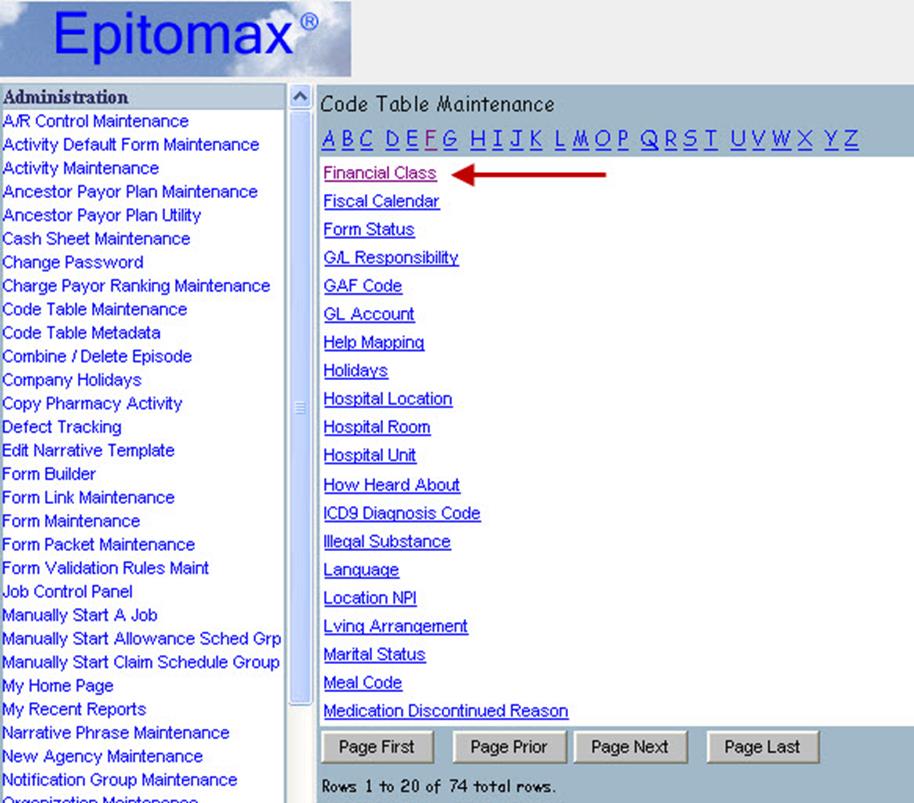
Financial Classes are used as a way to group like Payor Plans in the system. By grouping payor plans (and Ancestor Payor Plans) by financial classes the system then has the ability to generate claims and run several A/R Reports based on the Financial Class assigned.
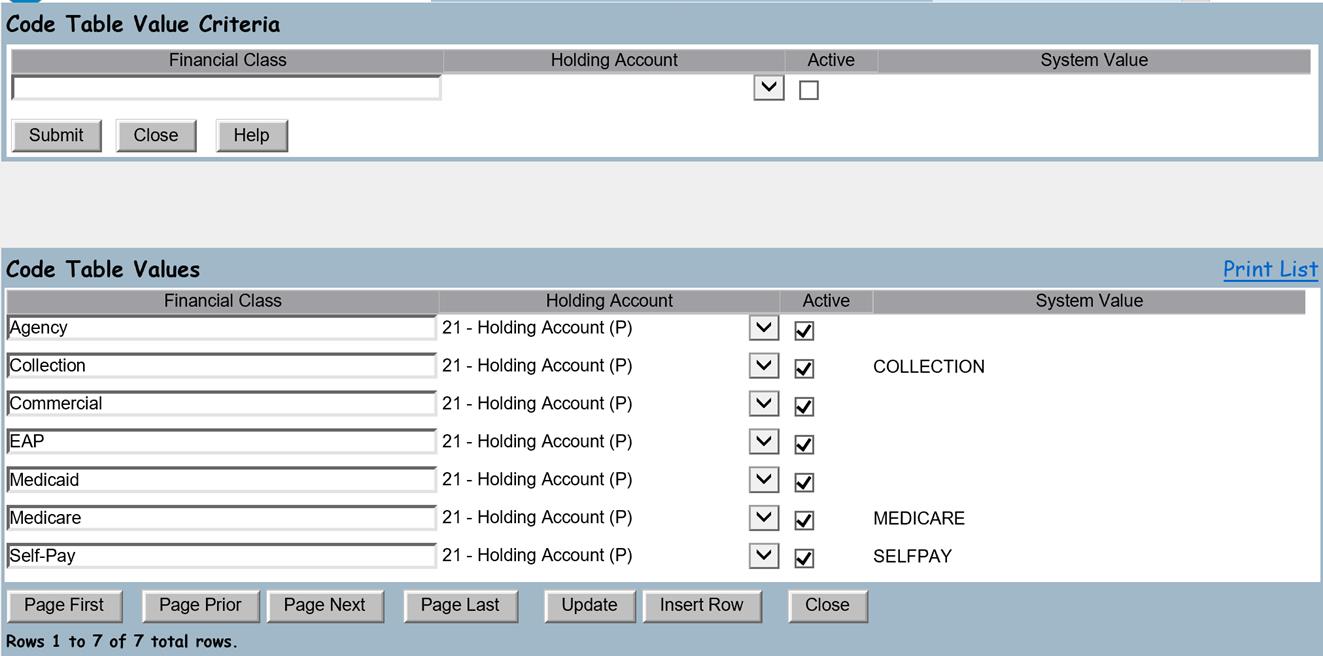
· Financial Class Name – This is the name that will be used to classify your Ancestor Payor Plans and Payor Plans.
· Holding Account – This should be the unapplied cash account that receipts should go into for this financial class. If none is specified here, the default holding account as entered in Administration->A/R Control Maintenance will be used.
· Active – Indicates that the financial class is active and ready for use. Uncheck this box to make a Financial Class inactive and unavailable for future use.
· System Value – Not user editable.
Click here for a training video regarding Financial Classes
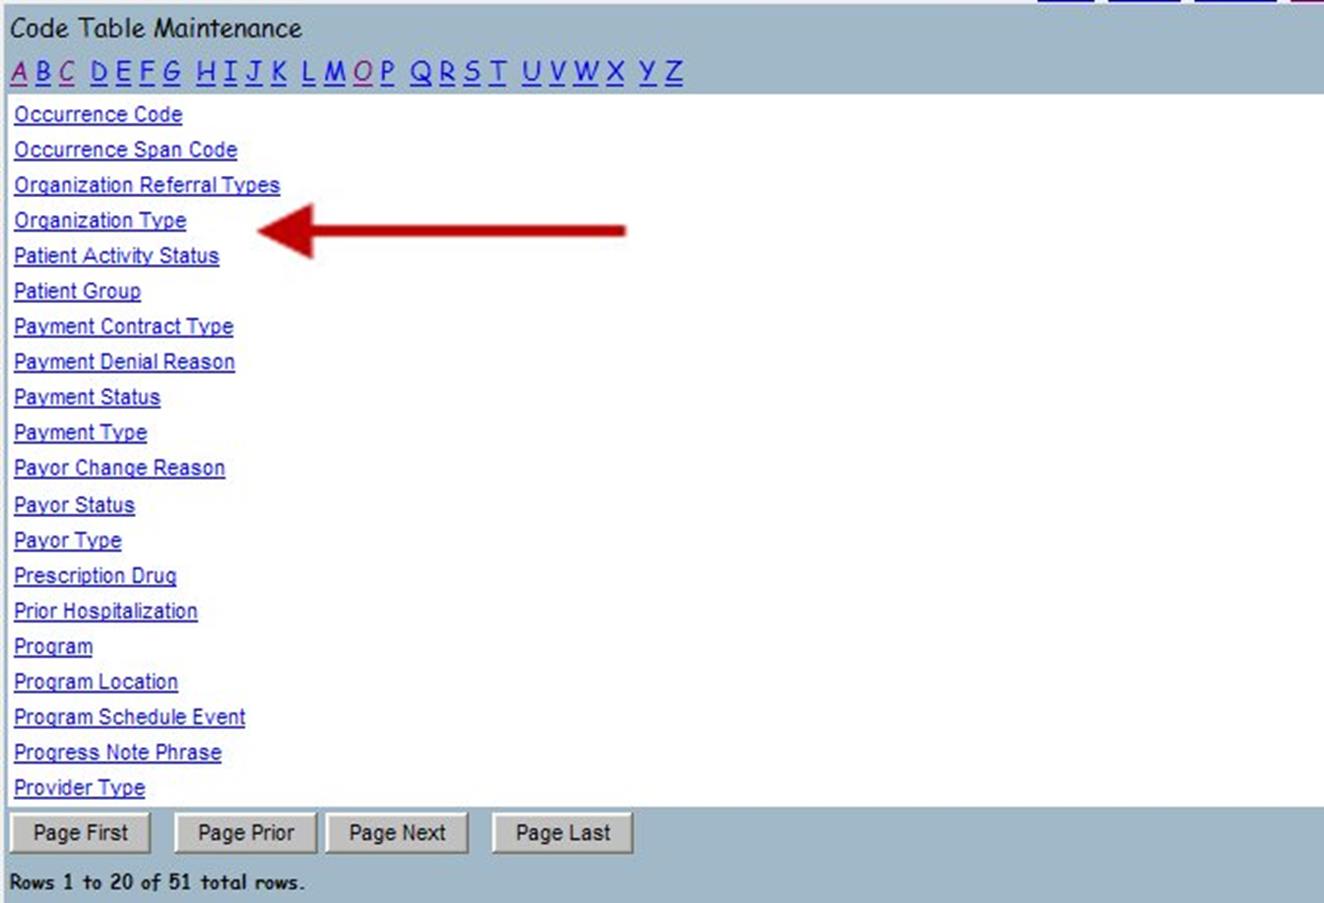
Organization Types are used to classify Organizations and determine where that organization should be available in Epitomax. Note: You should not make any changes to this code table. All rows have a System Value indicating that they are linked to programming in Epitomax. Adding new Organization Types would be of no benefit to you.
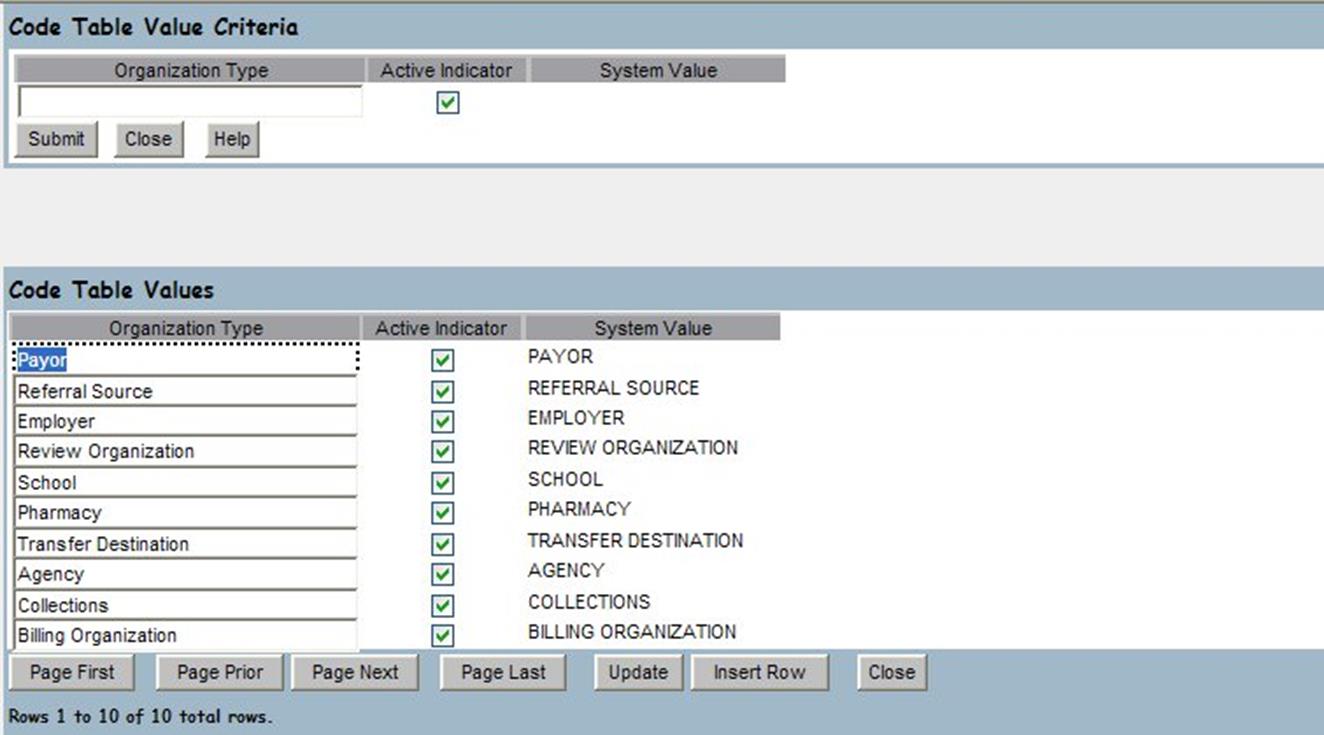
· Organization Type – This is description you will see in the system.
· Active – Indicates that the Organization Type is active and ready for use.
· System Value – Not user editable.
Click here for a training video regarding Organization Types
Authorized Service Groups are used to give a name to groups of Activities and to group them the way the Review Organization (or payer) authorizes services. You create the group names (Authorized Service Groups) using Code Table Maintenance. You use the Authorized Service Groups in Organization Maintenance (shown later in the guide) to group the services together in the way that organization authorizes services.
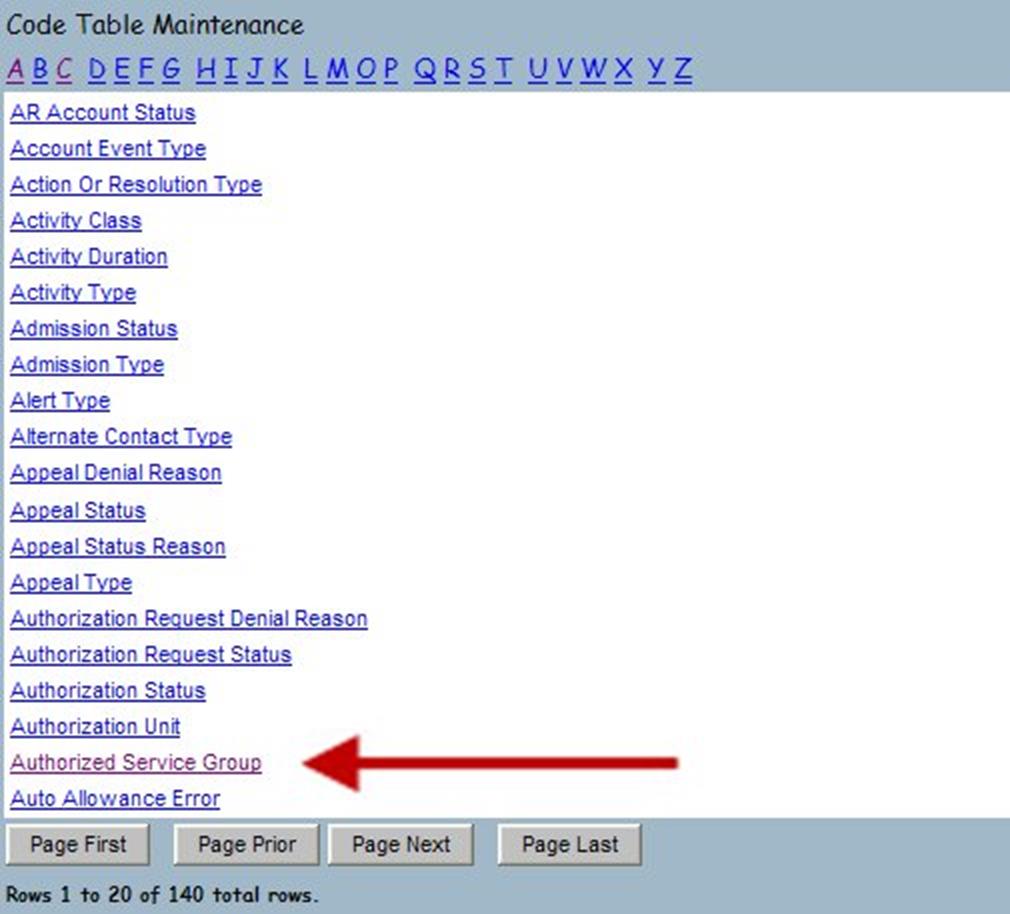
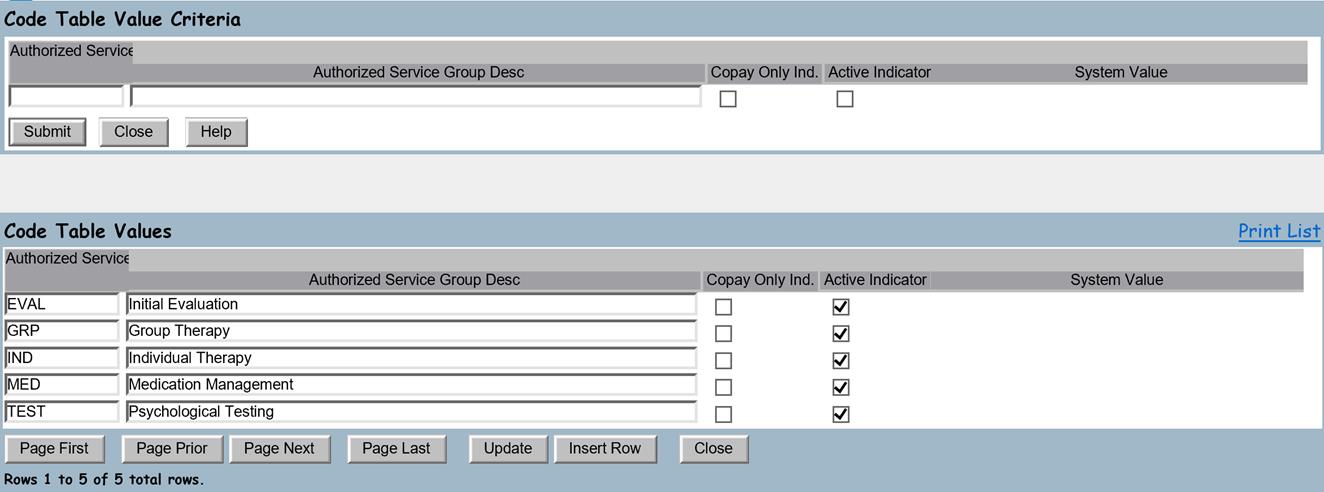
· Authorized Service Group Cd – This is a short code to identify the group.
· Authorized Service Group Desc – This is the name of the group.
· Copay Only Ind. – If checked, this authorized service group will only be available when defining copay rules and not for authorizations.
· Active – Indicates that the authorized service group is active and ready for use.
Click here for a training video regarding Authorized Service Groups
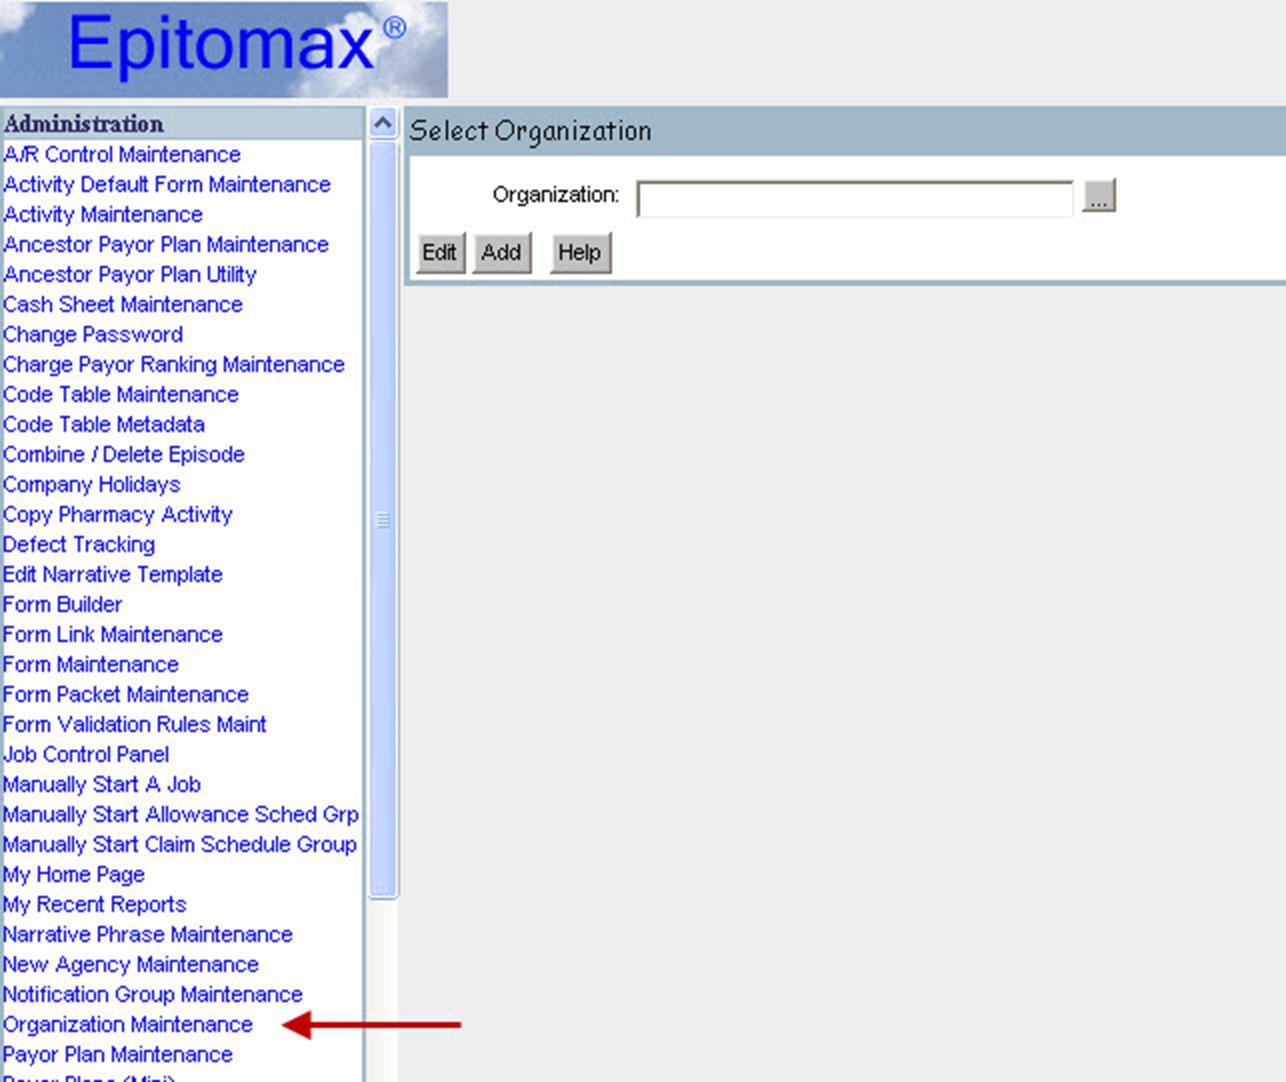
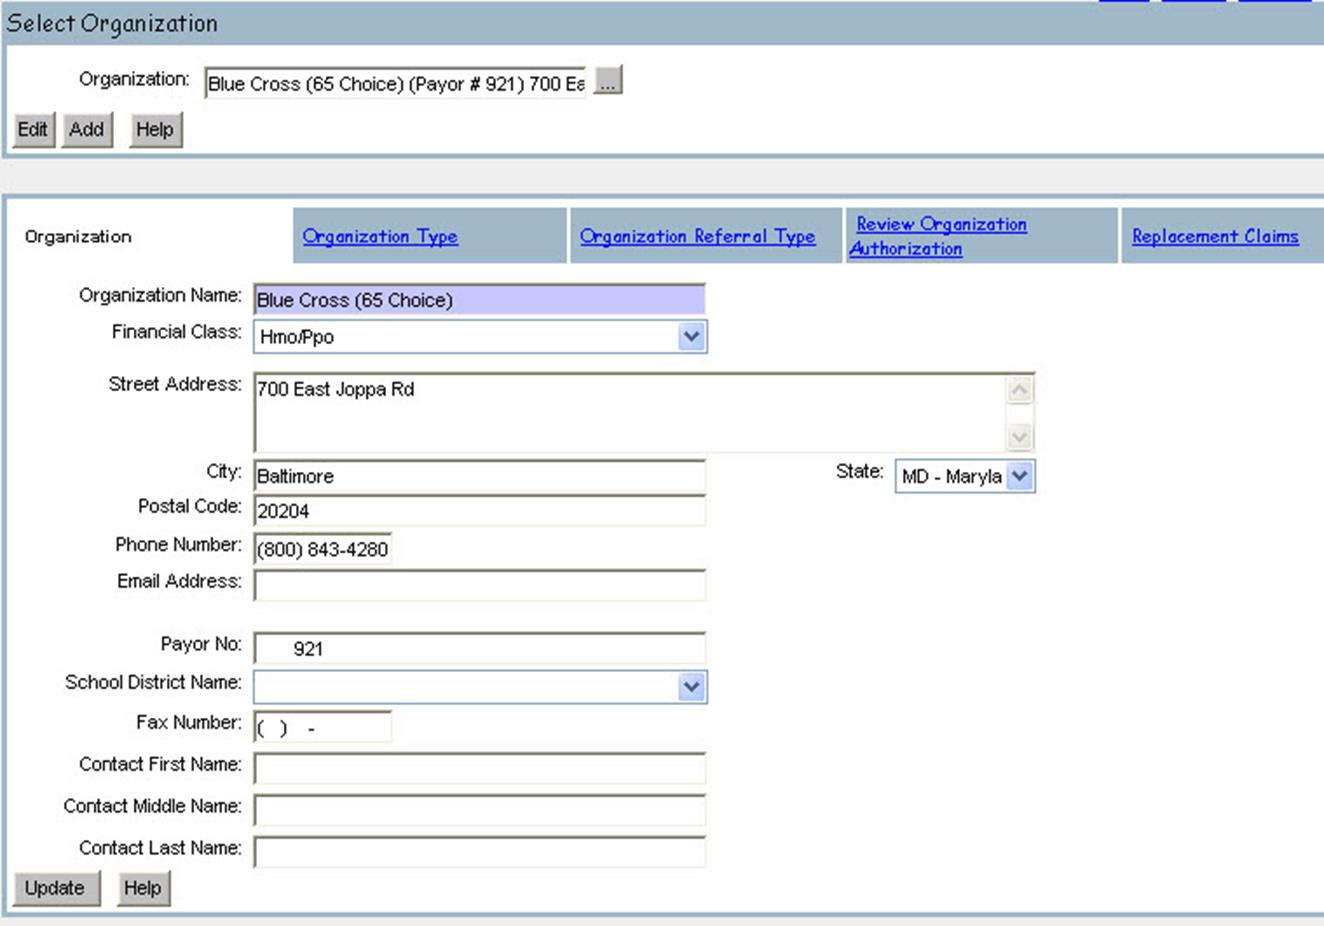
Organizations are companies or agencies that you interact with. They can be payors, review organizations, billing organizations, employers, referral organizations, etc. Each organization can have multiple organization types.
Click here for a training video regarding Organization Maintenance
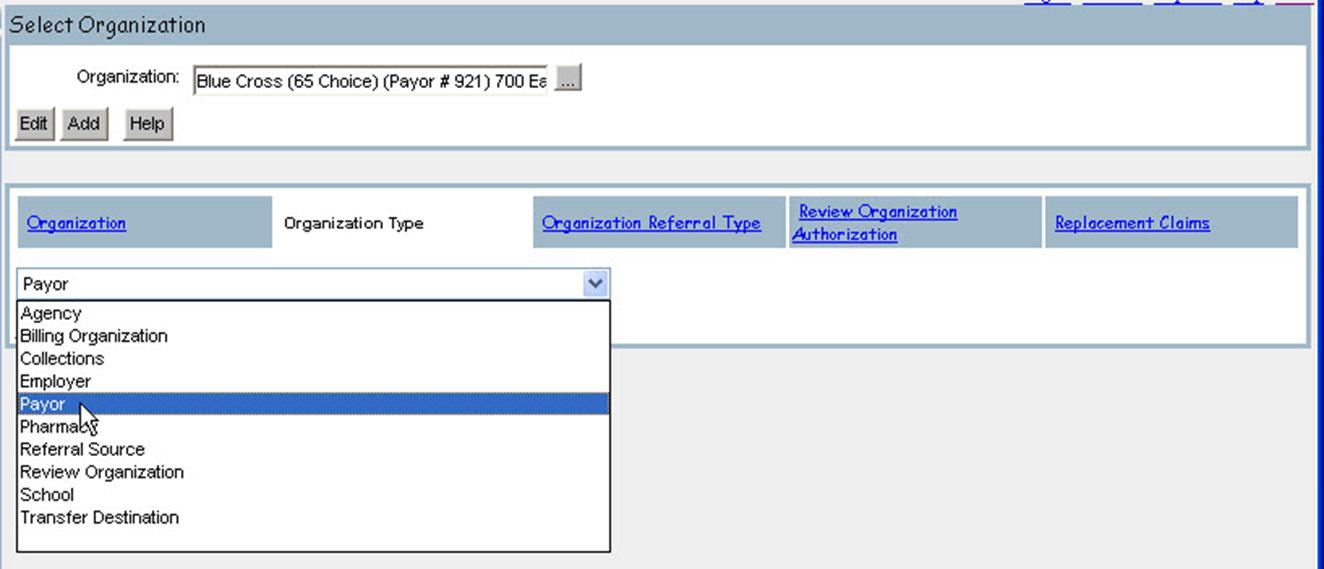
Click here for a training video regarding the Organization Type tab
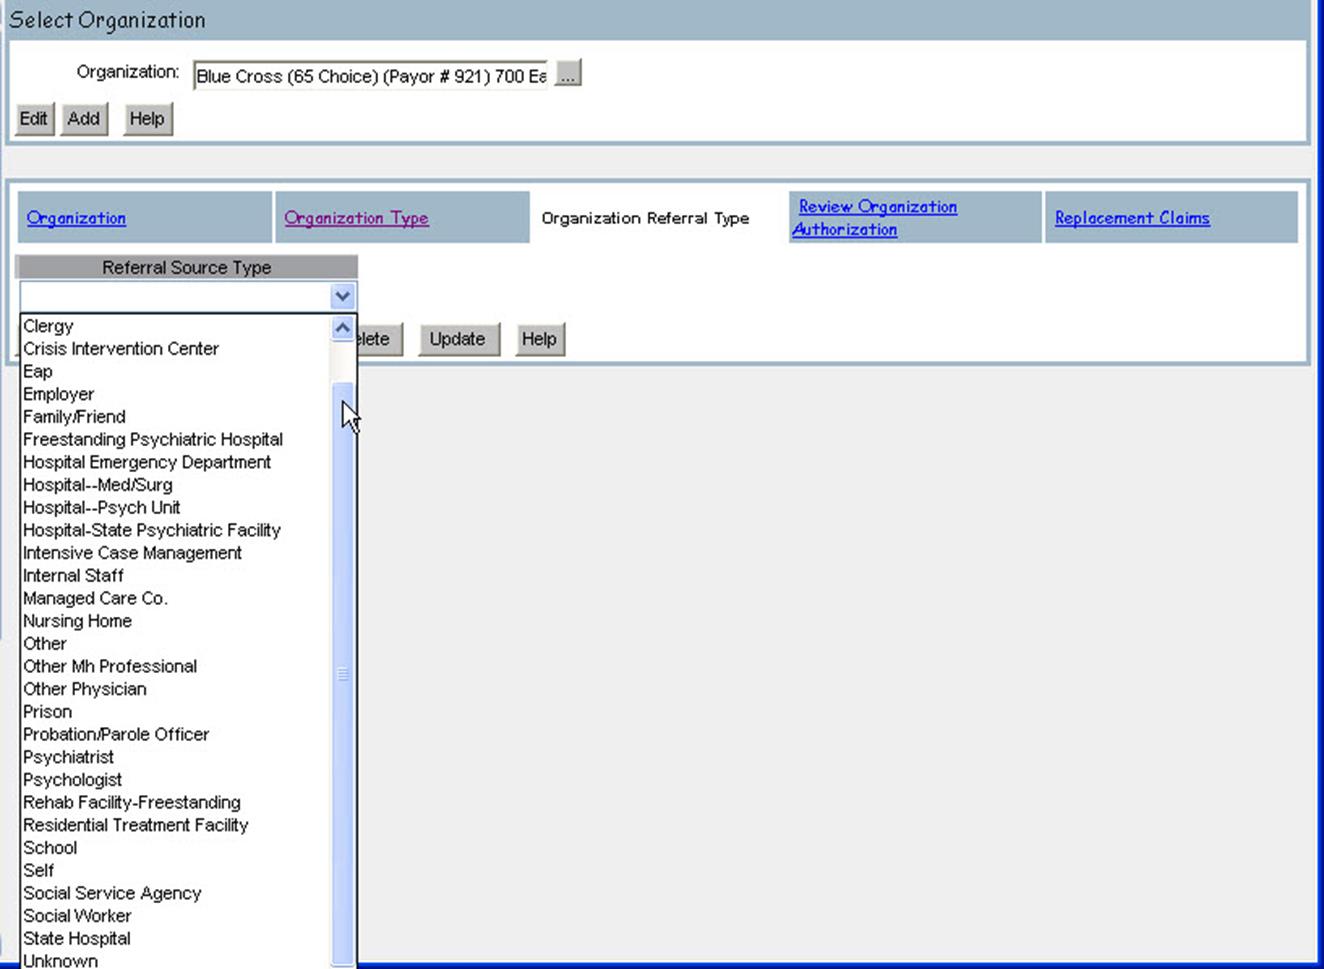
Click here for a training video regarding the Organization Referral Type tab
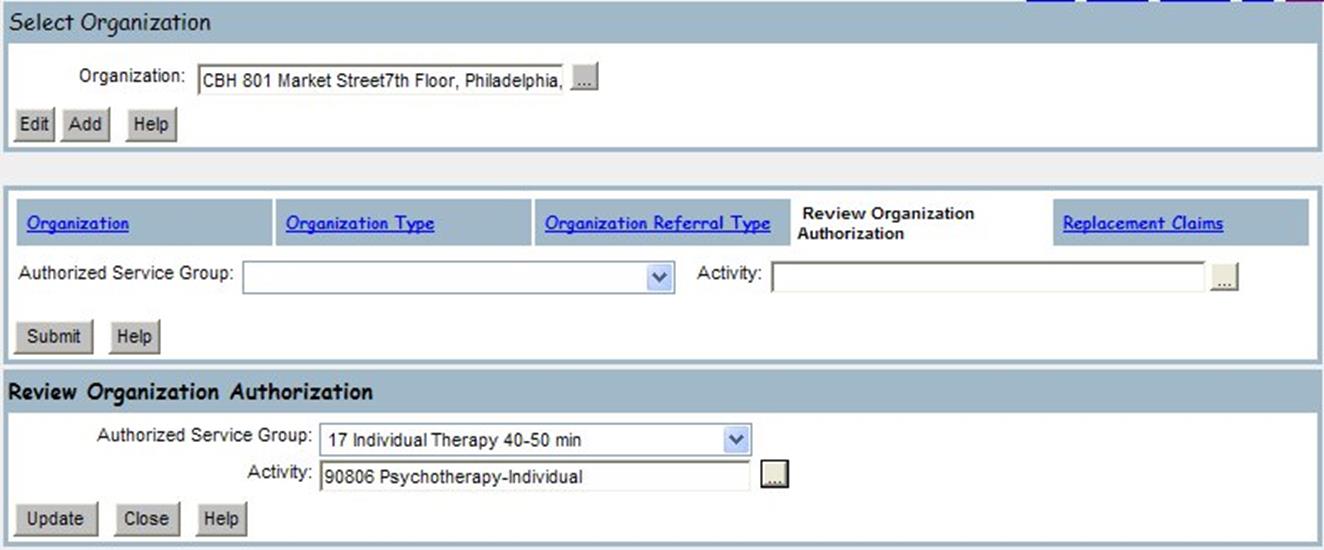
Click here for a training video regarding the Review Organization Authorization tab
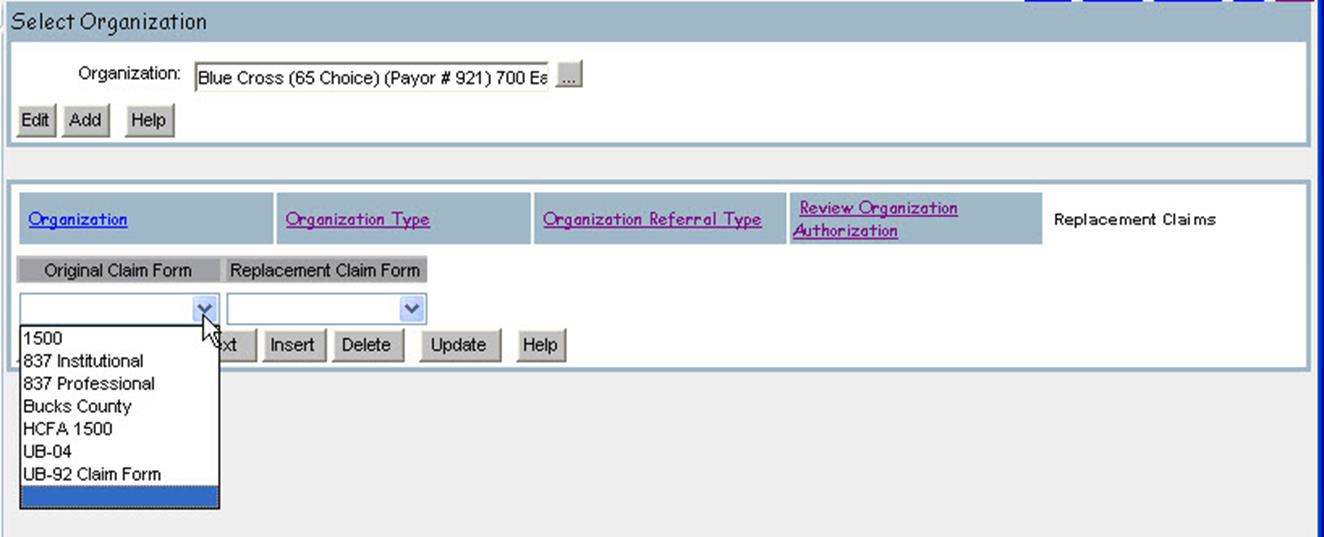
Click here for a training video regarding the Replacement Claim tab
In order to minimize the amount of work needed to maintain payor plan information, each Payor Plan in Epitomax has an Ancestor Payor Plan. Payor Plans inherit the information from their Ancestor Payor Plan. You can override ancestor information at the Payor Plan level as needed. The main idea is to group your payor plans based on how you need to bill them and have a different Ancestor Payor Plan for each. Don’t worry about copays or payment rules (contract rates) at the ancestor level. These typically vary by Payor Plan. Instead, focus on the Claim Forms, Procedure Codes, and how those charges are grouped on the claims. Significant changes in any of these factors would most be a good reason to use a different Ancestor Payor Plan that matches your needs more closely or create a new Ancestor Payor Plan.
Epitomax comes with a number of pre-configured Ancestor Payor Plans. You can view these to see how they are configured. It is best to start out by using existing Ancestor Payor Plans until you are more familiar with Epitomax.
Click here for a training video regarding Payor Plans and Ancestors
To view or edit an Ancestor Payor Plan, click on Ancestor Payor Plan Maintenance under the Administration menu section.
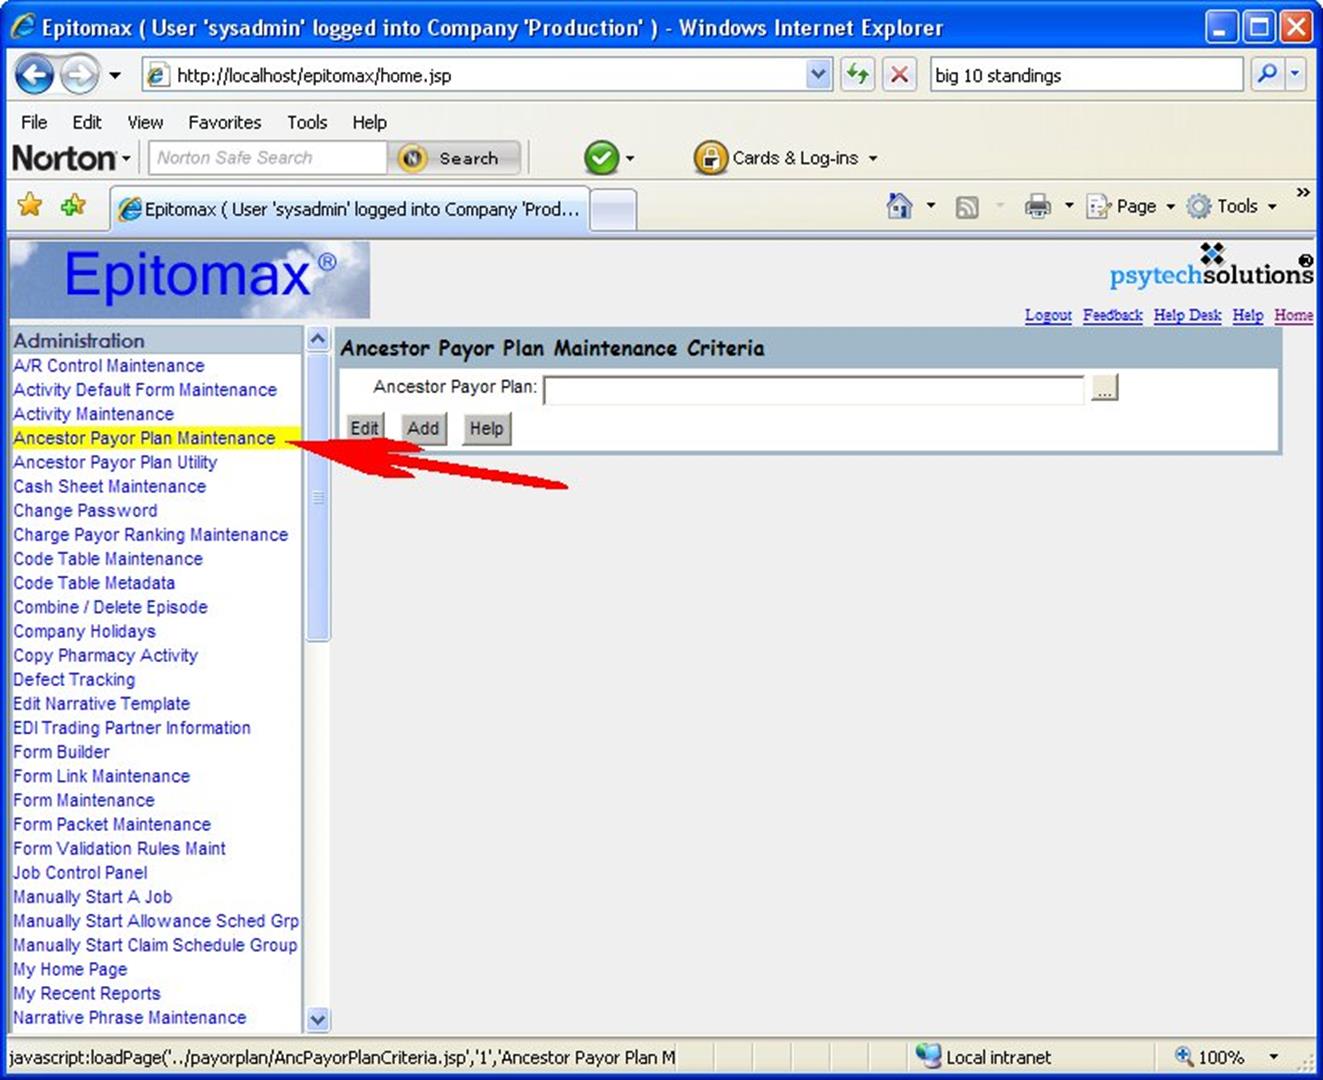
Use the drop-down to select an Ancestor Payor Plan to view/edit or click on the Add button to add a new Ancestor Payor Plan.
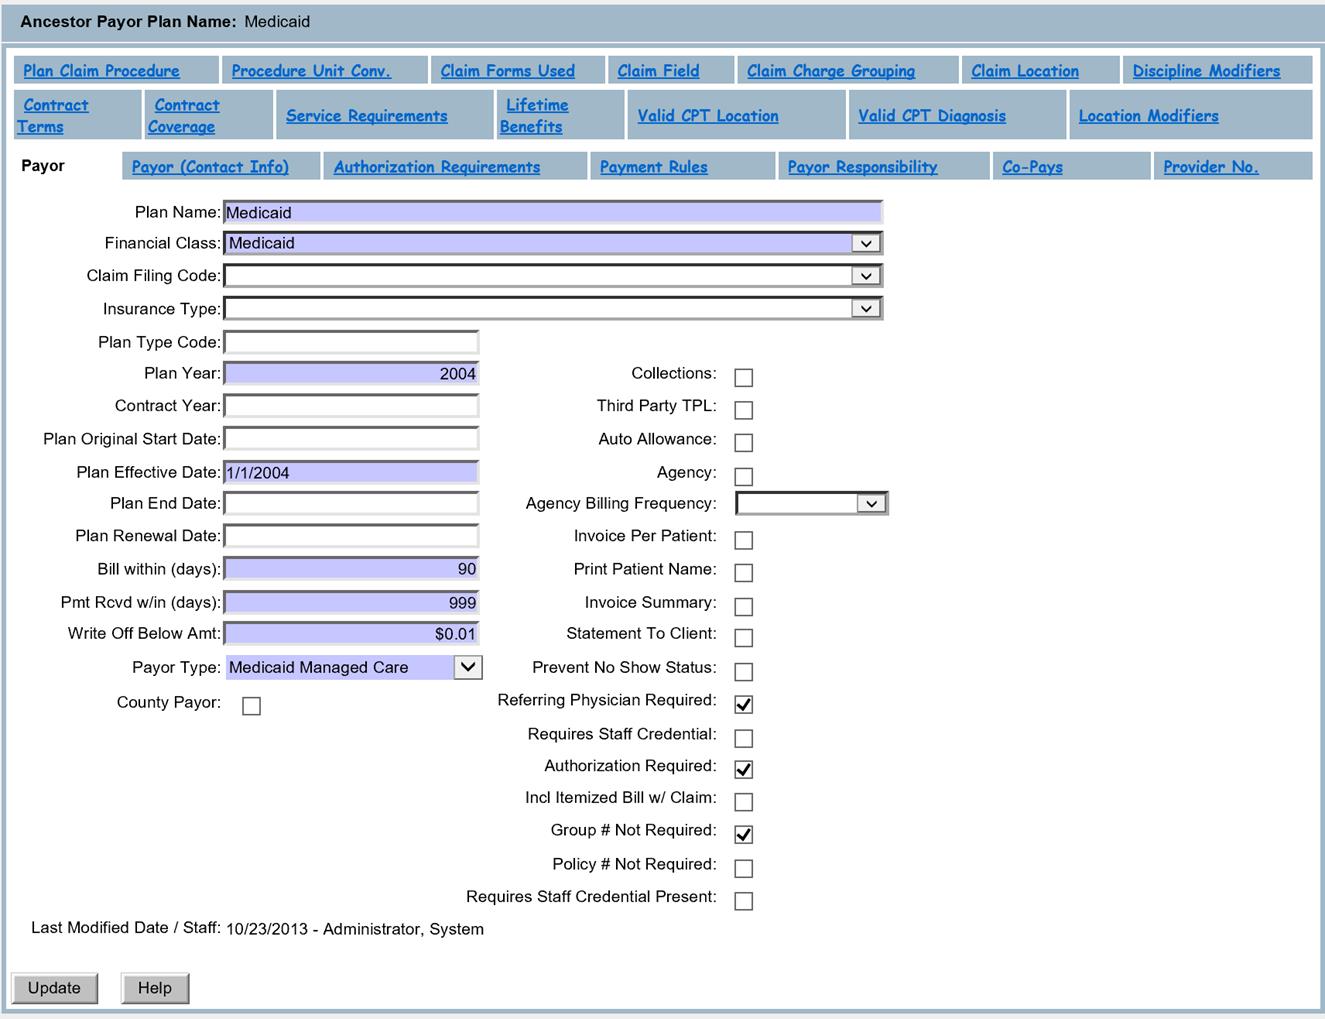
Don’t be intimidated by the number of tabs. The only tabs to be concerned with at the ancestor level are Payor, Plan Claim Procedure, Procedure Unit Conv., Claim Forms Used, Claim Field, and Claim Charge Grouping.
The following tabs
are described in detail in the corresponding Payor Plan section of this
document.
The following tabs
are for information only at this time.
There is no functionality linked to this information at this time. Refer to the corresponding Payor Plan
sections for more information about these tabs.
Epitomax comes with a number of pre-configured Ancestor Payor Plans. You can view these to see how they are configured. You can also contact support for assistance on choosing the best Ancestor Payor Plan for the Payor Plan you are creating.
The Payor Plan Maintenance feature allows staff to modify existing information about a Payor Plan or add a new Payor Plan to Epitomax.
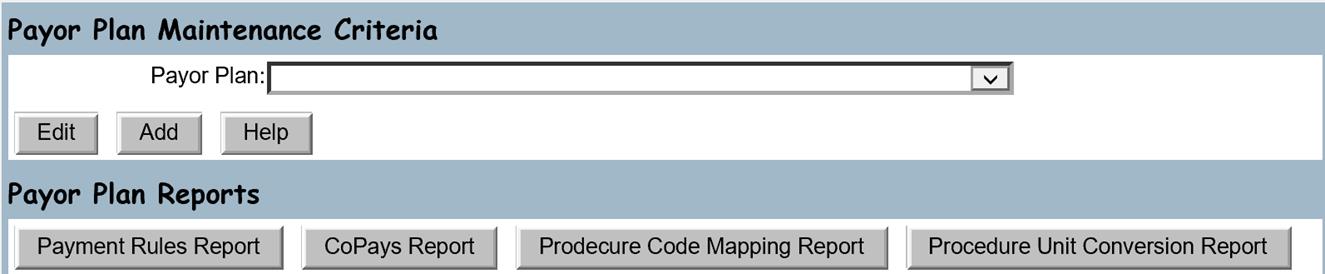
Select the Add button and then select an Ancestor Payor Plan that will be associated with the new Payor Plan. All Payor Plans must have an Ancestor plan.

Once you have selected an Ancestor Payor Plan hit ok to create the new plan.
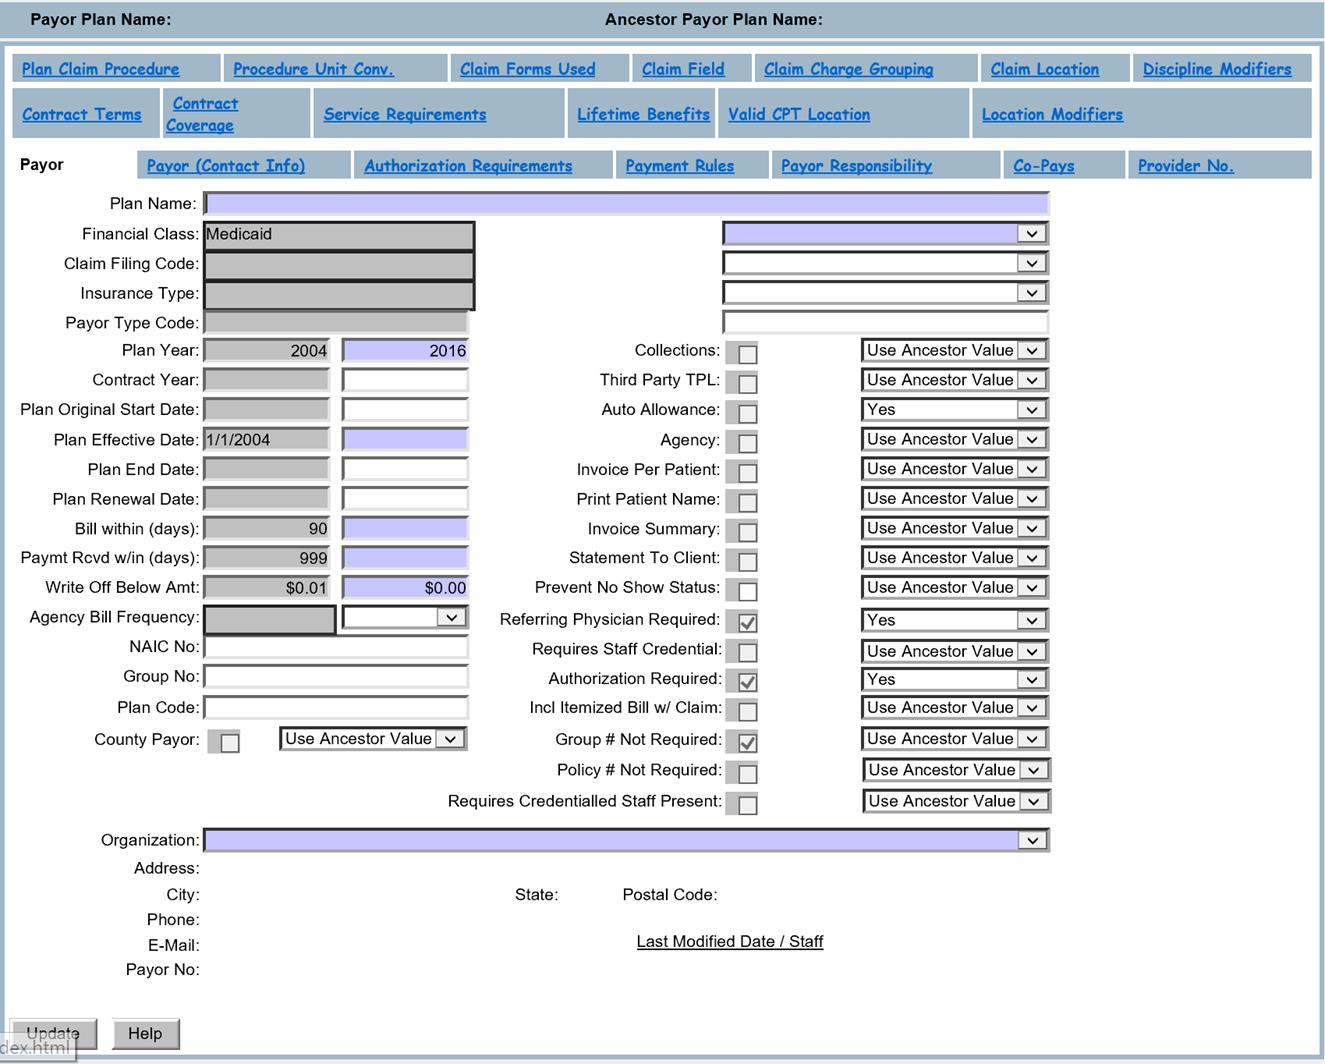
All fields entered in the Ancestor are defaults for the Payor Plan and do not have to be re-entered
The following fields are currently for information only. These fields may be used in future releases of Epitomax:
· Plan Renewal Date
· Bill with (days)
· Payment Received within (days)
· Write off below amount
· Agency Billing Frequency
· Third Party TPL
· Referring Physician Required
Click
here for a training video regarding the Payor tab
The Payor (Contact
Info) tab lists the valid Contacts & their address & phone # associated
with the Payor including Eligibility/Benefits contact, Billing Org, Review Org,
and Appeals Contacts.
The Review
Organization will be defaulted in as the primary review organization when
creating authorizations. Enter the
Review Organization if the payor requires authorizations. If no review organization is selected nothing
will be defaulted into the review organization for new authorizations.
The Billing
Organization is used when generating 837 claims and in the receipting
process. This field is used to identify
what organization will receive the claims / paid the claim. This field is required to receipt third party
payments.
1. Click the Payor (Contact Info) tab of the selected Payor Plan
2.
Click ![]() to save the changes
to save the changes
Click here for a training video regarding the Payor (Contact Info) tab
If the payor requires an authorization for everything or for nothing, you can ignore this tab. If the payor requires an authorization for most services and not for others, this tab is used to specify the exceptions. The information that defaults on this tab says that an authorization is required for everything.
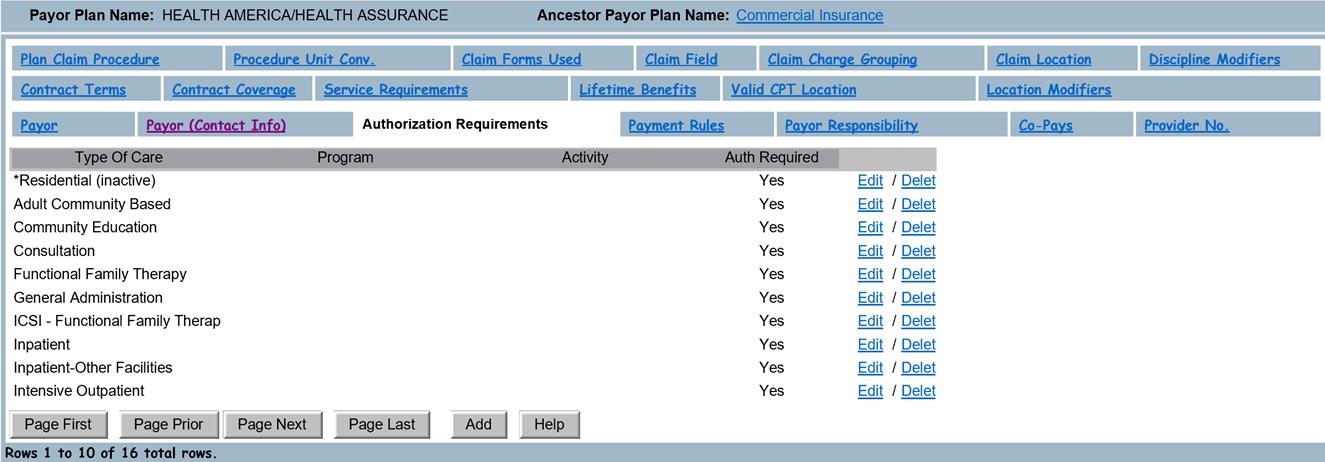
Click on the Add button to add the exceptions that do not require an authorization.
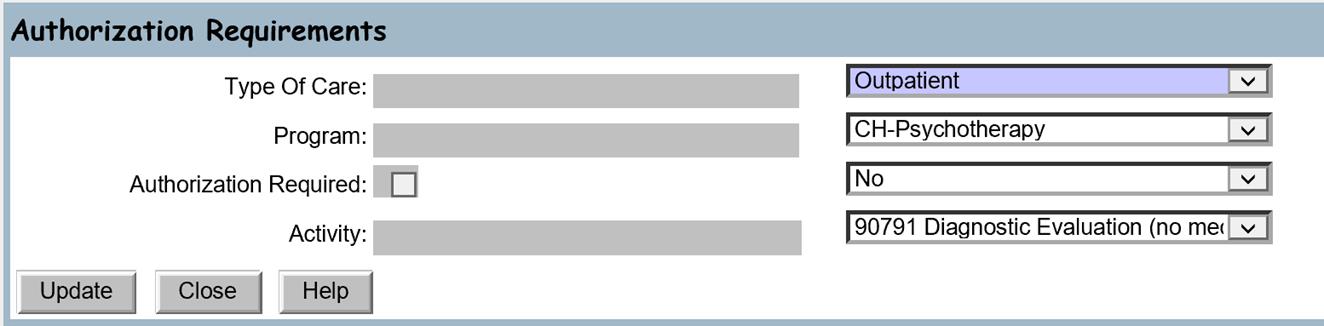
Click here for a training video regarding the Authorization Requirements tab
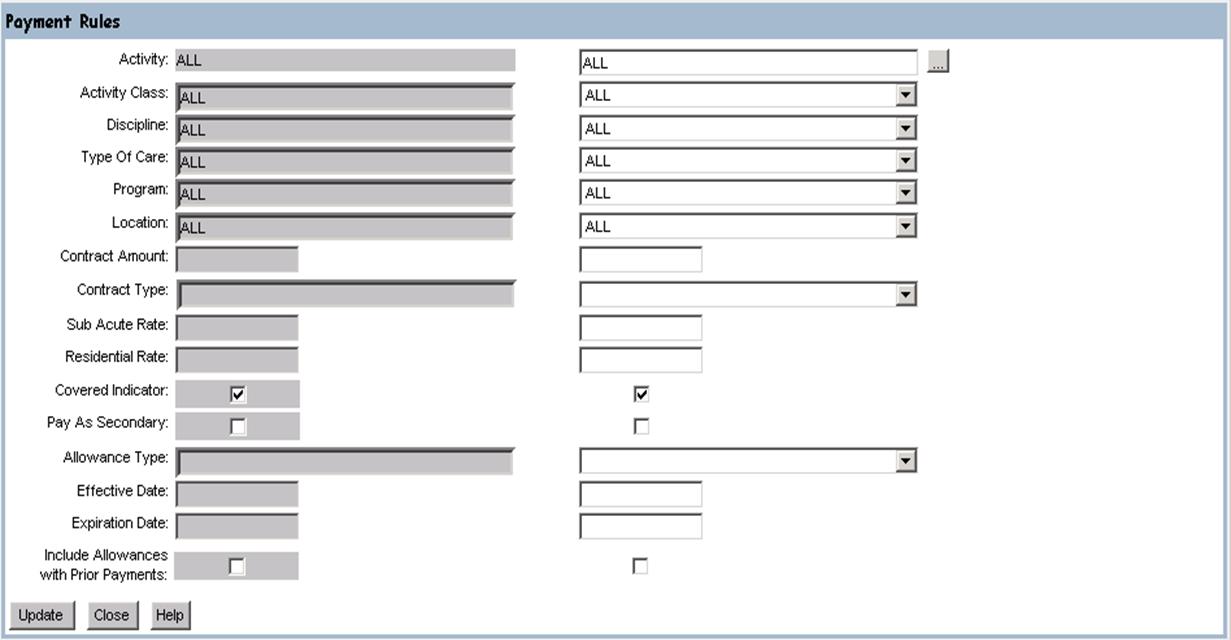
The Payment Rules
tab defines the Payment Rules as they relate to payor contracts and
Auto-Allowances. The payment rule will determine the contractual amount for a
given charge. This is also where the
Auto-Allowance function will look for its criteria to take the correct
Auto-Allowance amount off of charges.
Payment rules can
be as granular or as generic as needed.
Payment rules can be broken down by the following fields:
·
Activity
·
Activity
Class
·
Discipline
·
Type of
Care
·
Program
·
Location
Payment rules can
also have the sub-acute and residential rates supplied.
The Allowance Type
specified will be the allowance type used for the auto allowance processing. Customers
also now have the option to have Epitomax create contractual allowances based
on the information returned in the 835 electronic remittance. This virtually eliminates the need to
maintain payment rules and the need to run the old auto-allowance process. See the How To Configure Epitomax to
Automatically Allowance From an 835 Remittance Advice File on the
Administration->Getting Started with Epitomax menu item for more
information.
The covered
indicator and include allowances with prior payments are information only
fields at this time and may be implemented in a later release of Epitomax.
![]() The user can Add, Edit, or Delete Payment
Rules.
The user can Add, Edit, or Delete Payment
Rules.
![]() You only can delete a Payment Rule that
is created in the Payor Plan. You will not have a delete option
if the Payment Rule was created in the Ancestor Payor Plan level.
You only can delete a Payment Rule that
is created in the Payor Plan. You will not have a delete option
if the Payment Rule was created in the Ancestor Payor Plan level.
![]() The following fields are required
fields: Effective Date, Contract Amount, and Contract Type.
The following fields are required
fields: Effective Date, Contract Amount, and Contract Type.
![]() Any Payment Rule added using the above
screen will not be copied to the Ancestor Payor Plan Maintenance screen.
Any Payment Rule added using the above
screen will not be copied to the Ancestor Payor Plan Maintenance screen.
![]() All Ancestor Payment Rules will show in gray
and are view only.
All Ancestor Payment Rules will show in gray
and are view only.
![]() If “Pay as Secondary” is checked, and this
plan is a secondary payor on a charge, auto allowancing will not be processed
for that charge because the system assumes the secondary payor will pay the
remainder.
If “Pay as Secondary” is checked, and this
plan is a secondary payor on a charge, auto allowancing will not be processed
for that charge because the system assumes the secondary payor will pay the
remainder.
2. Click ![]() to save the changes
to save the changes
Click here for a training video regarding the Payment Rules tab
The Co-Pays tab defines the amount of Co-Pay that is required for each TOC if any is required & when the Co-Pay becomes effective. This is most commonly used with Outpatient. The Co-Pay amount will print on the Charge Slip / Super Bill. The Auto Allowance function will also take into account the amount of Co-Pay entered here. Epitomax uses the copay amounts entered in Payor Plan Maintenance unless it is not entered. Then, copay information from the Ancestor Payor Plan is used. The user accesses the Co-pays tab under the Ancestor Payor Plan Maintenance or Payor Plan Maintenance functions and enters the Type of Care, Authorized Service Group (not required), Starting and Ending Visit No, Copay Amount and Copay Type.
Co-pays can also be defined at the client record level. When co-pays are defined at the client record level, that overrides any co-pays defined on the Payor Plan. Many customers choose to only define co-pays at the client record level (meaning they enter the co-pay roles per client rather than per payor plan). Defining co-pays and payment rules on the Payor Plan my require entering many more payor plans vs. entering co-pays per client and allowing Epitomax to do the contractual allowances from the 835 electronic remittance.
1. Click on the Co-Pays tab then select Add (Click the edit link for an existing co-pay rule)
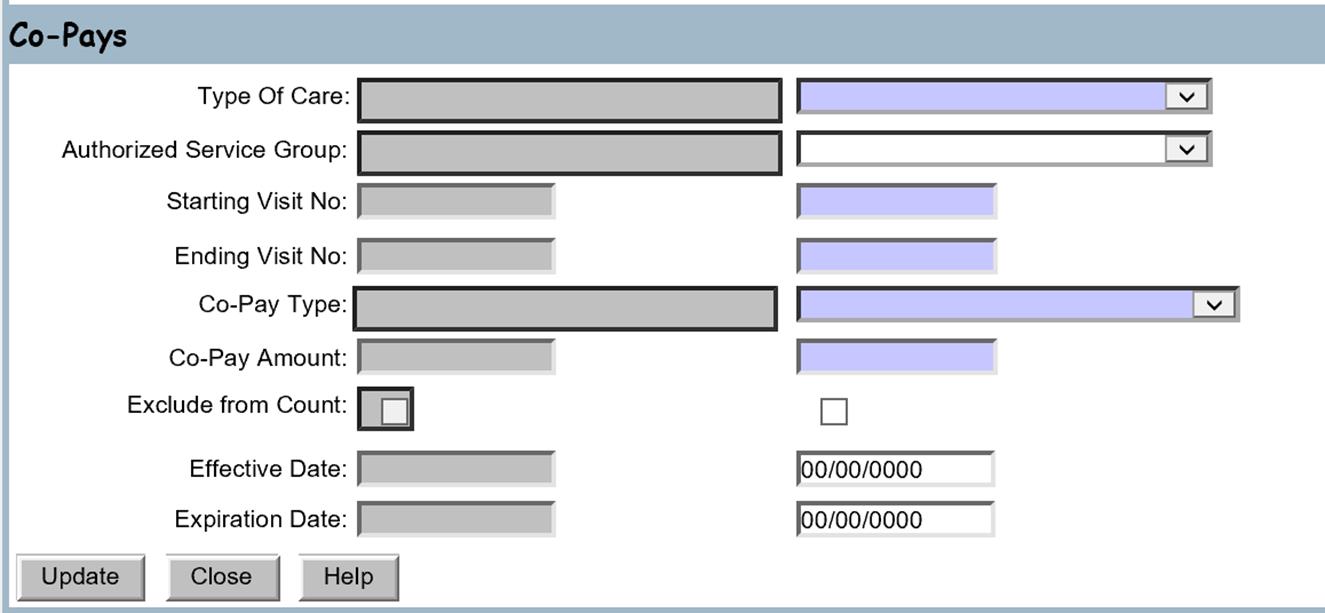
2. Select the Type Of Care from the drop down menu
![]() The
Type of Care is a required field.
The
Type of Care is a required field.
3. Select the Authorized Service Group(s) covered under this type of care from the drop down menu
![]() Leaving
this field blank and not selecting a specific Authorized Service Group will
allow the payor to cover all services under the Type of Care selected
Leaving
this field blank and not selecting a specific Authorized Service Group will
allow the payor to cover all services under the Type of Care selected
4. Enter the Starting Visit No:
5. Enter the Ending Visit No:
![]() Copay
Types can be entered as a percent of Responsible Amount, a Flat Rate or a
Percentage of Charge.
Copay
Types can be entered as a percent of Responsible Amount, a Flat Rate or a
Percentage of Charge.
7. Enter the Copay Amount
![]() The copay amount is determined from the
patient’s insurance card or verified by contacting the payor
The copay amount is determined from the
patient’s insurance card or verified by contacting the payor
Click here for a training video regarding the Co-pays tab
The Provider No.
tab displays a unique # that a Payor assigns to a Provider (Your organization/agency). These may differ by TOC
or they may all be the same. These
Provider Numbers are used for claims, however these are
legacy numbers and have been replaced by the Location NPI numbers. Location NPI numbers are entered using Code
Table Maintenance.
1.
Click
the Provider No. tab
of the selected Payor Plan

![]() You can only delete Provider Numbers
that are created in the Payor Plan. You will not have a delete option if
the Provider Number was created in the Ancestor Payor Plan level.
You can only delete Provider Numbers
that are created in the Payor Plan. You will not have a delete option if
the Provider Number was created in the Ancestor Payor Plan level.
![]() The Ancestor Provider Numbers will
only appear if a Payor Plan Provider Number for the same value does not exist.
The Ancestor Provider Numbers will
only appear if a Payor Plan Provider Number for the same value does not exist.
![]() The following fields are required
fields: Type of Care and Provider Number.
The following fields are required
fields: Type of Care and Provider Number.
![]() Any Provider
Number added using the above screen will not show in the Ancestor Payor
Plan Maintenance screen.
Any Provider
Number added using the above screen will not show in the Ancestor Payor
Plan Maintenance screen.
![]() All Ancestor Payment Rules will show in gray
and are view only.
All Ancestor Payment Rules will show in gray
and are view only.
2.
Click ![]() after making the necessary changes
after making the necessary changes
The Plan Claim Procedure
tab is critical to the claims process. Each valid Service Activity Code needs
to be defined by the Claim Form, what Claim Procedure code is needed on the
Claim Form, what TOC is related to the Activity, % of each Charge to display on
the claim (typically 100%). A Discipline with modifiers can be selected if
needed. Certain codes require a modifier for certain disciplines. The Discipline Modifiers tab should be used
to define situations when the modifier varies based on what staff performed the
service.
The Plan Claim
Procedure tab is the tab most often defined at the Ancestor Payor Plan
level. If you need to override a row
that was entered on the Ancestor Payor Plan, use the Edit link next to the row
you want to override. Make sure to enter
a value for every field even if it is already entered on the ancestor when
overriding an ancestor row! You are
overriding the ancestor when you Edit here, so you must enter values in all
fields needed. To add a row needed by
this Payor Plan but not needed by other payor plans sharing this same ancestor,
click on the Add button.
1.
Click
the Plan Claim Procedure tab of the selected Payor Plan
![]() The
user can Add, Edit, or Delete features.
The
user can Add, Edit, or Delete features.
![]() You can only delete a Plan Claim Procedure
that is created in the Payor Plan. You will not have a delete option if
the Plan Claim Procedure was created in the Ancestor Payor Plan level.
You can only delete a Plan Claim Procedure
that is created in the Payor Plan. You will not have a delete option if
the Plan Claim Procedure was created in the Ancestor Payor Plan level.
![]() The
Ancestor Plan Claim Procedure will only appear if a Payor Plan Claim Procedure
for the same value does not exist.
The
Ancestor Plan Claim Procedure will only appear if a Payor Plan Claim Procedure
for the same value does not exist.
![]() The
following fields are required fields: Claim Form, Form Ranking, Claim
Procedure, Activity, Type of Care, and Percent of Charges Displayed on Claim.
The
following fields are required fields: Claim Form, Form Ranking, Claim
Procedure, Activity, Type of Care, and Percent of Charges Displayed on Claim.
![]() Any Plan Claim Procedure added using the above
screen will not show in the Ancestor Payor Plan Maintenance screen.
Any Plan Claim Procedure added using the above
screen will not show in the Ancestor Payor Plan Maintenance screen.
Click ![]() after making the necessary changes
after making the necessary changes
Click here for a
training video regarding the Plan Claim Procedure tab
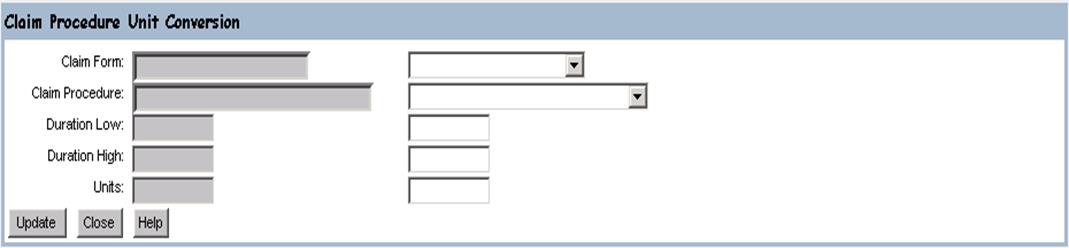
The Procedure Unit
Conversion tab is used when a payor wants to see different units than you have
defined in Activity Maintenance. Each
row here defines Low & High Durations of an Activity and converts it to
Units for each specified Claim Form. If
no Procedure Unit Conversion exists for a charge on a claim, the units will
default to the way they are defined for the activity in Activity Maintenance.
1. Click the Procedure Unit Conversion tab of the selected Payor Plan
![]() The user can access the Add, Edit and Delete features.
The user can access the Add, Edit and Delete features.
![]() You can only delete a Procedure Unit Conversion that is created in the
Payor Plan. You will not have a delete option if the Procedure Unit
Conversion was created in the Ancestor Payor level.
You can only delete a Procedure Unit Conversion that is created in the
Payor Plan. You will not have a delete option if the Procedure Unit
Conversion was created in the Ancestor Payor level.
![]() The Ancestor Claim Field will only
appear if a Procedure Unit Conversion for the same value does not exist.
The Ancestor Claim Field will only
appear if a Procedure Unit Conversion for the same value does not exist.
![]() The following fields are required:
Claim Form, Claim Procedure, Duration Low, Duration High, and
Units.
The following fields are required:
Claim Form, Claim Procedure, Duration Low, Duration High, and
Units.
2. Click ![]() after making the necessary changes.
after making the necessary changes.
Click here for a
training video regarding the Procedure Unit Conv tab
The Claims Forms
Used tab indicates the valid Claim Forms Used for this Payor. Only Claims forms listed will be processed by
the claim generation process.
1. Click the Claim Forms Used tab of the selected Payor Plan

![]() The user can access the Add, Edit, and Delete
features.
The user can access the Add, Edit, and Delete
features.
![]() You only can delete a Claim Form that is
created in the Payor Plan. You will not have a delete option if the
Claim Form was created in the Ancestor Payor Plan level.
You only can delete a Claim Form that is
created in the Payor Plan. You will not have a delete option if the
Claim Form was created in the Ancestor Payor Plan level.
![]() The Ancestor Claim Forms Used will only appear
if a Payor Plan Claim Forms Used for the same value does not exist.
The Ancestor Claim Forms Used will only appear
if a Payor Plan Claim Forms Used for the same value does not exist.
![]() The
following fields are required fields: Claim Form.
The
following fields are required fields: Claim Form.
![]() Any
Claim Forms Used added using the above screen will not show in the
Ancestor Payor Plan Maintenance screen.
Any
Claim Forms Used added using the above screen will not show in the
Ancestor Payor Plan Maintenance screen.
![]() The
following fields are view only: Claim Form (Ancestor).
The
following fields are view only: Claim Form (Ancestor).
2. Click ![]() after making the necessary changes
after making the necessary changes
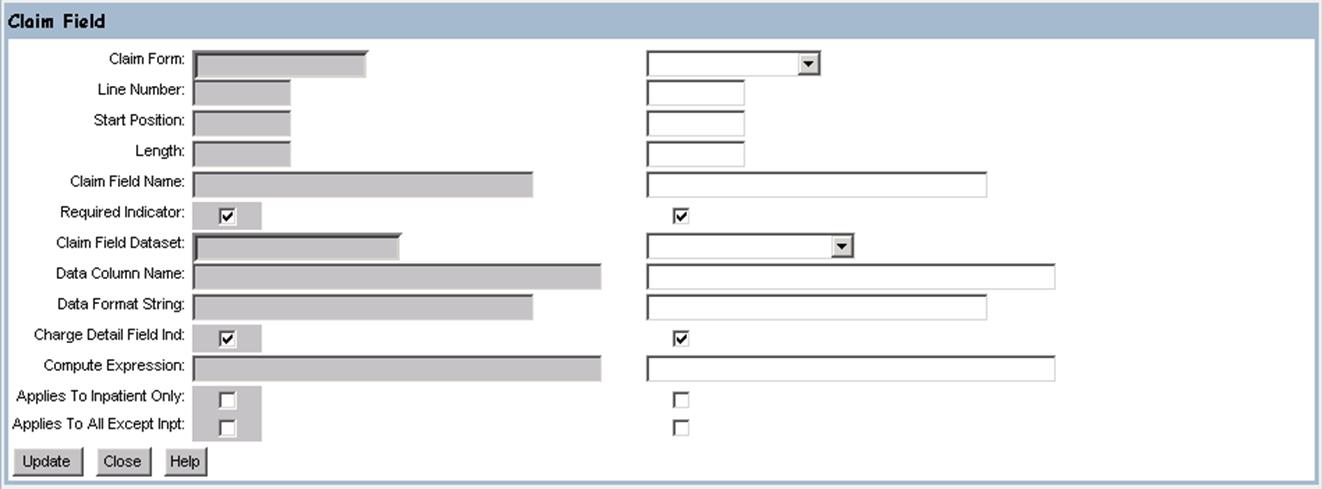
The Claim Field tab
defines where a field will print on paper claims only and which fields will
print on those claims. Care should be
used when making changes to this information to make sure claims print
properly. Customers typically do not
make changes on this tab. If your paper
claims are not printing properly, please enter a support ticket for assistance
before trying to make changes yourself.
The Claim Charge
Grouping tab will allow for grouping of charges to be summarized on a claim for
a specific TOC, Program, Activity Class, etc. If Summary box is not checked, it
will print detail charges on the claim.
Most paper claims require at least one row in this tab. Use the Claim Break On Group Indicator
checkbox to cause charges to print on a separate claim page when the Claim
Group By Field changes. Customers
typically do not make changes on this tab.
If your claims are not grouping/separating properly, please enter a
support ticket for assistance before trying to make changes yourself.
Note: This function is an administrative function.
![]() The
following fields are required fields: Claim Form and Group By
Order.
The
following fields are required fields: Claim Form and Group By
Order.
![]() The
user can access the Edit, Add and Delete
features.
The
user can access the Edit, Add and Delete
features.
![]() Any
Claim Field added using the above screen will not show in the Ancestor
Payor Plan Maintenance screen.
Any
Claim Field added using the above screen will not show in the Ancestor
Payor Plan Maintenance screen.
The Claim Location
tab defines the Location and POS Code for a Payor. This is required for some
Payors. This is a Code that prints on a Claim.
1. Click the Claim Forms Used tab of the selected Payor Plan

![]() The
user can access the Add, Edit, and Delete features
The
user can access the Add, Edit, and Delete features
![]() You
can only delete a Claim Field that is created in the Payor Plan. You will
not have a delete option if the Claim Field was created in the Ancestor
Payor Plan level.
You
can only delete a Claim Field that is created in the Payor Plan. You will
not have a delete option if the Claim Field was created in the Ancestor
Payor Plan level.
![]() The
Ancestor Claim Field will only appear if a Payor Plan Claim Field for the same
value does not exist.
The
Ancestor Claim Field will only appear if a Payor Plan Claim Field for the same
value does not exist.
![]() Any Claim Field added using the above screen will
not show in the Ancestor Payor Plan Maintenance screen.
Any Claim Field added using the above screen will
not show in the Ancestor Payor Plan Maintenance screen.
2. Click
![]() after making the necessary changes.
after making the necessary changes.
Click here for a training video regarding the Claim Location tab
The Discipline Modifiers tab should only be used if the modifier needs to be added to EVERY procedure code you bill when the service is provided by a particular staff discipline. This is typically not the case, and if not, the setup should instead be done on the Plan Claim Procedure tab.
The Location Modifiers tab should only be used if the
modifier needs to be added to EVERY procedure code you bill when the service is
provided at a particular Location.
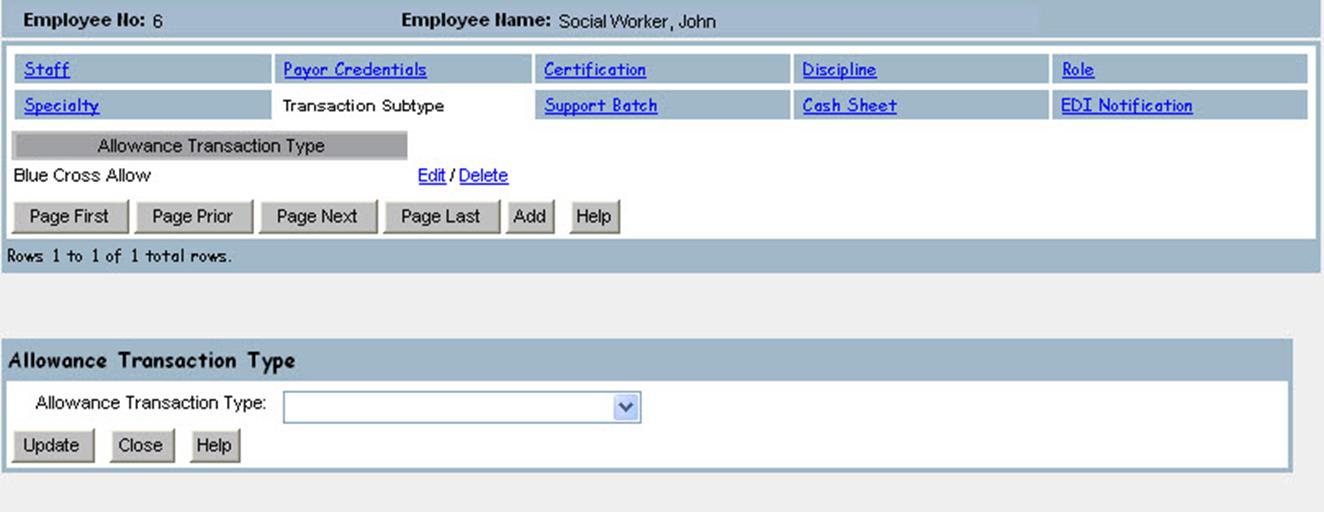
Staff cannot enter Allowances or Adjustments unless those Transaction Subtypes have been added in Staff Maintenance for that staff under the Transaction Subtype tab.

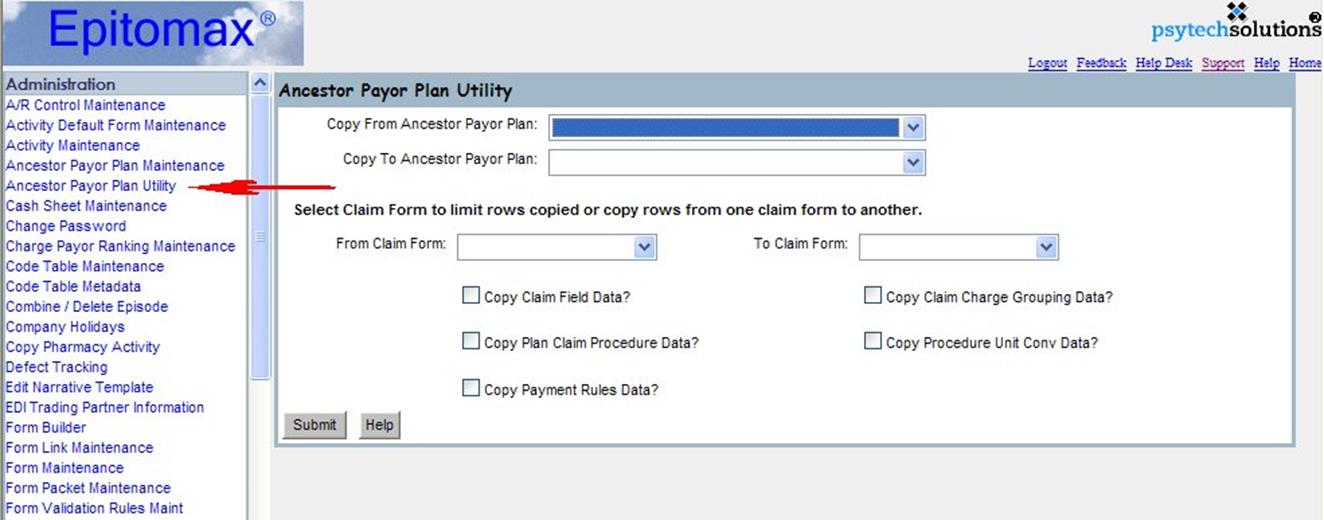
The Ancestor Payor Plan Utility is used to copy configuration data from one ancestor payor plan to another or to copy data within the same ancestor payor plan from one Claim Form to another. If you have created your own Ancestor Payor Plan (or you find the one you are using is missing Claim Field data), you can use this utility to copy Claim Field data from an ancestor that has data for the UB-04 and/or 1500 paper claims to the ancestor you are using.
Be careful not to
copy data to an ancestor payor that already has that data or the data will be
duplicated!
To copy Claim Field data and the accompanied Claim Charge Grouping data from one ancestor payor plan to another, do the following.

Click here for a training video regarding the Ancestor Payor Plan Utility